The Best Paper Airplane
By: G | Published: 2024-01-03About 10 years ago, I searched on google how to make the best paper airplane and I found a small website showing how to make this paper airplane. These directions served me well through school and even professional life. I had a job interview where I was asked to teach the interviewers something and I taught them how to make this paper airplane, I ended up getting that job! :) A while back I tried to find the original website directions to send to a friend but I was not able to find them anywhere. It looks like there are other guides to build this plan, and it is typically called the swallow paper plane.
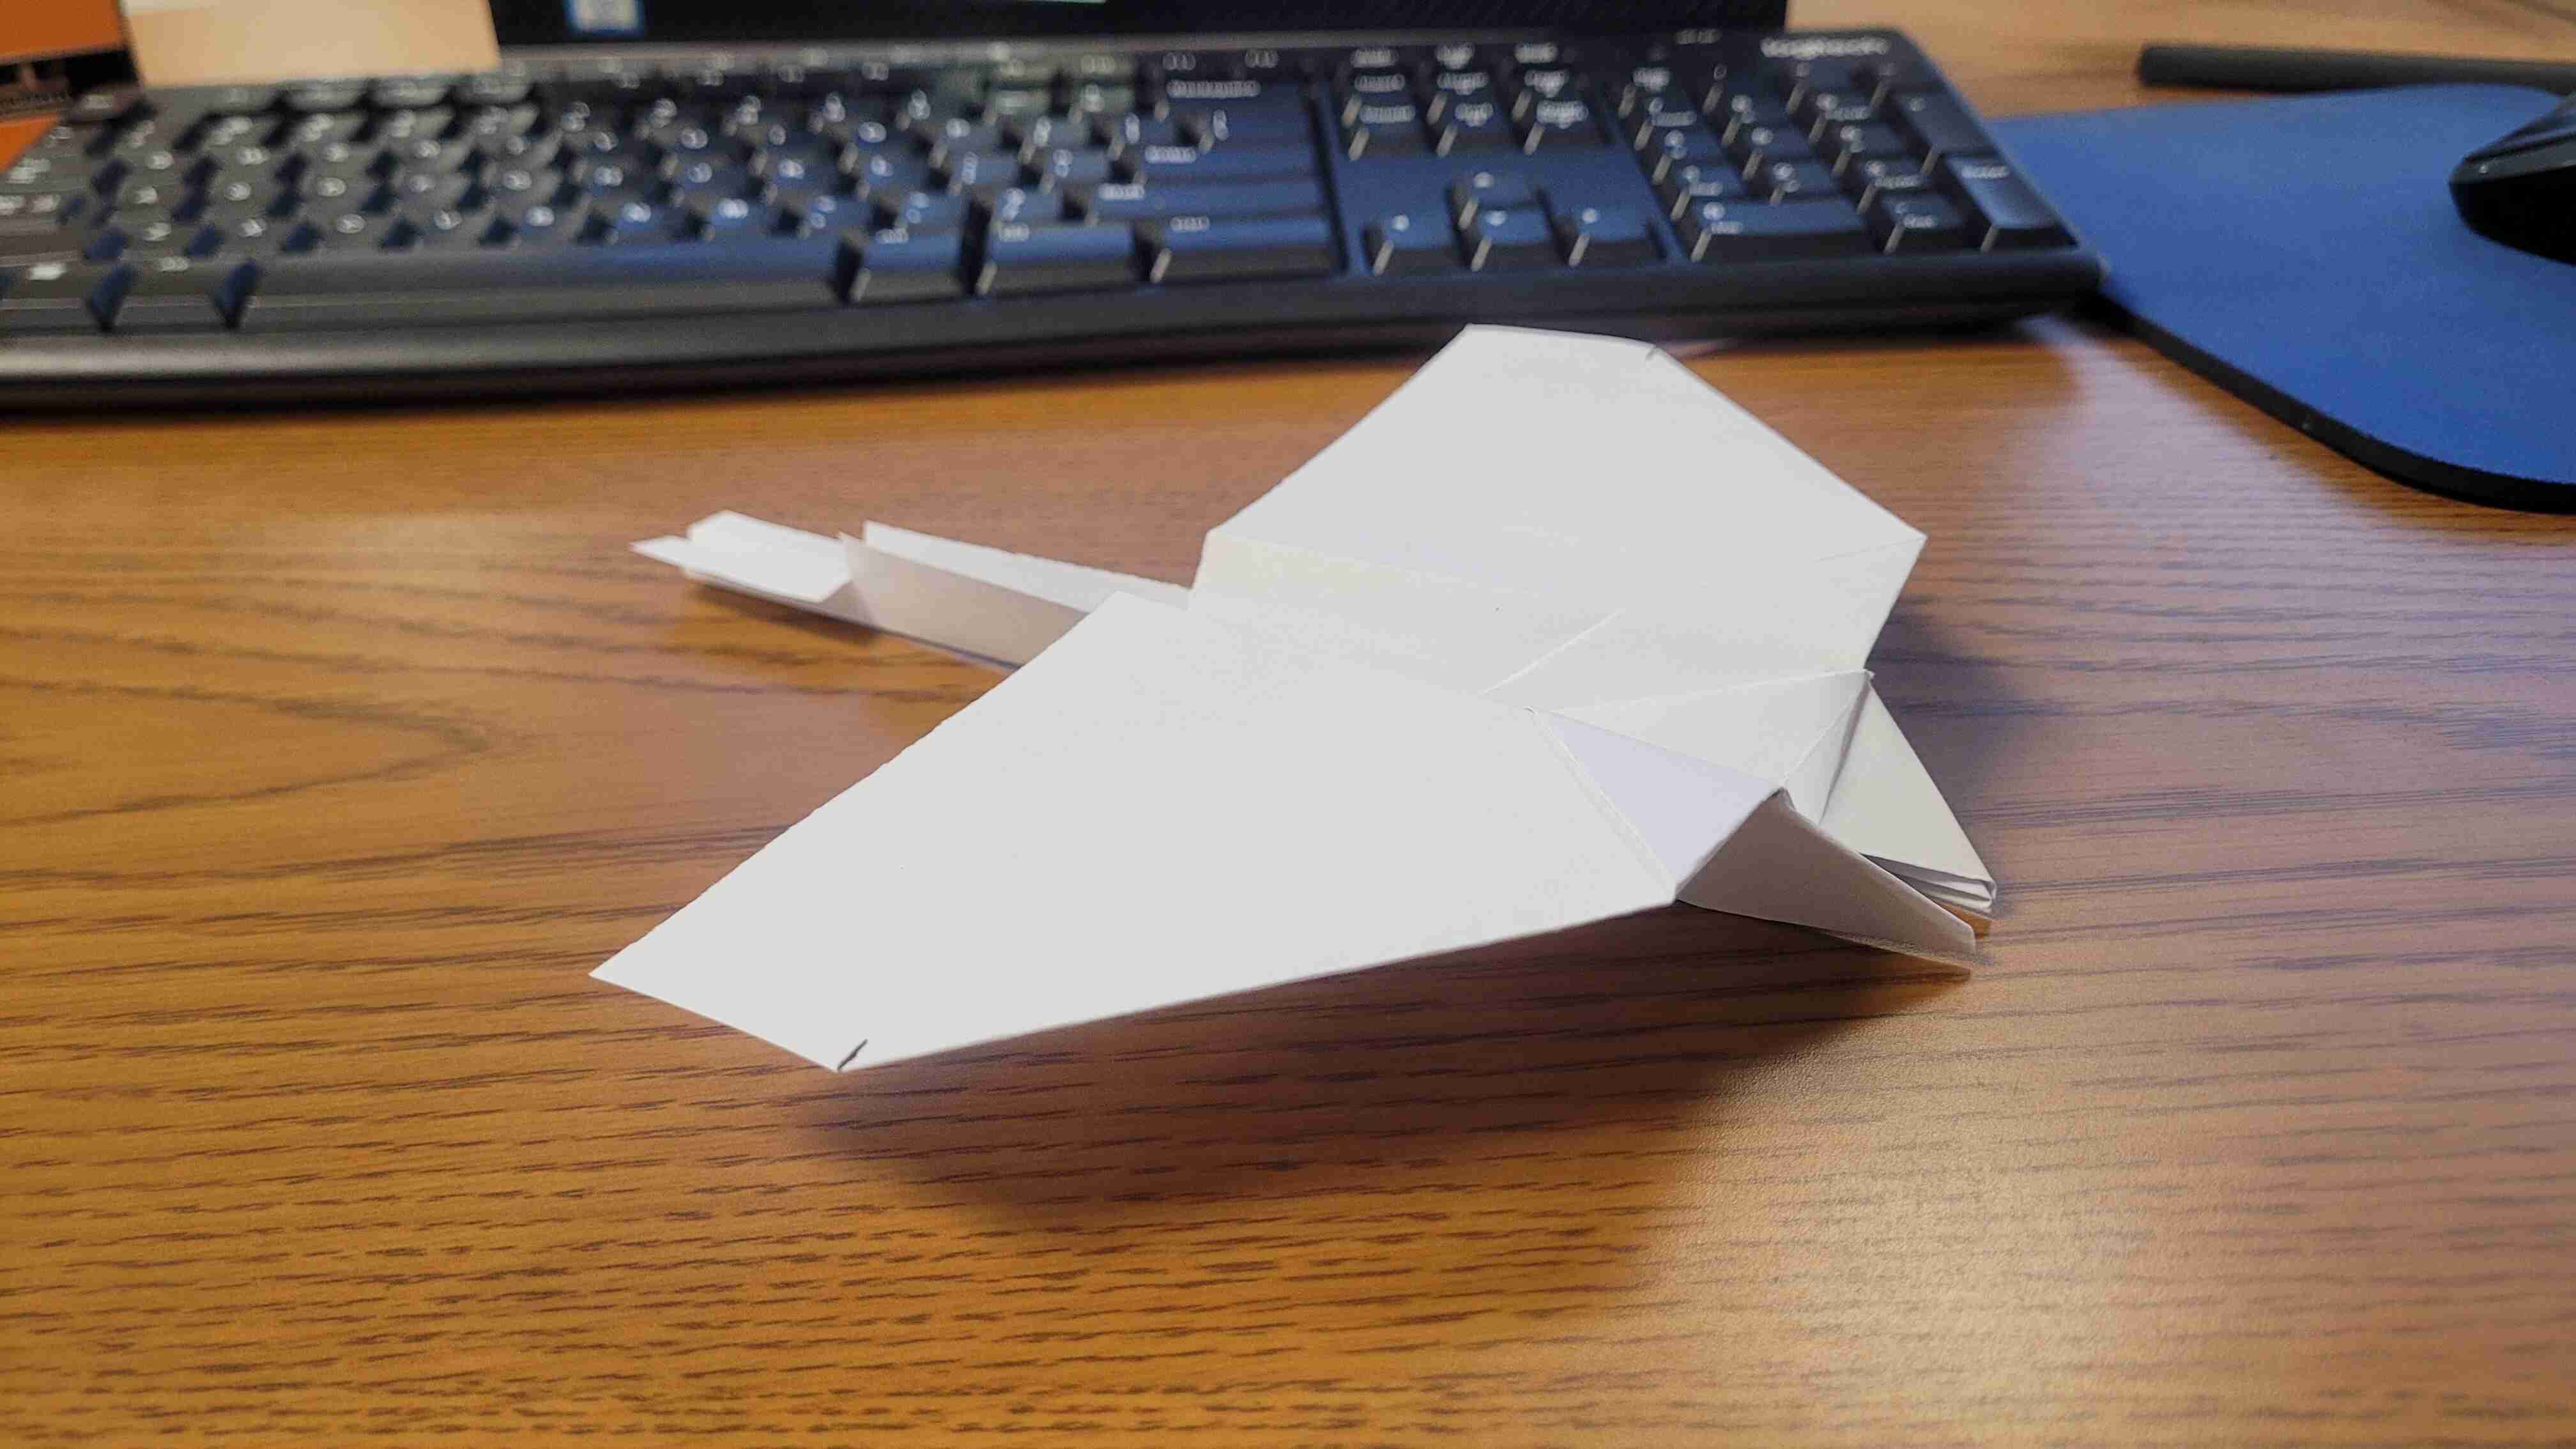
In hopes to teach others how to make this airplane in the event the original are gone forever, I have included the steps with pictures below to make the best airplane you will ever make:
Material - 8 1/2 x 11 in. printer paper
Step 1 - Fold corner 1 to the right side to make a triangle, keeping the edges flush. Then unfold.
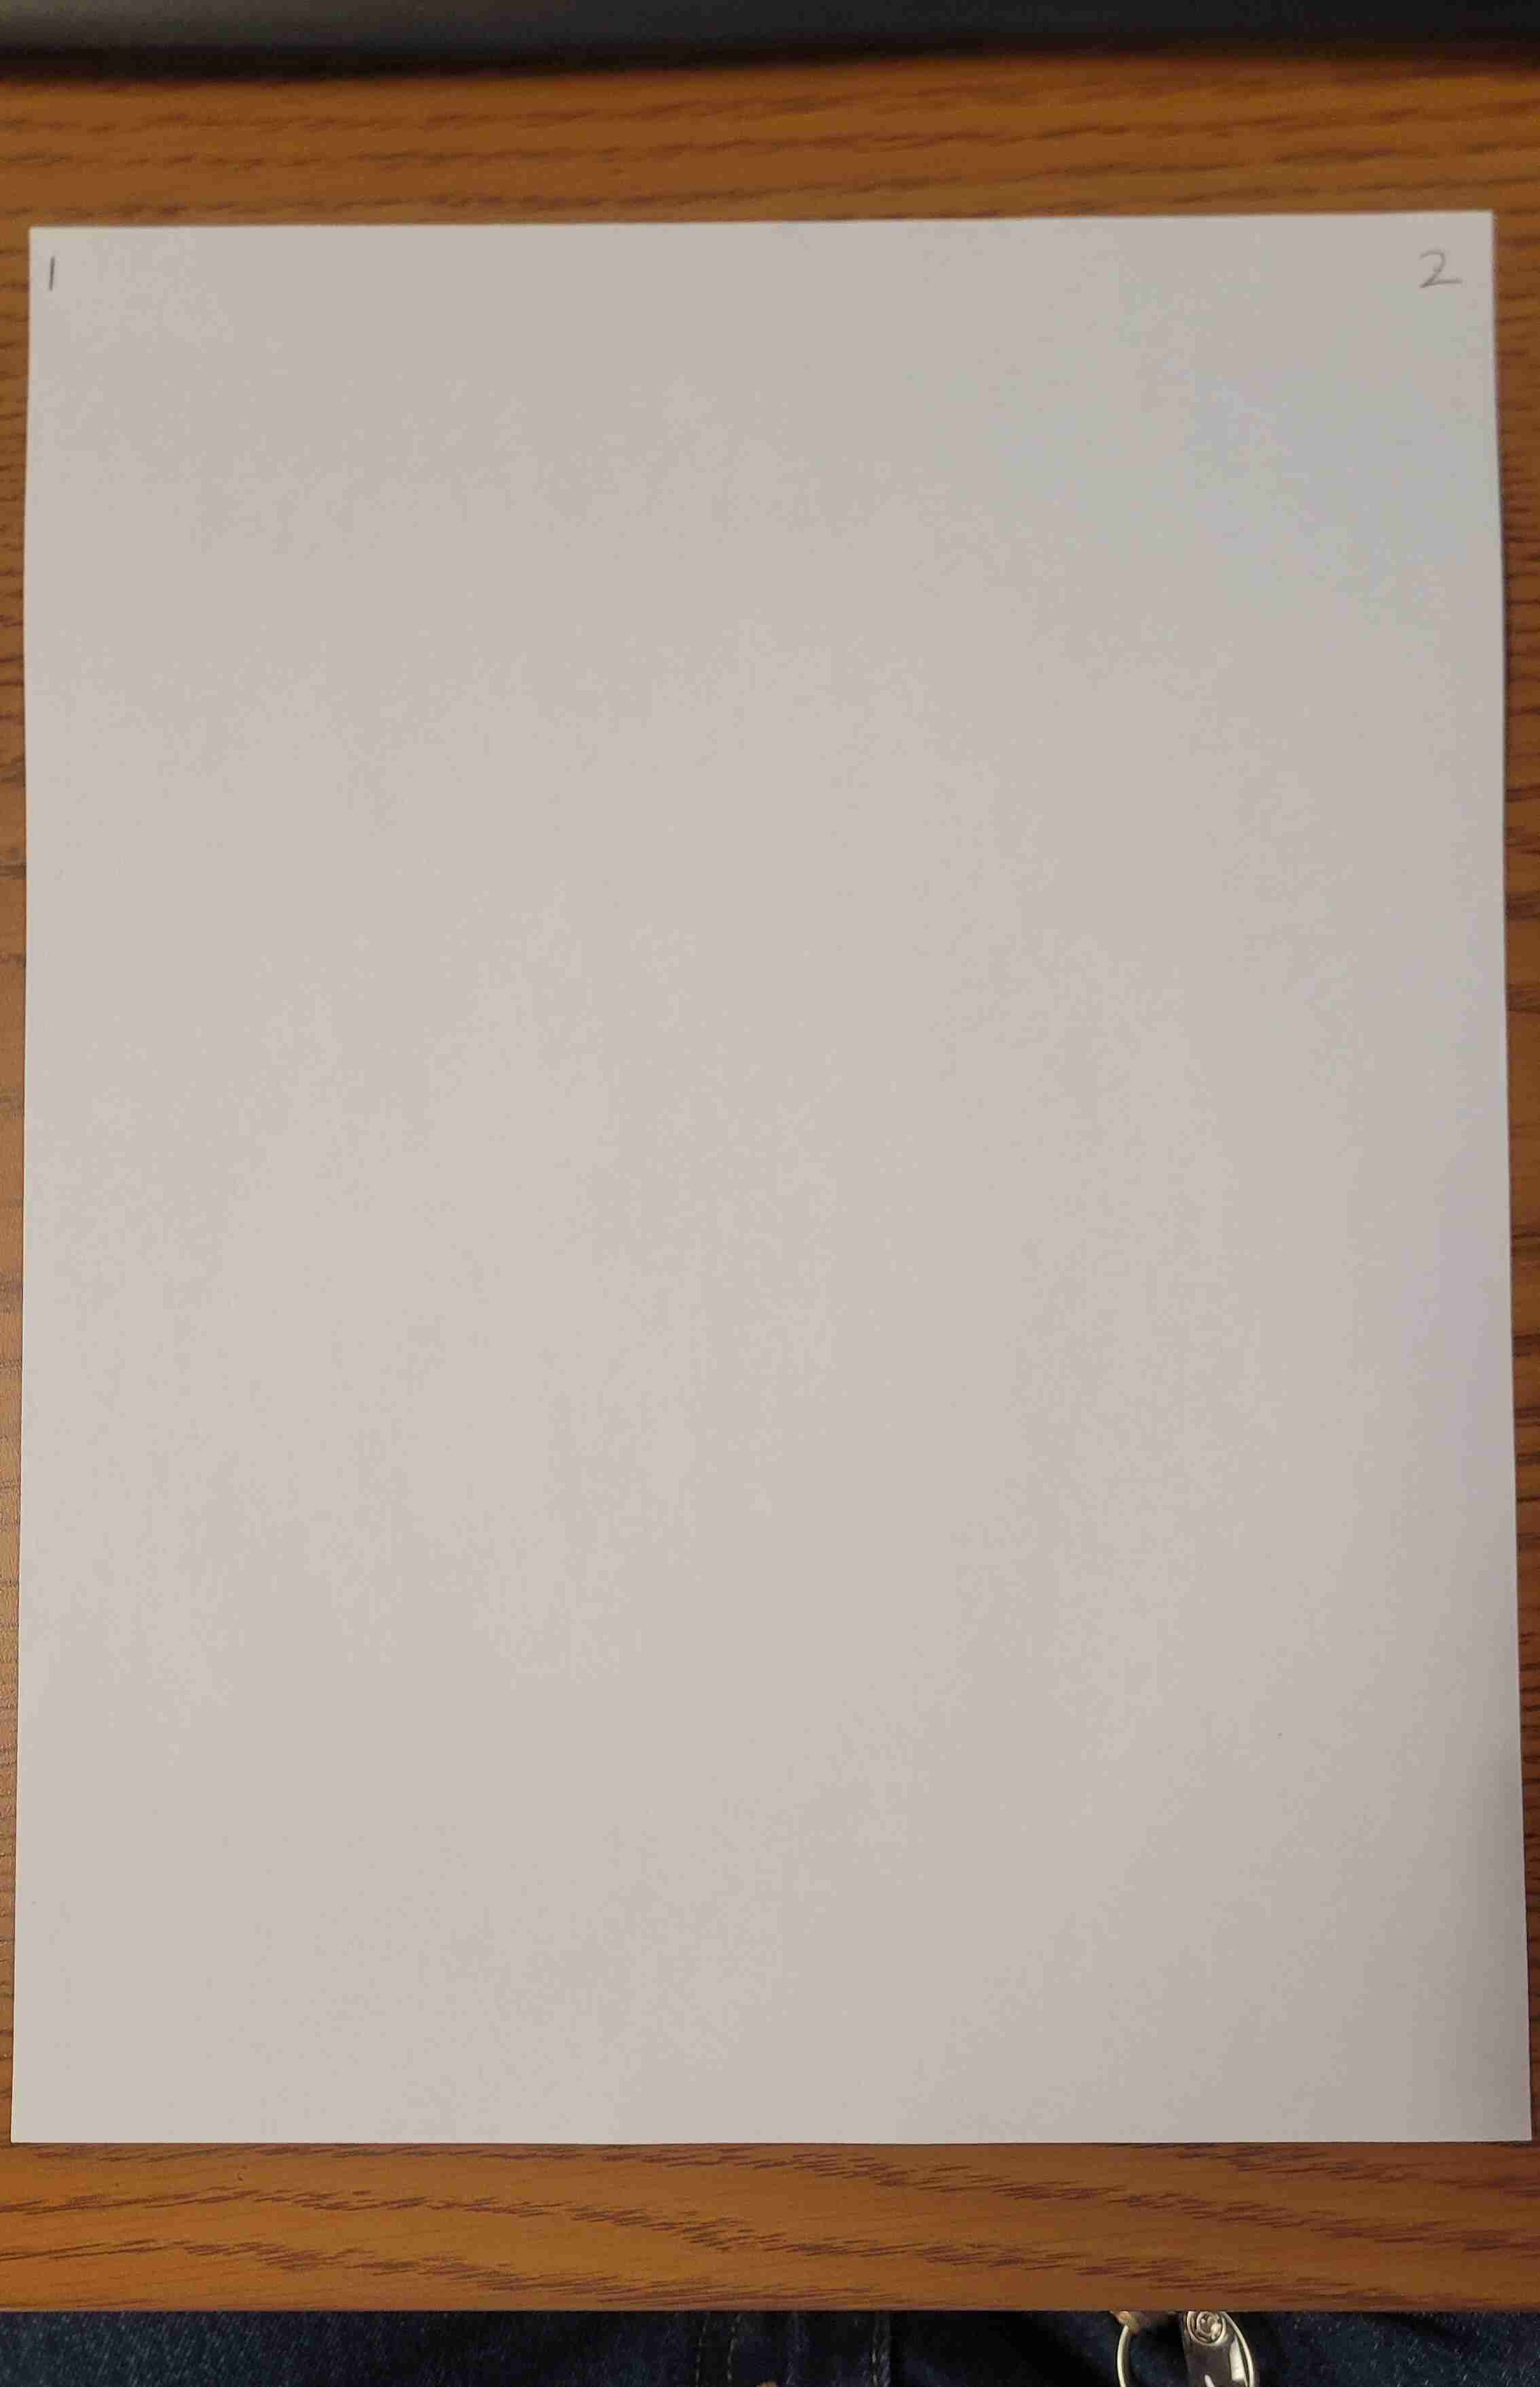
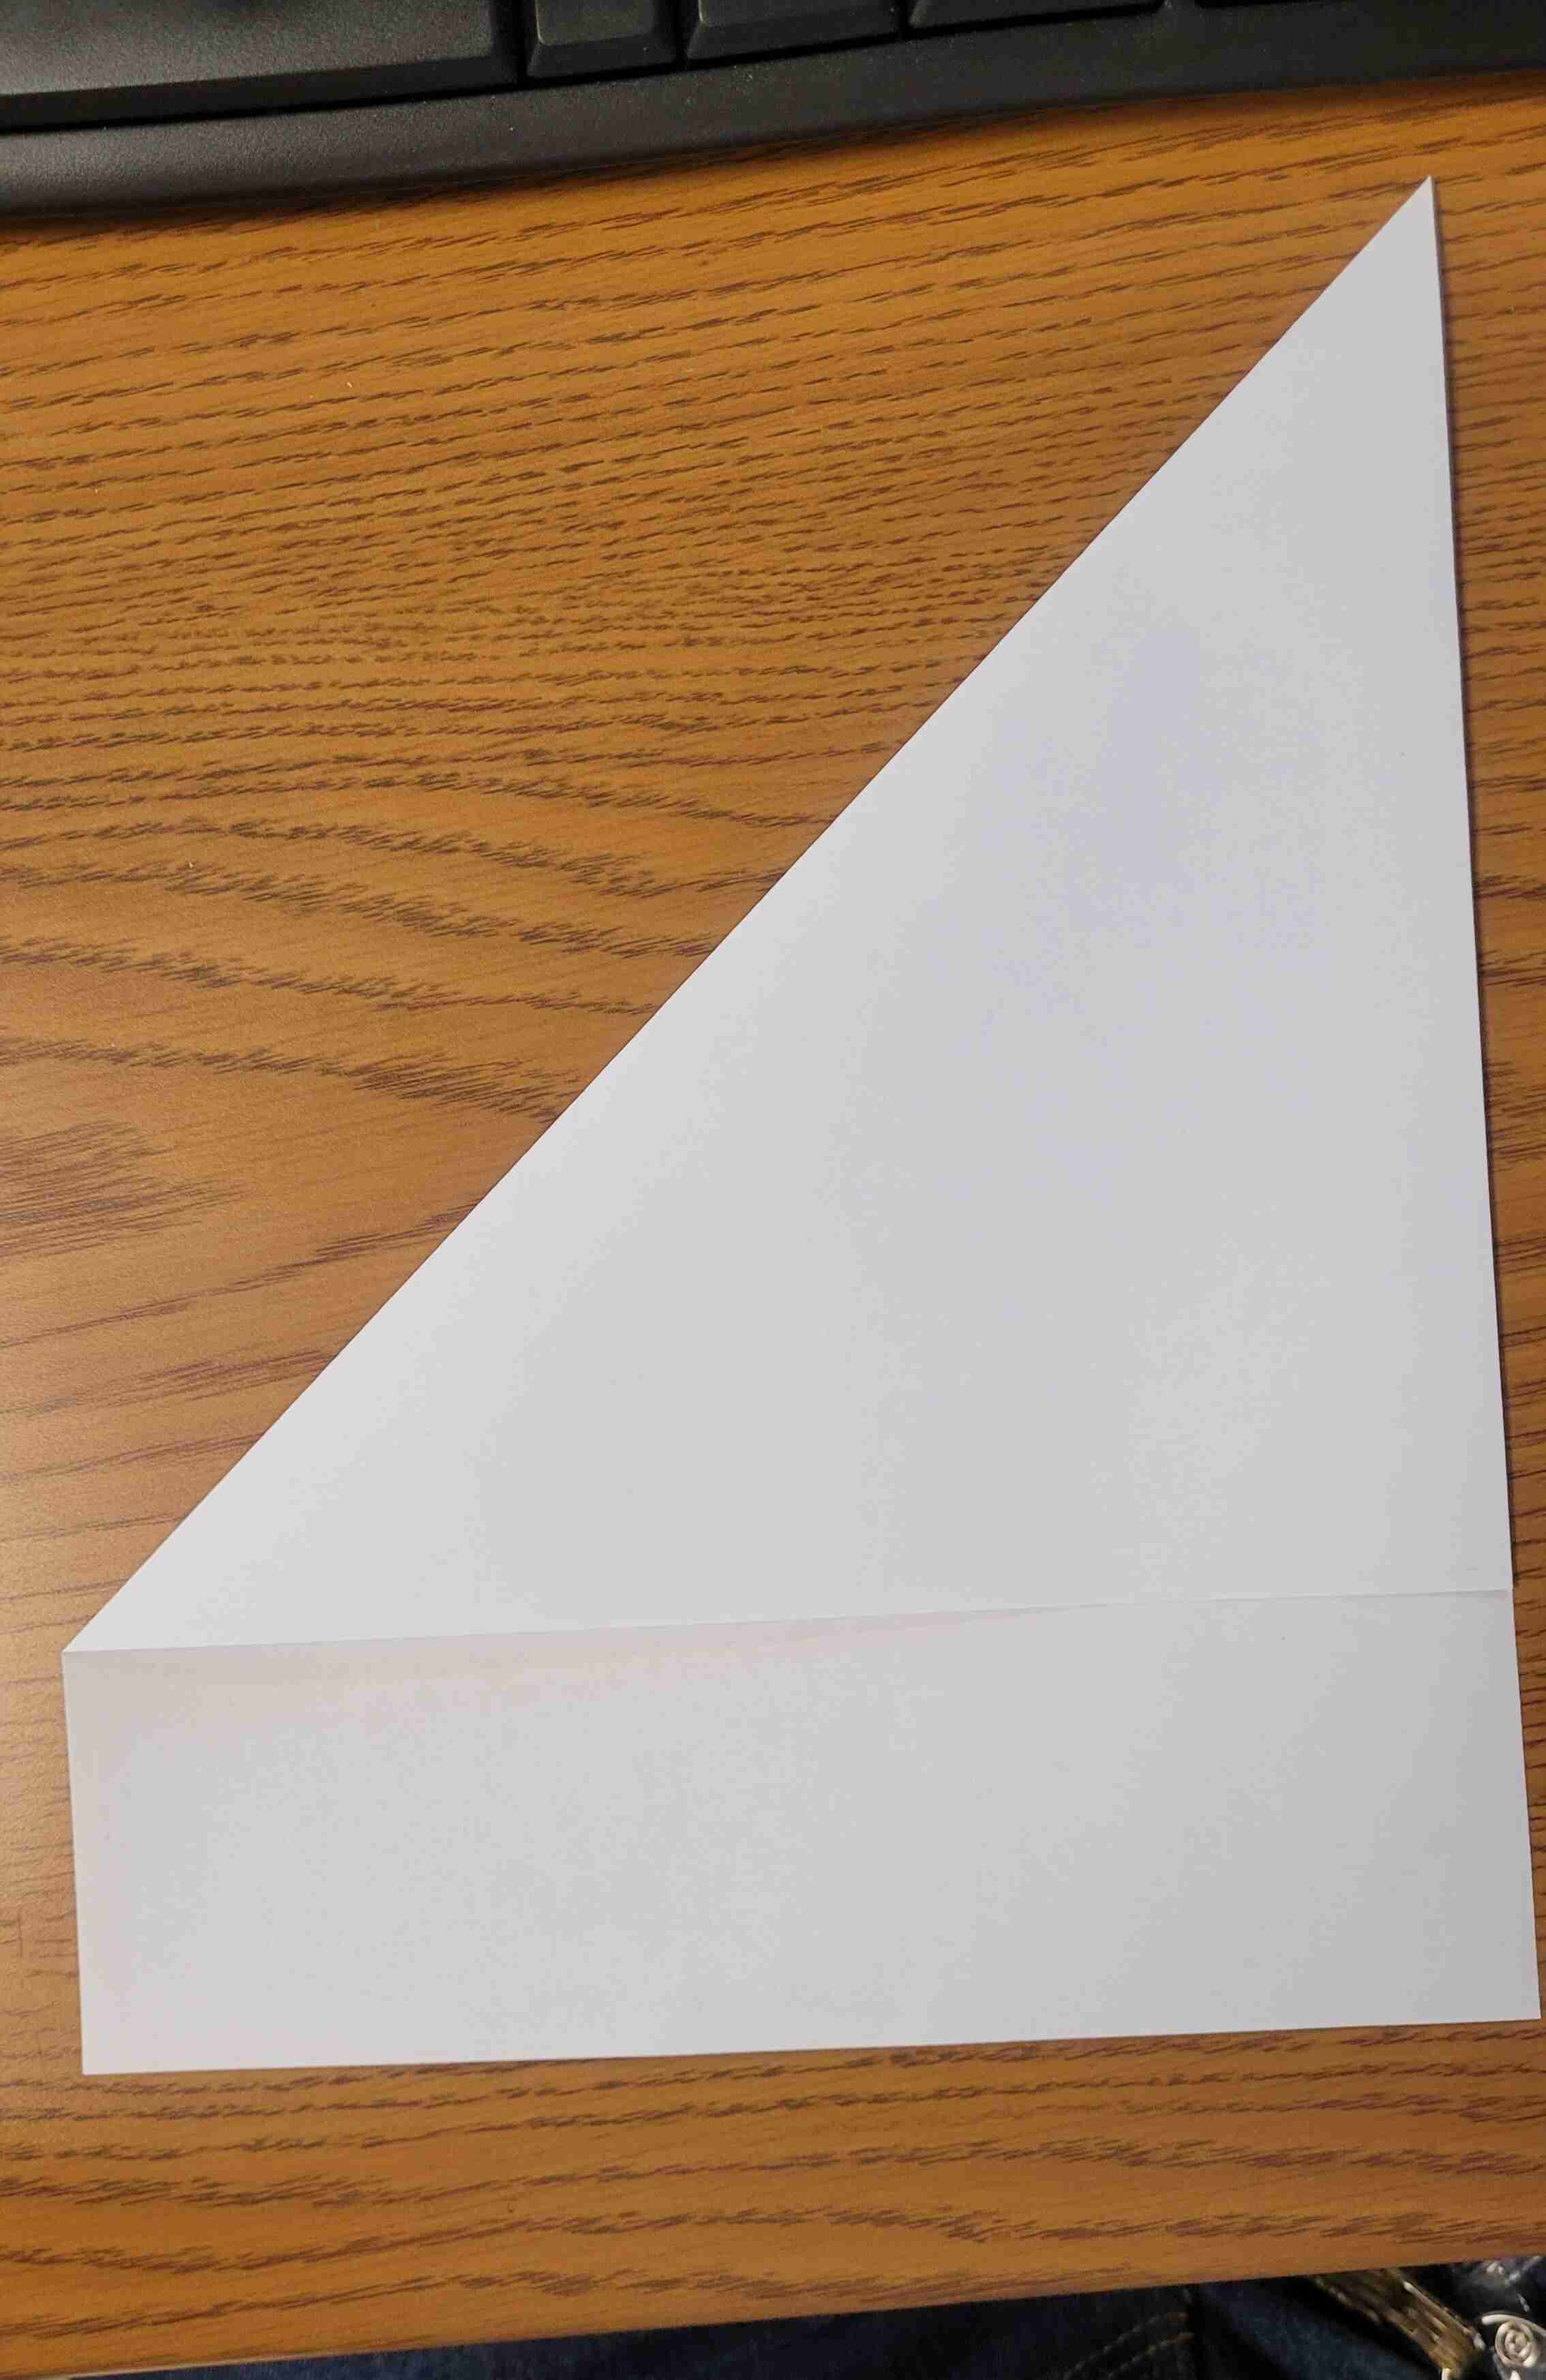
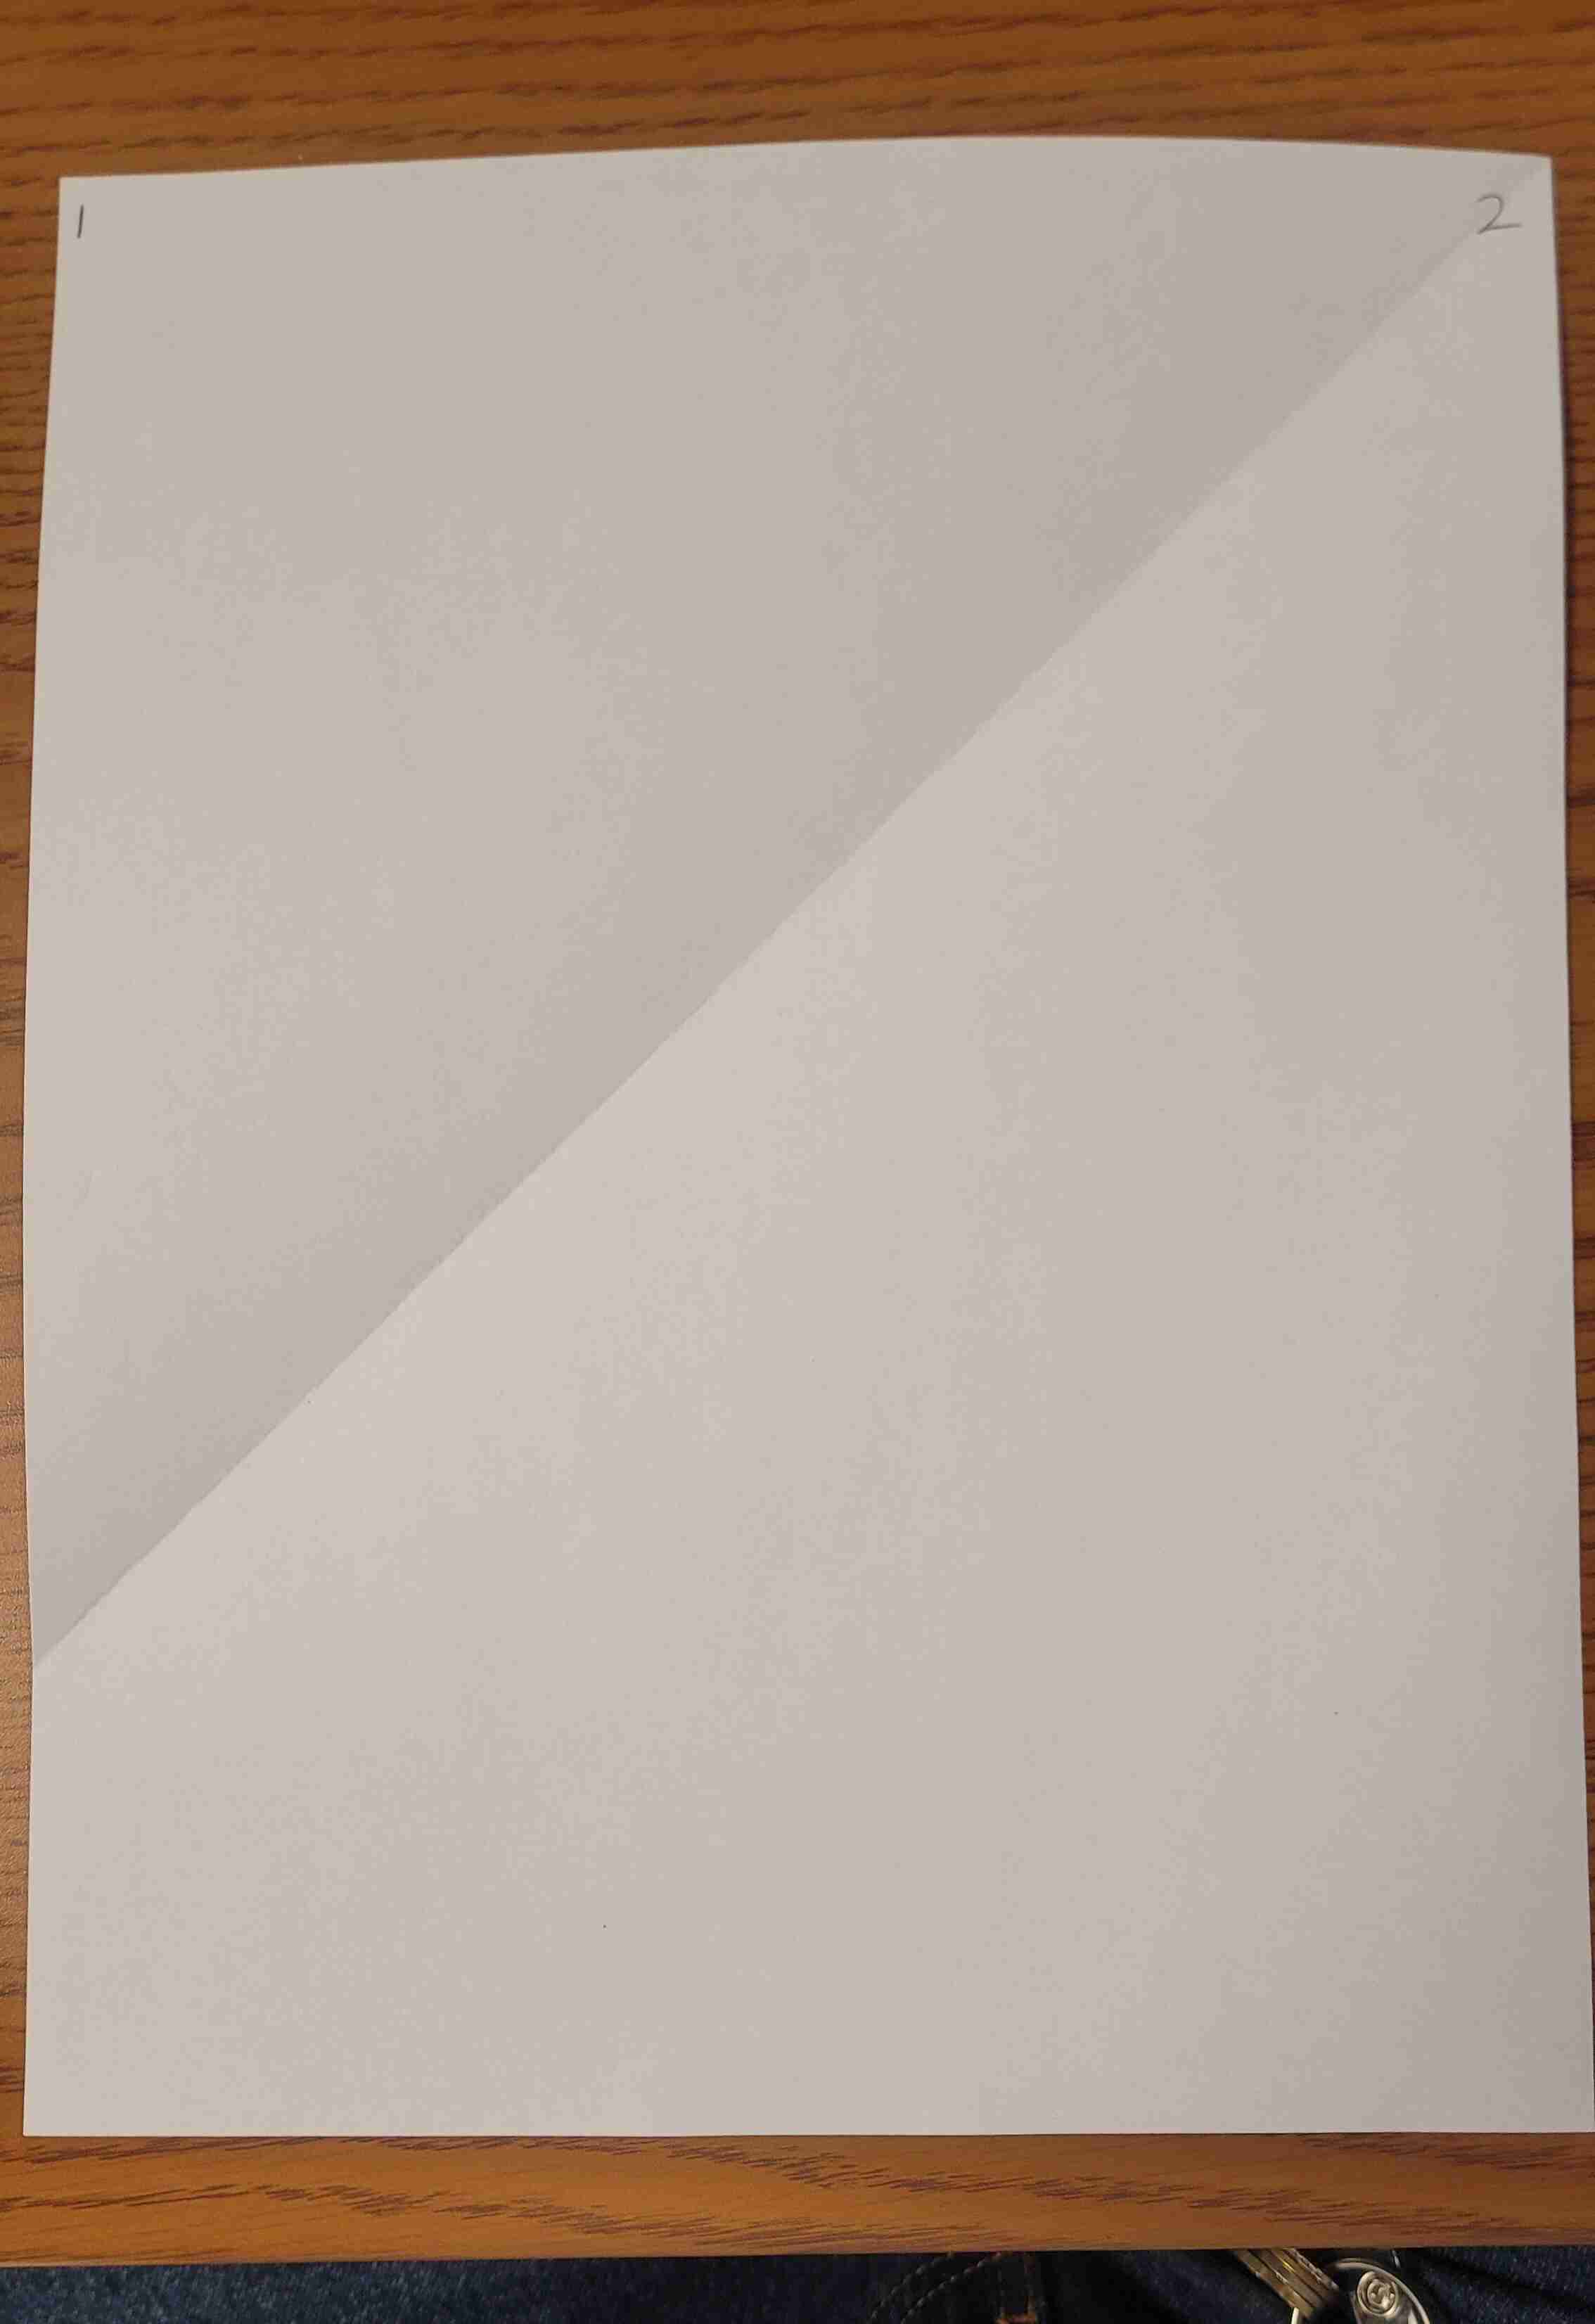
Step 2 - Fold corner 2 to the left side to make a triangle, keeping the edges flush. Then unfold.
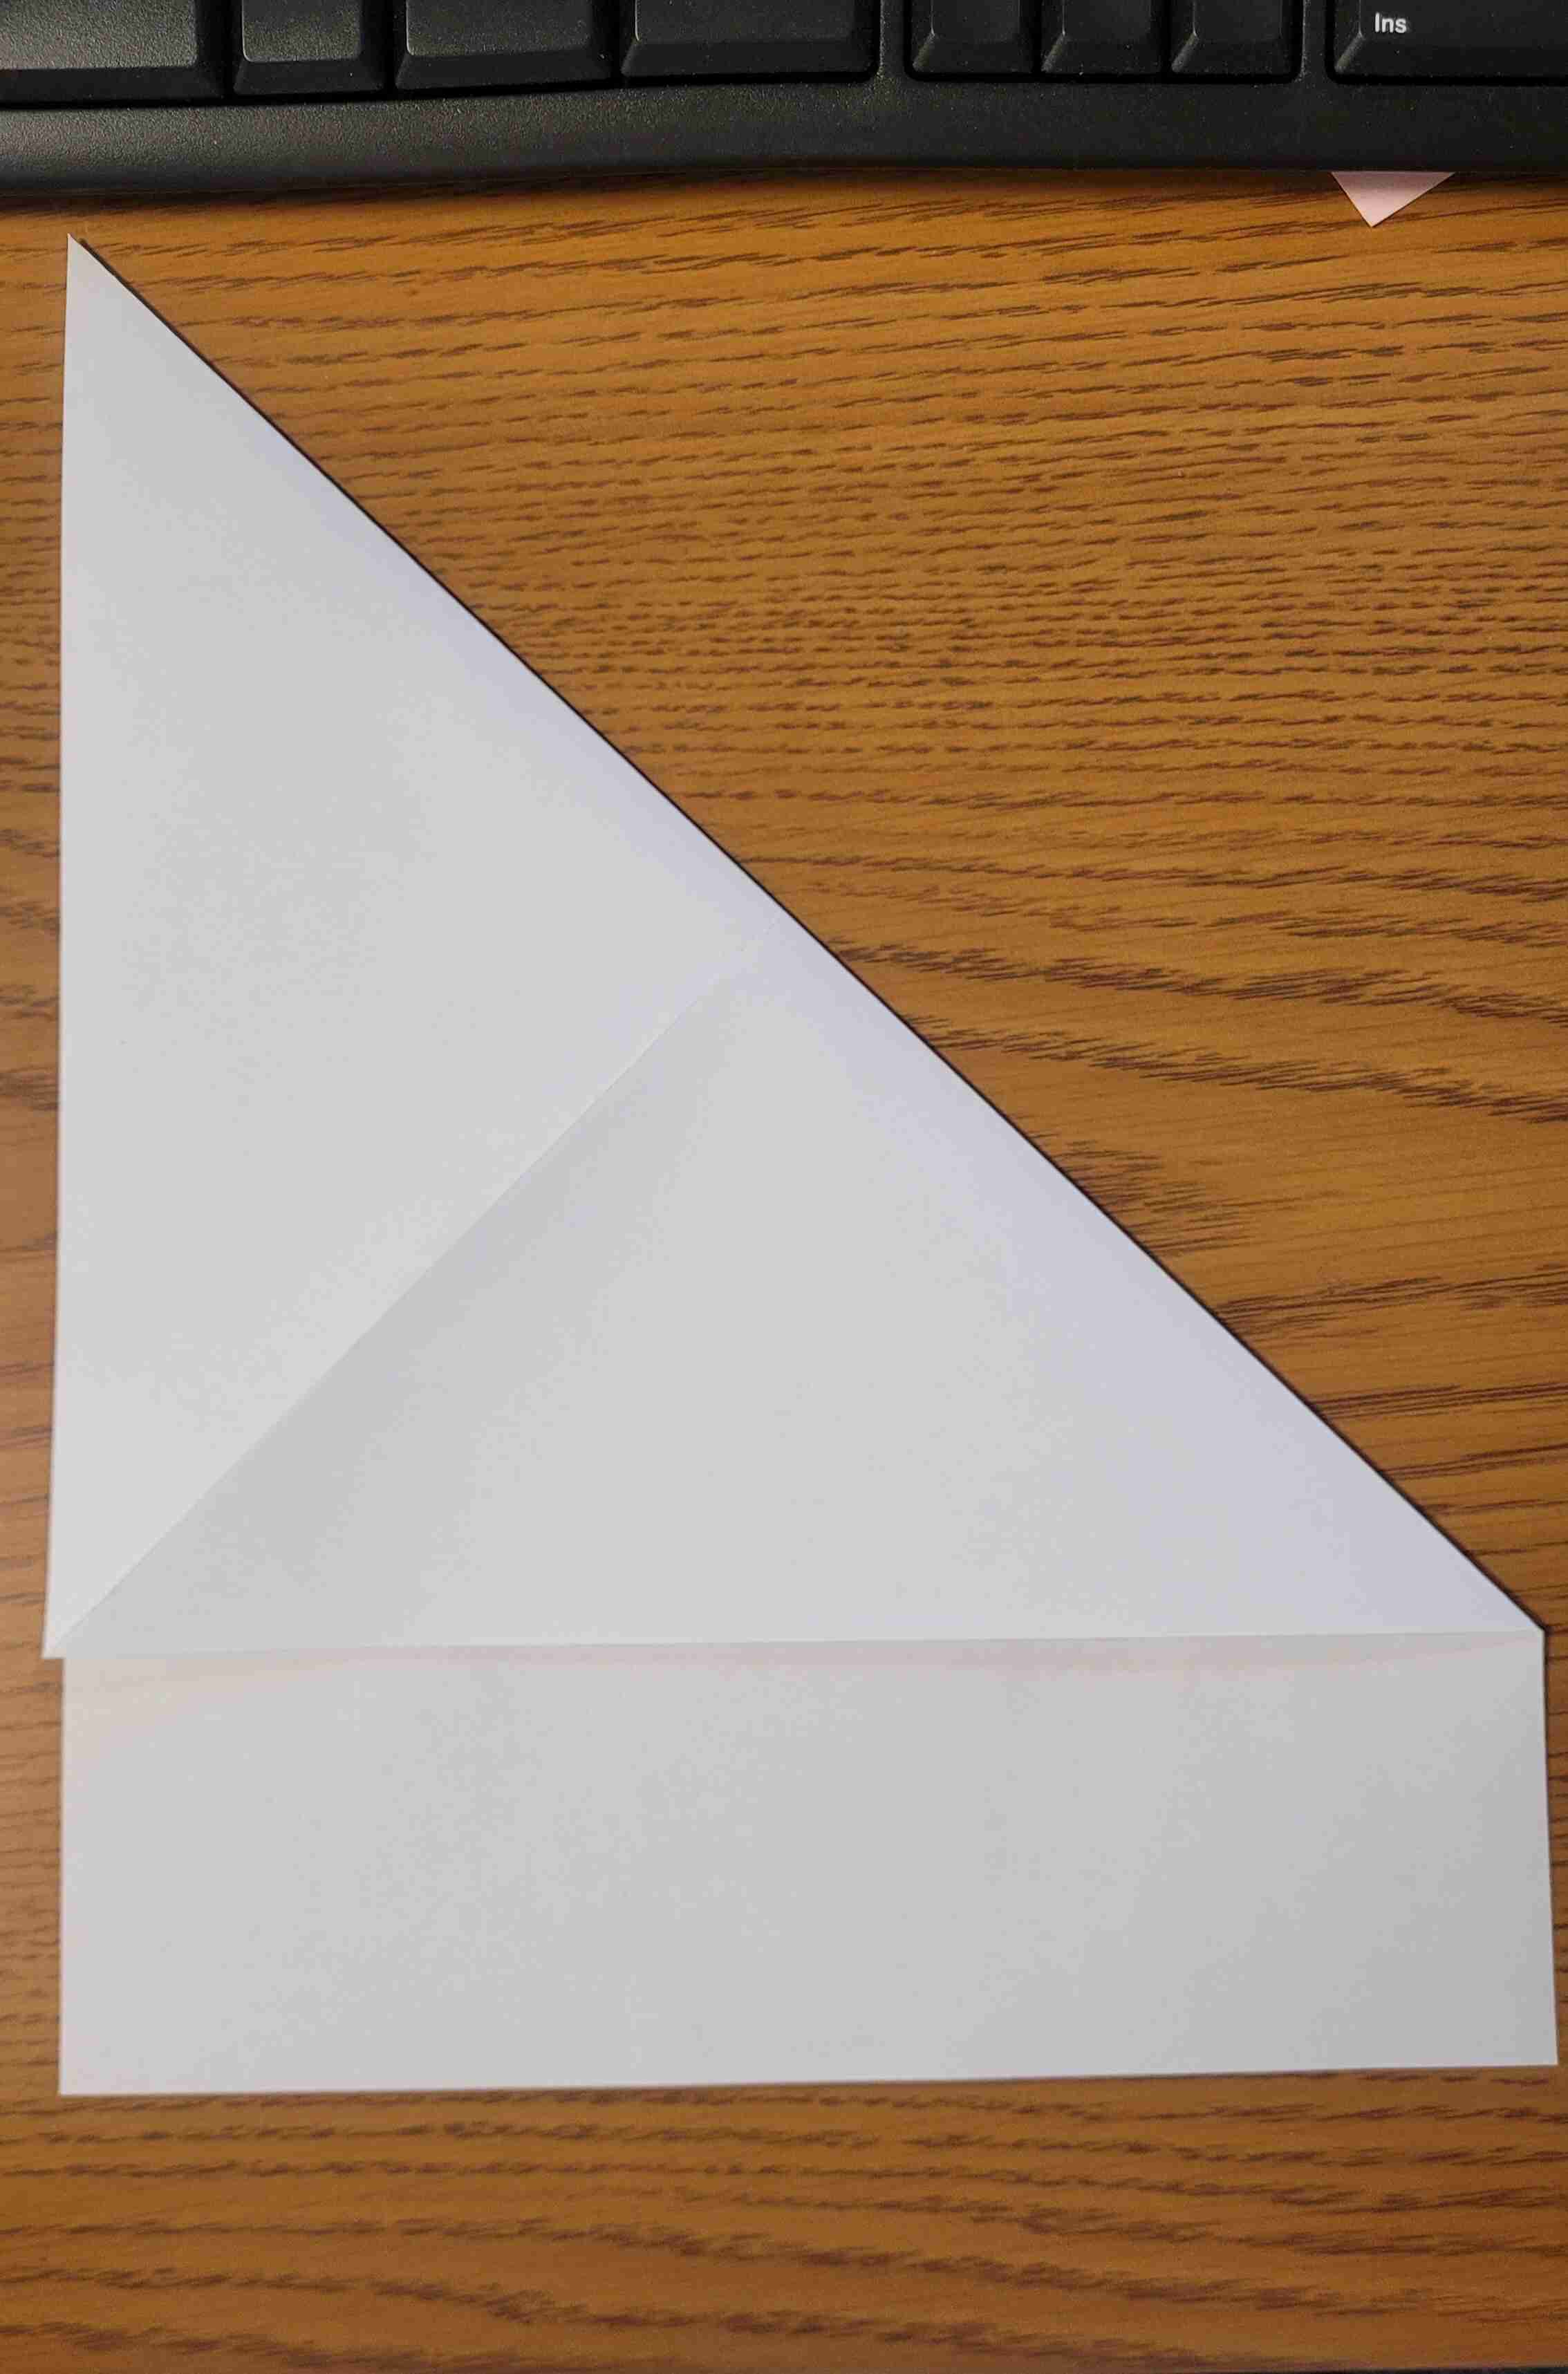
Step 3 - Flip over the paper and you will notice the creases come to a point where they meet. Press down in the middle where the creases meet.
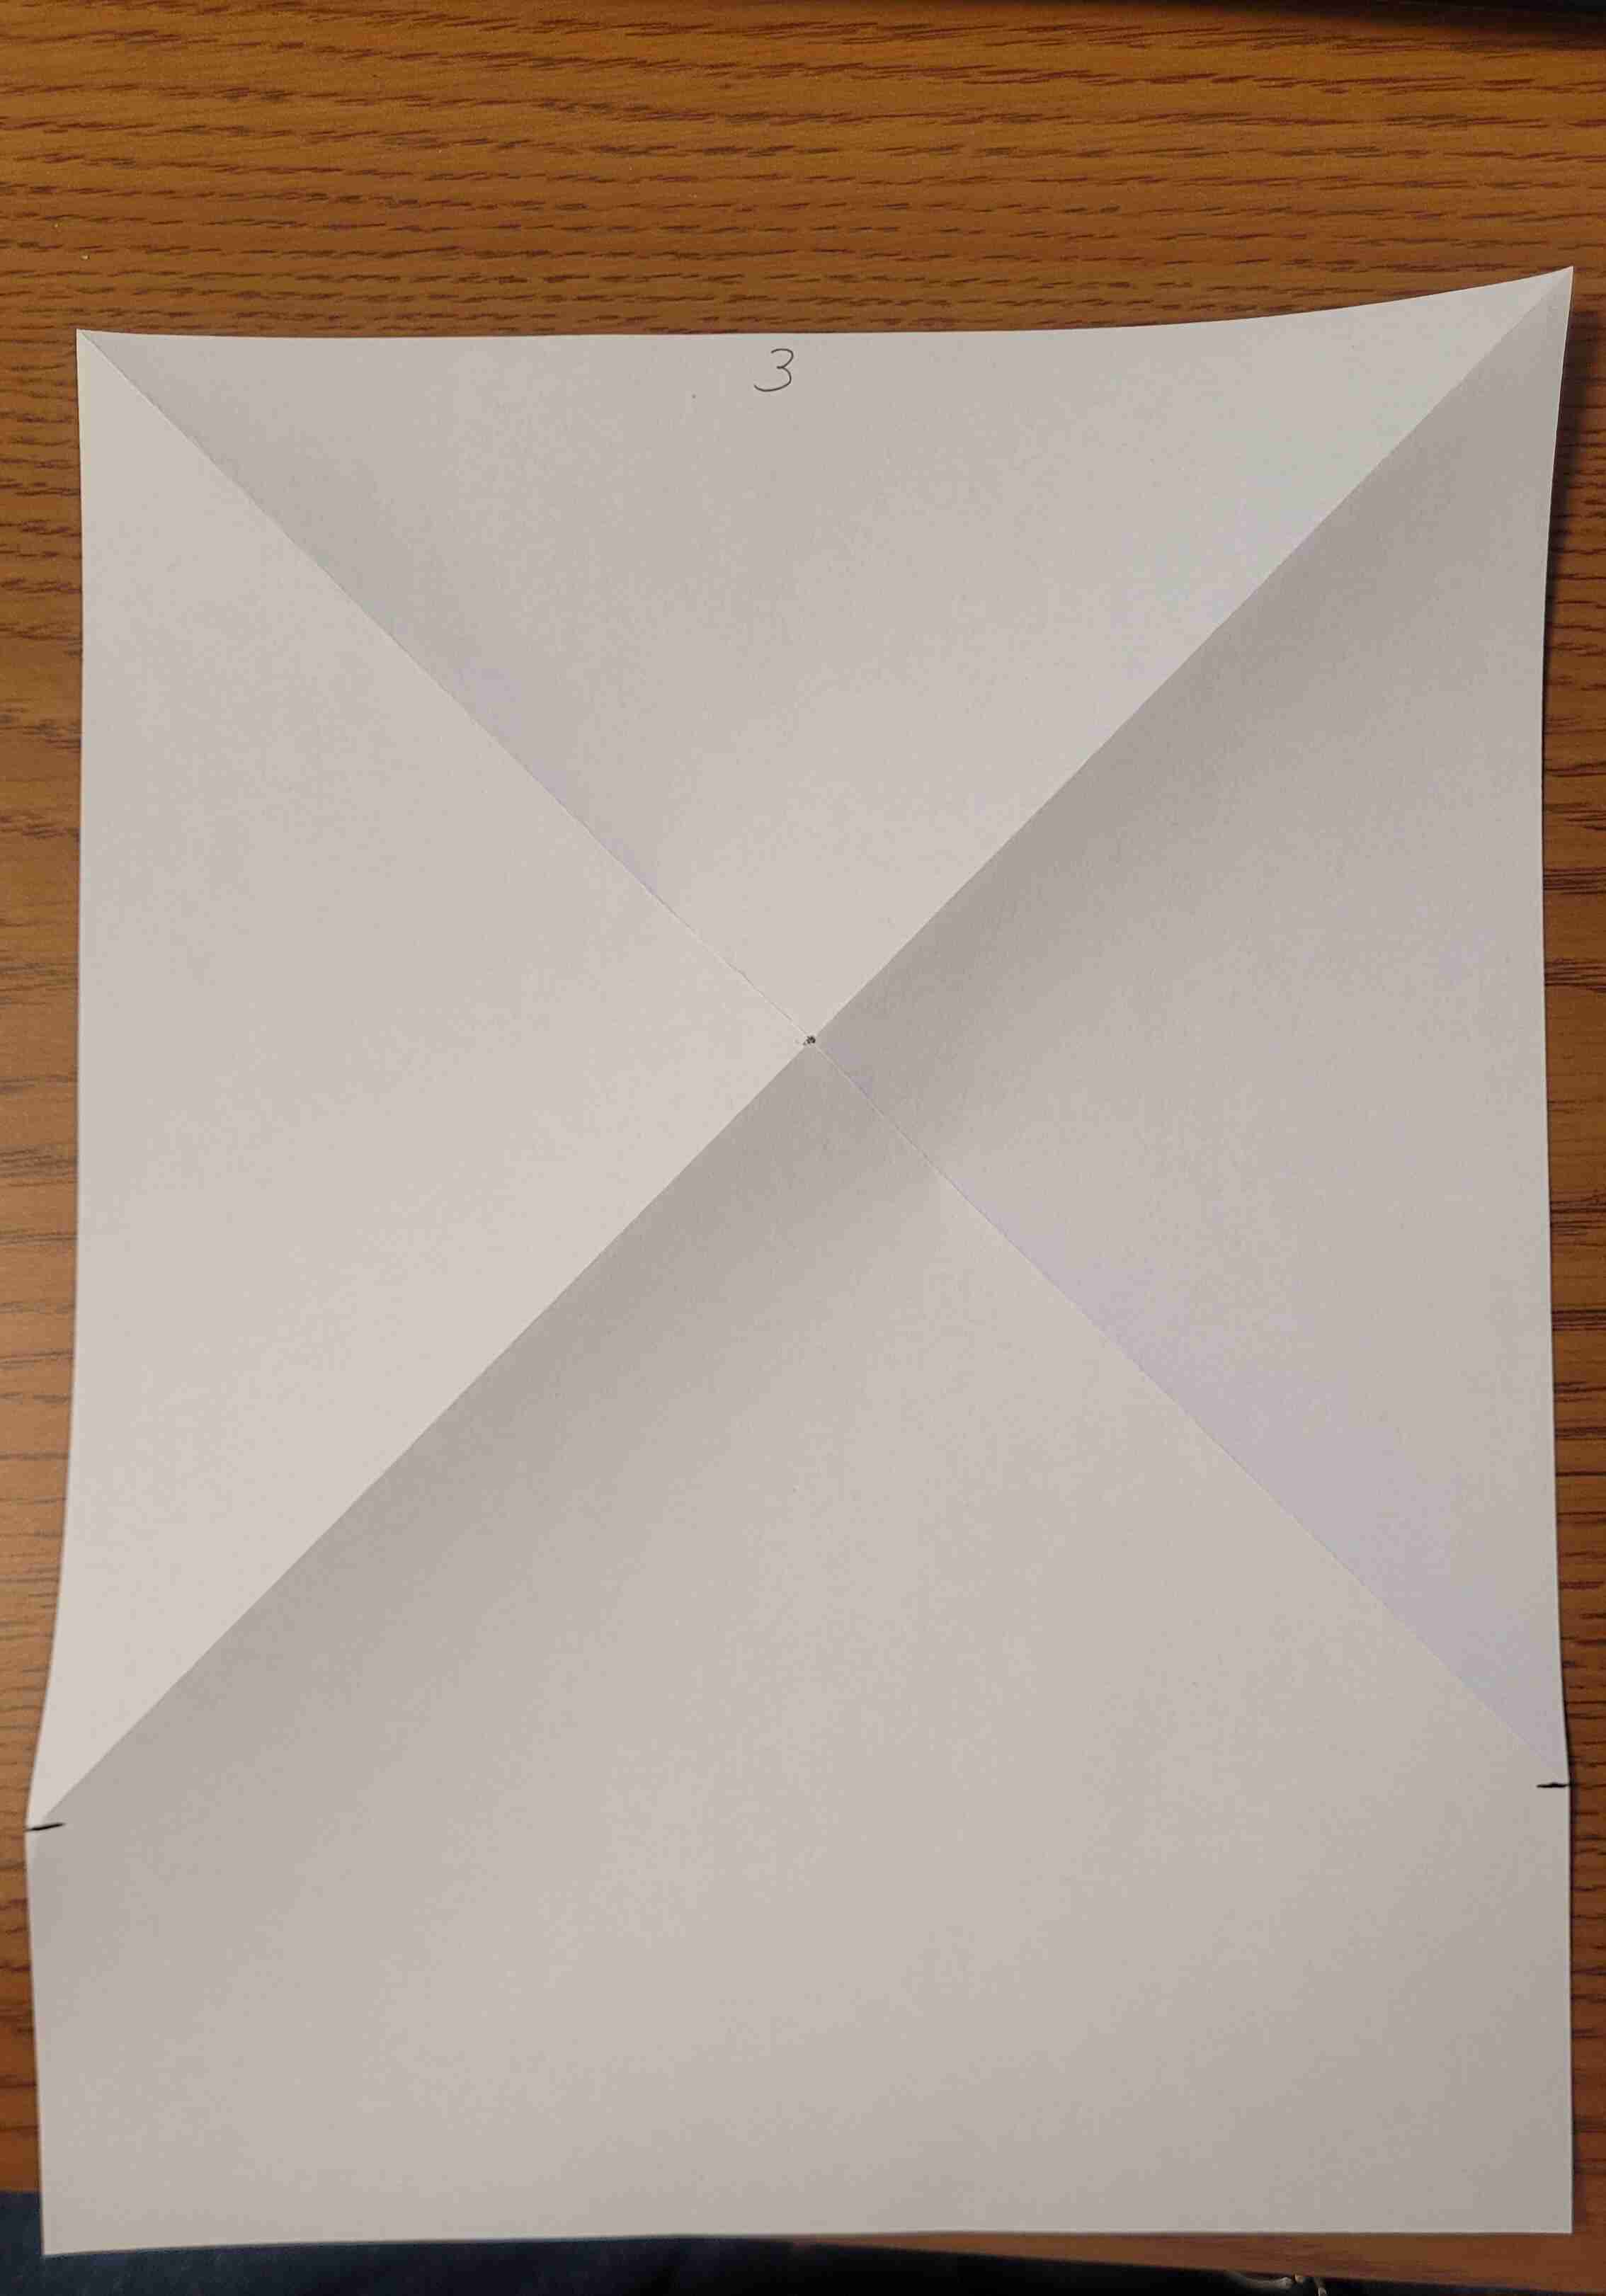
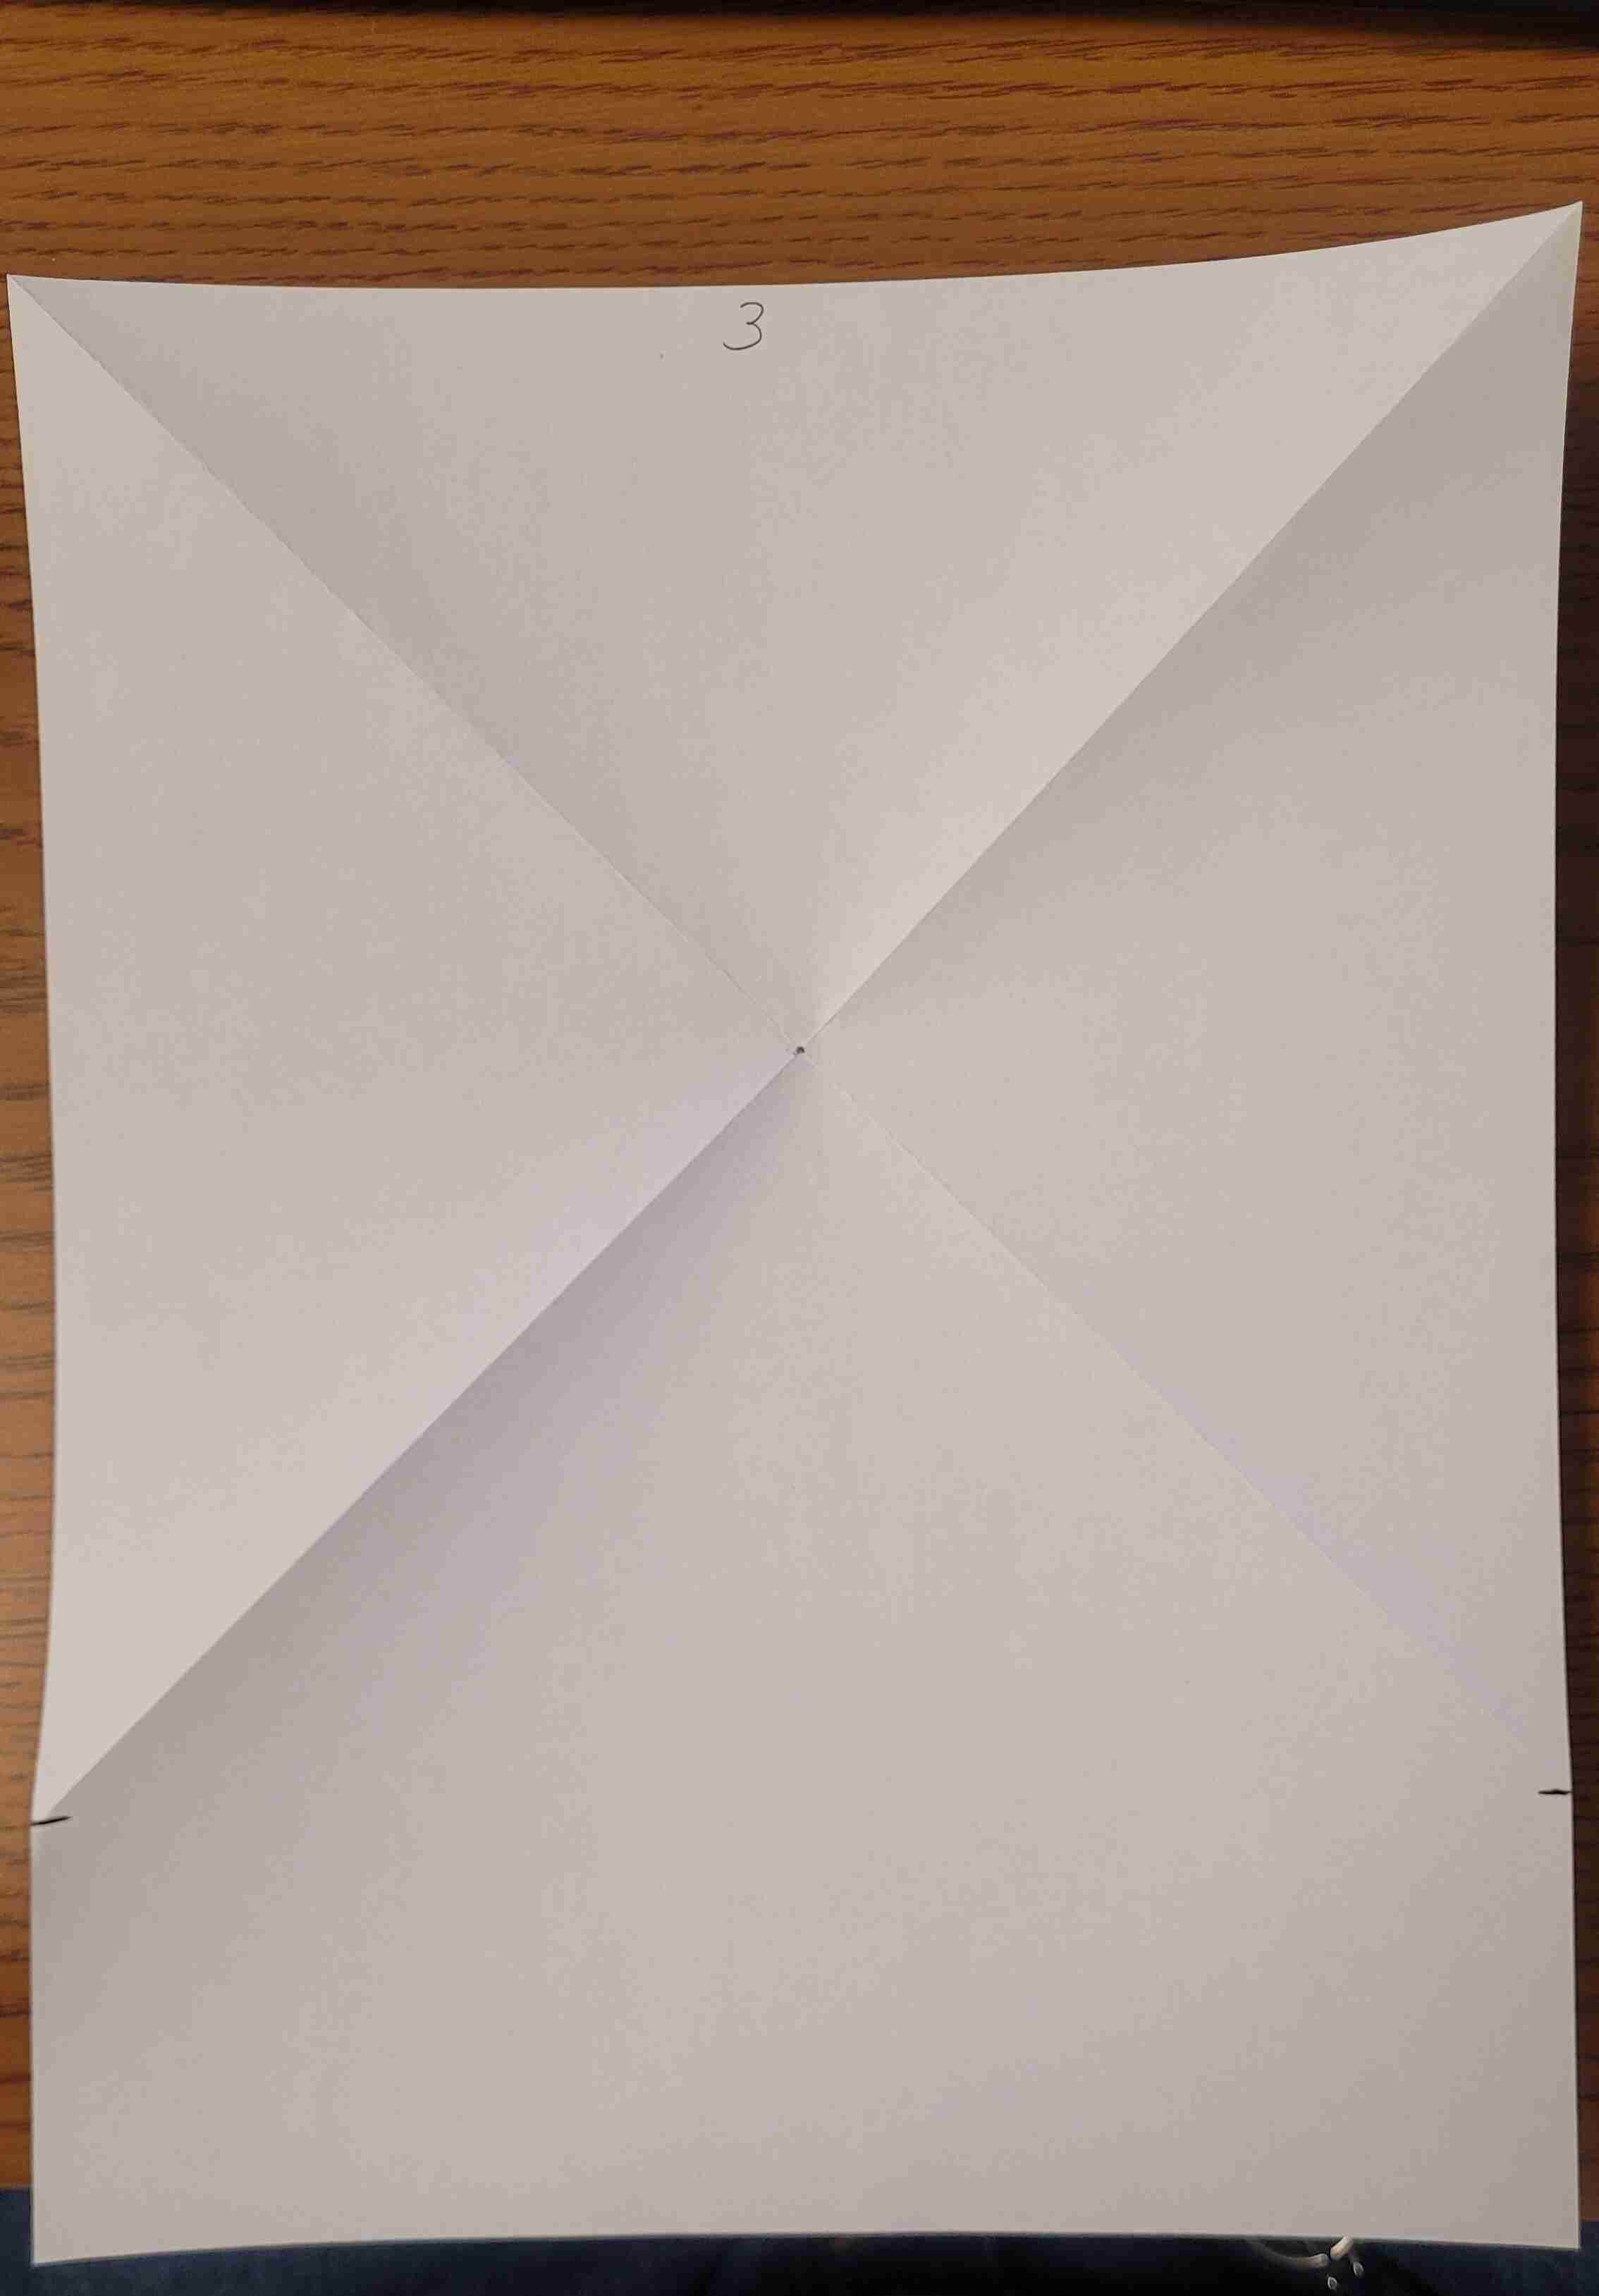
Step 4 - Then fold edge 3 the to where the creases end. Flip over the page.
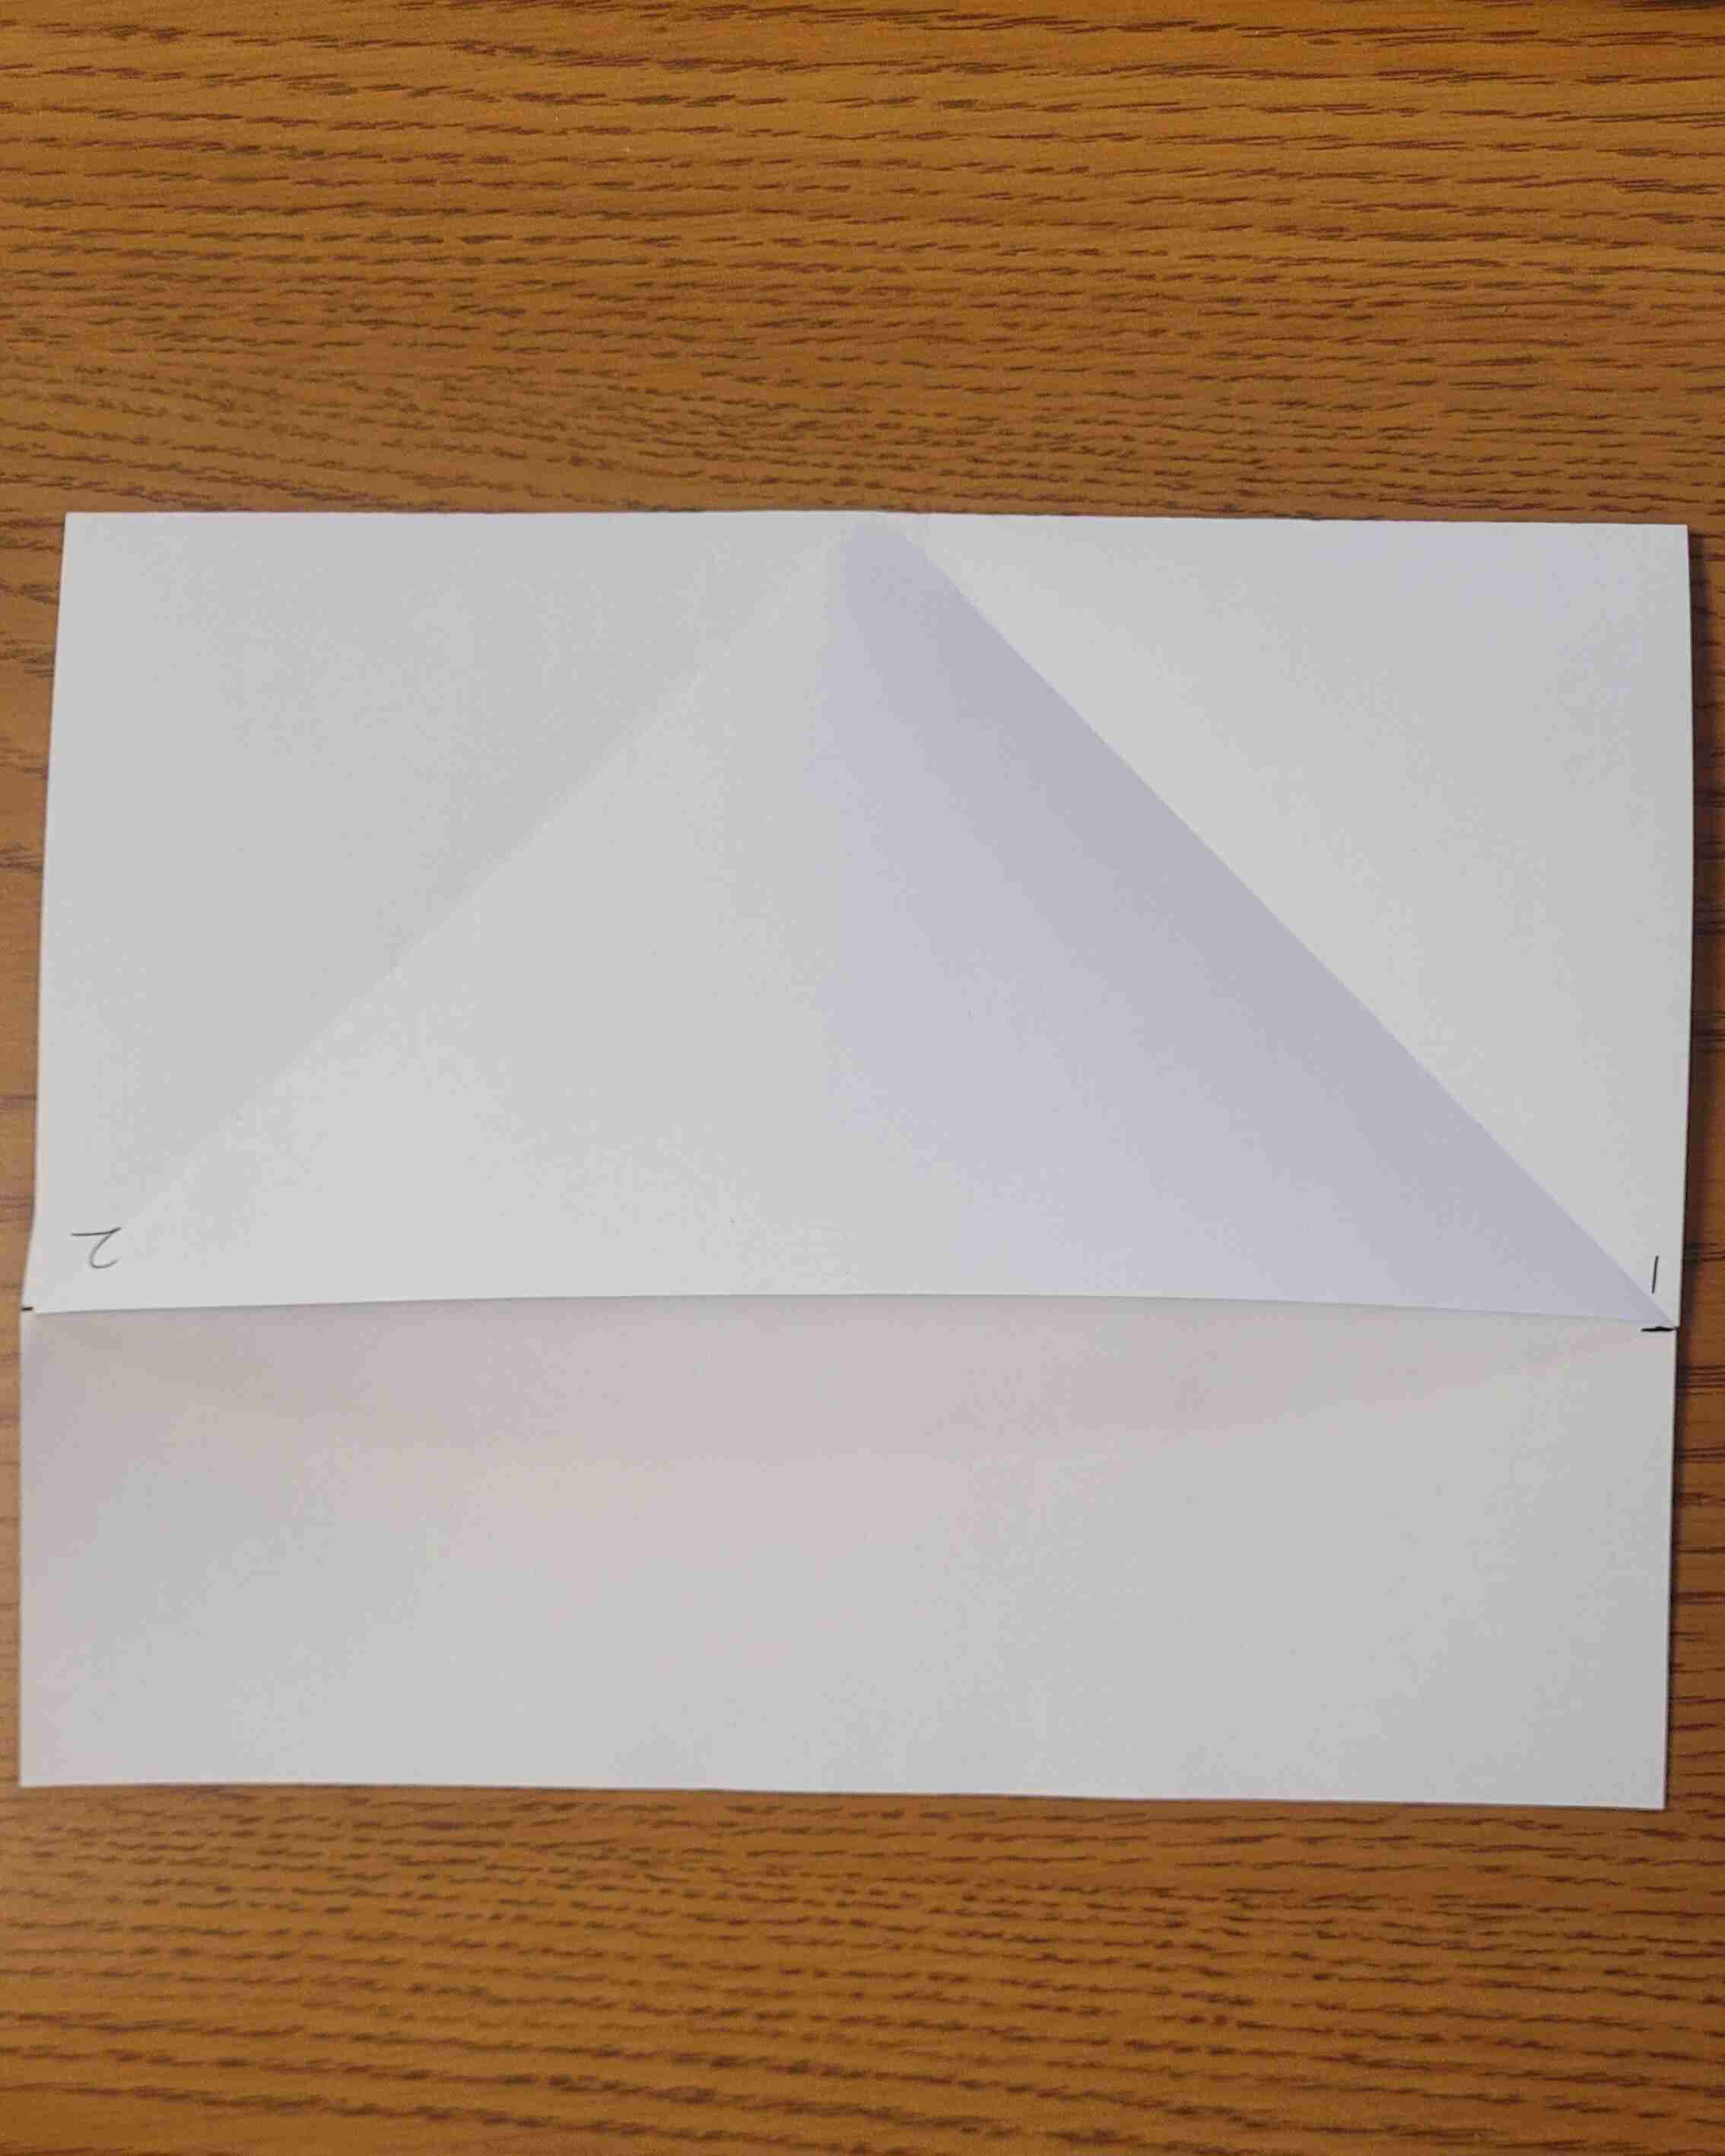
Step 5 - All creases should be meeting in one point near the center of the page. Press down on the center of where the creases meet to make the paper pop up.
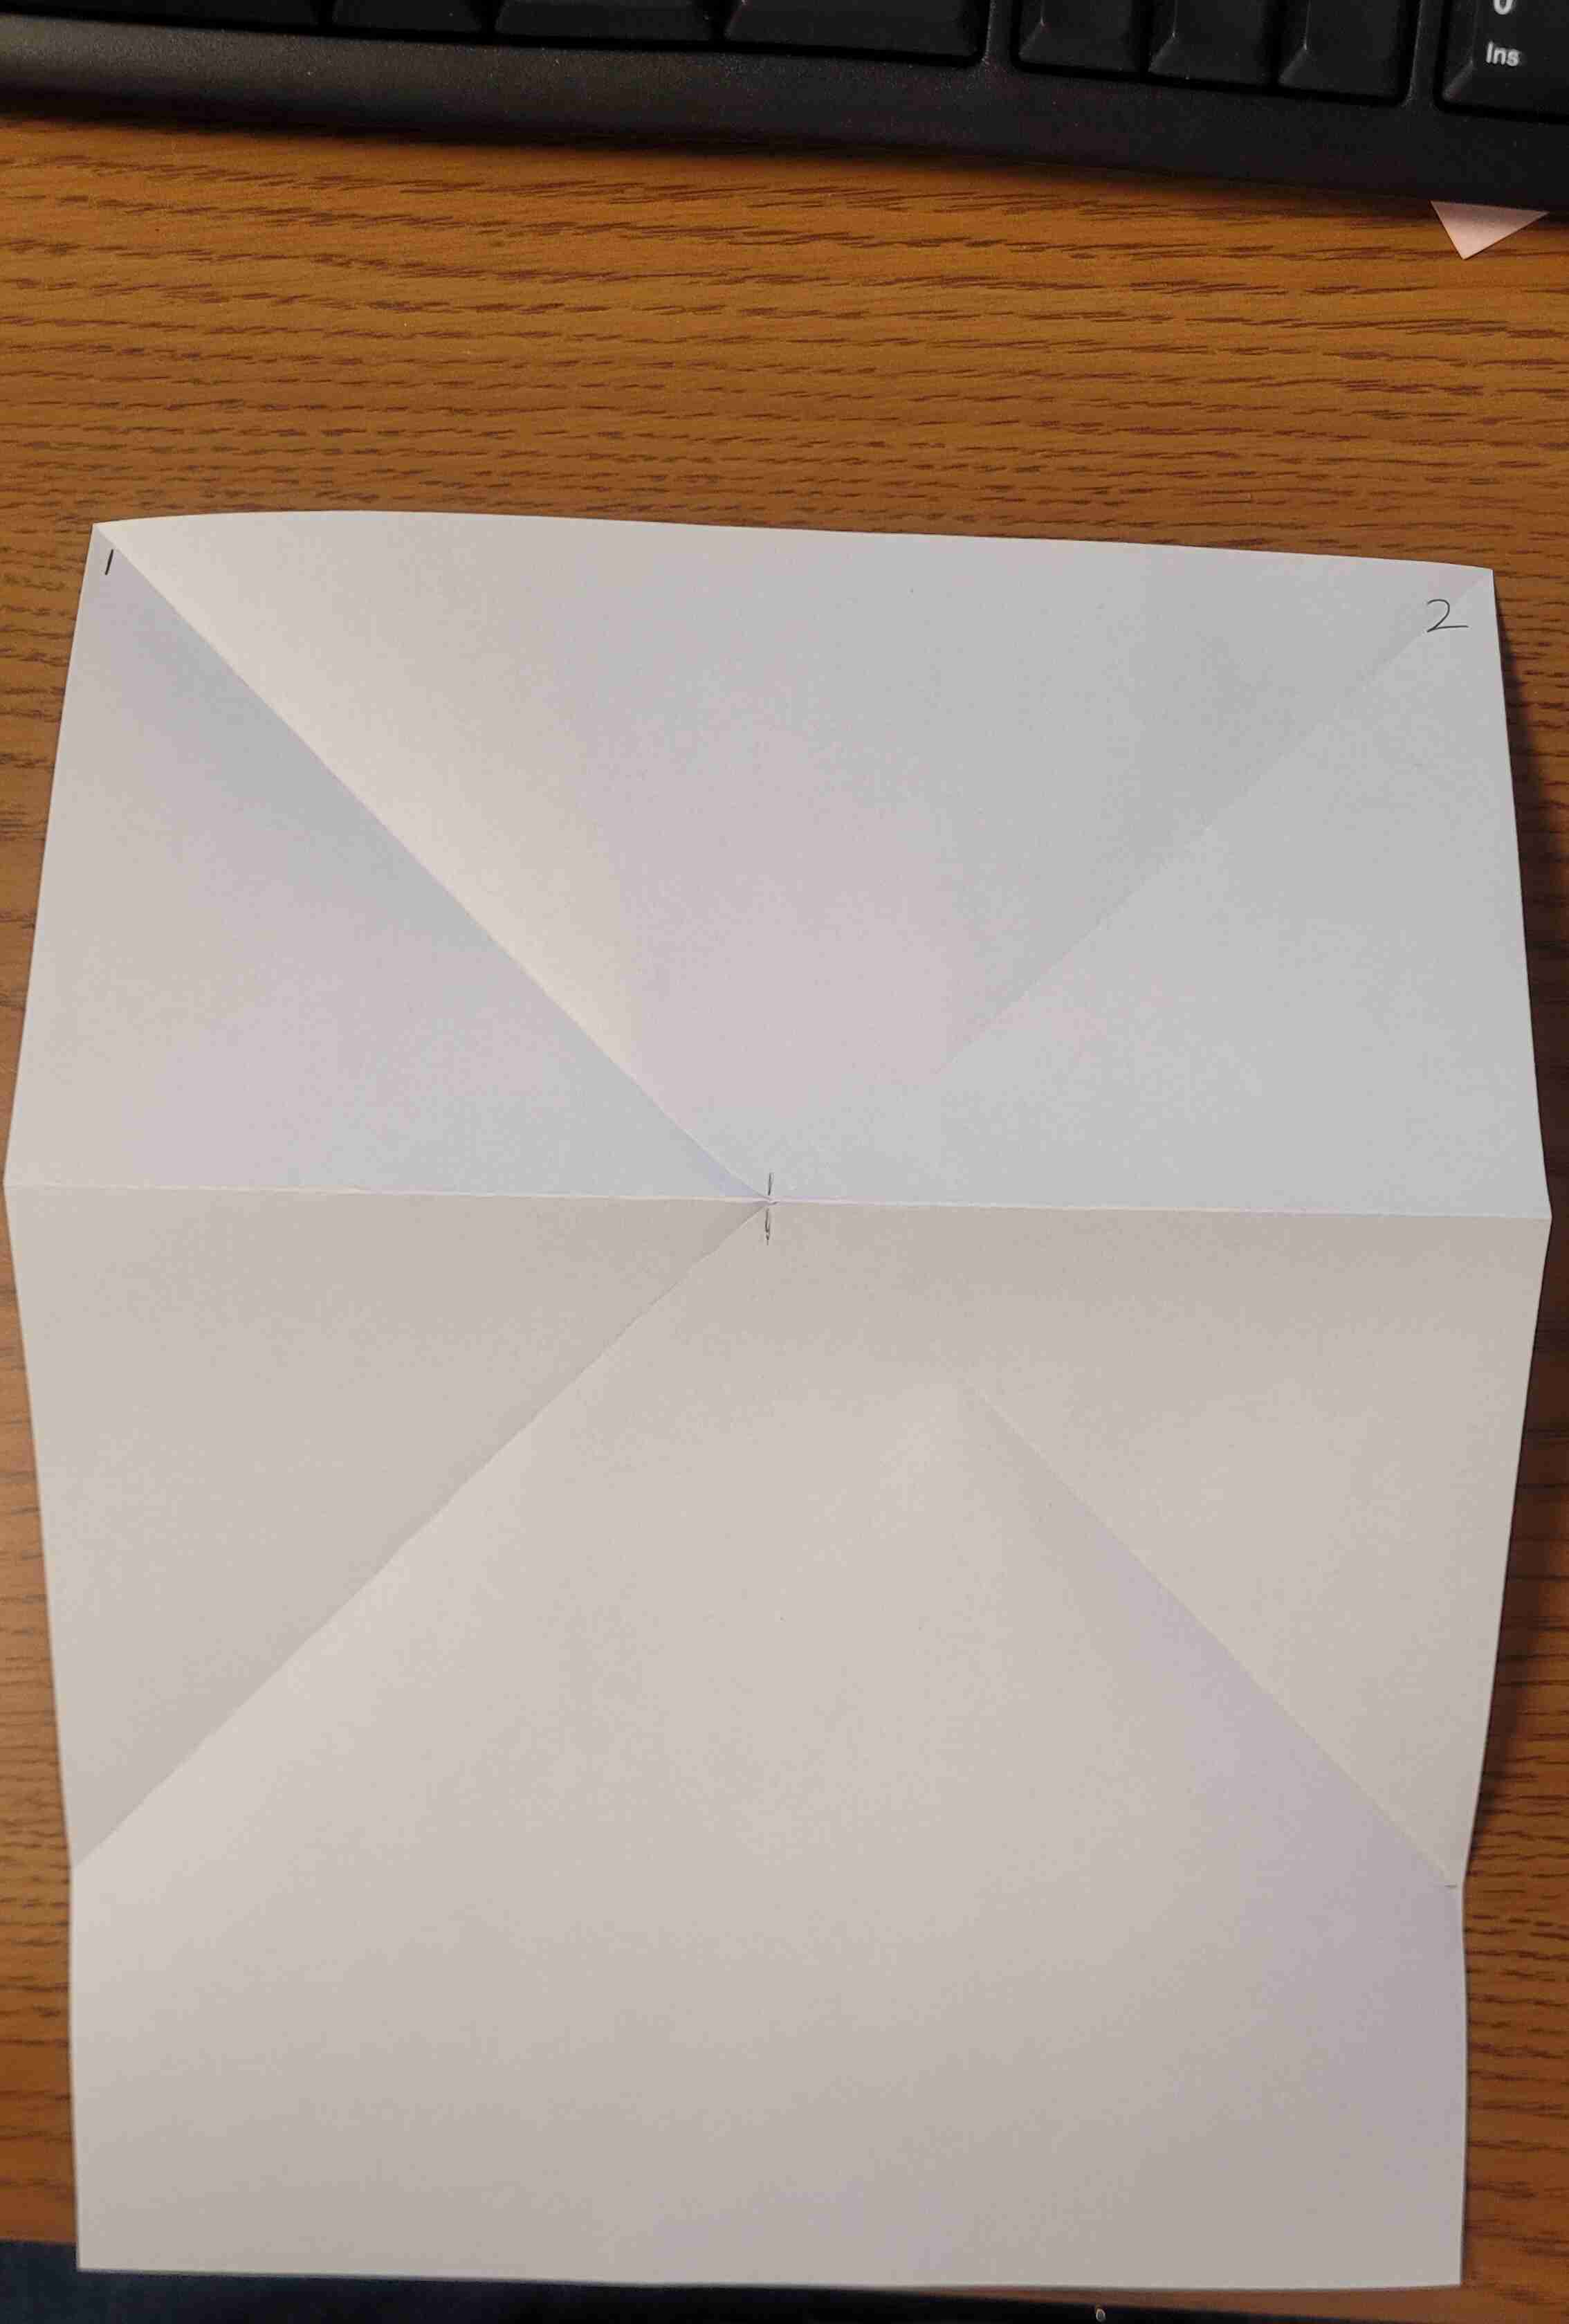
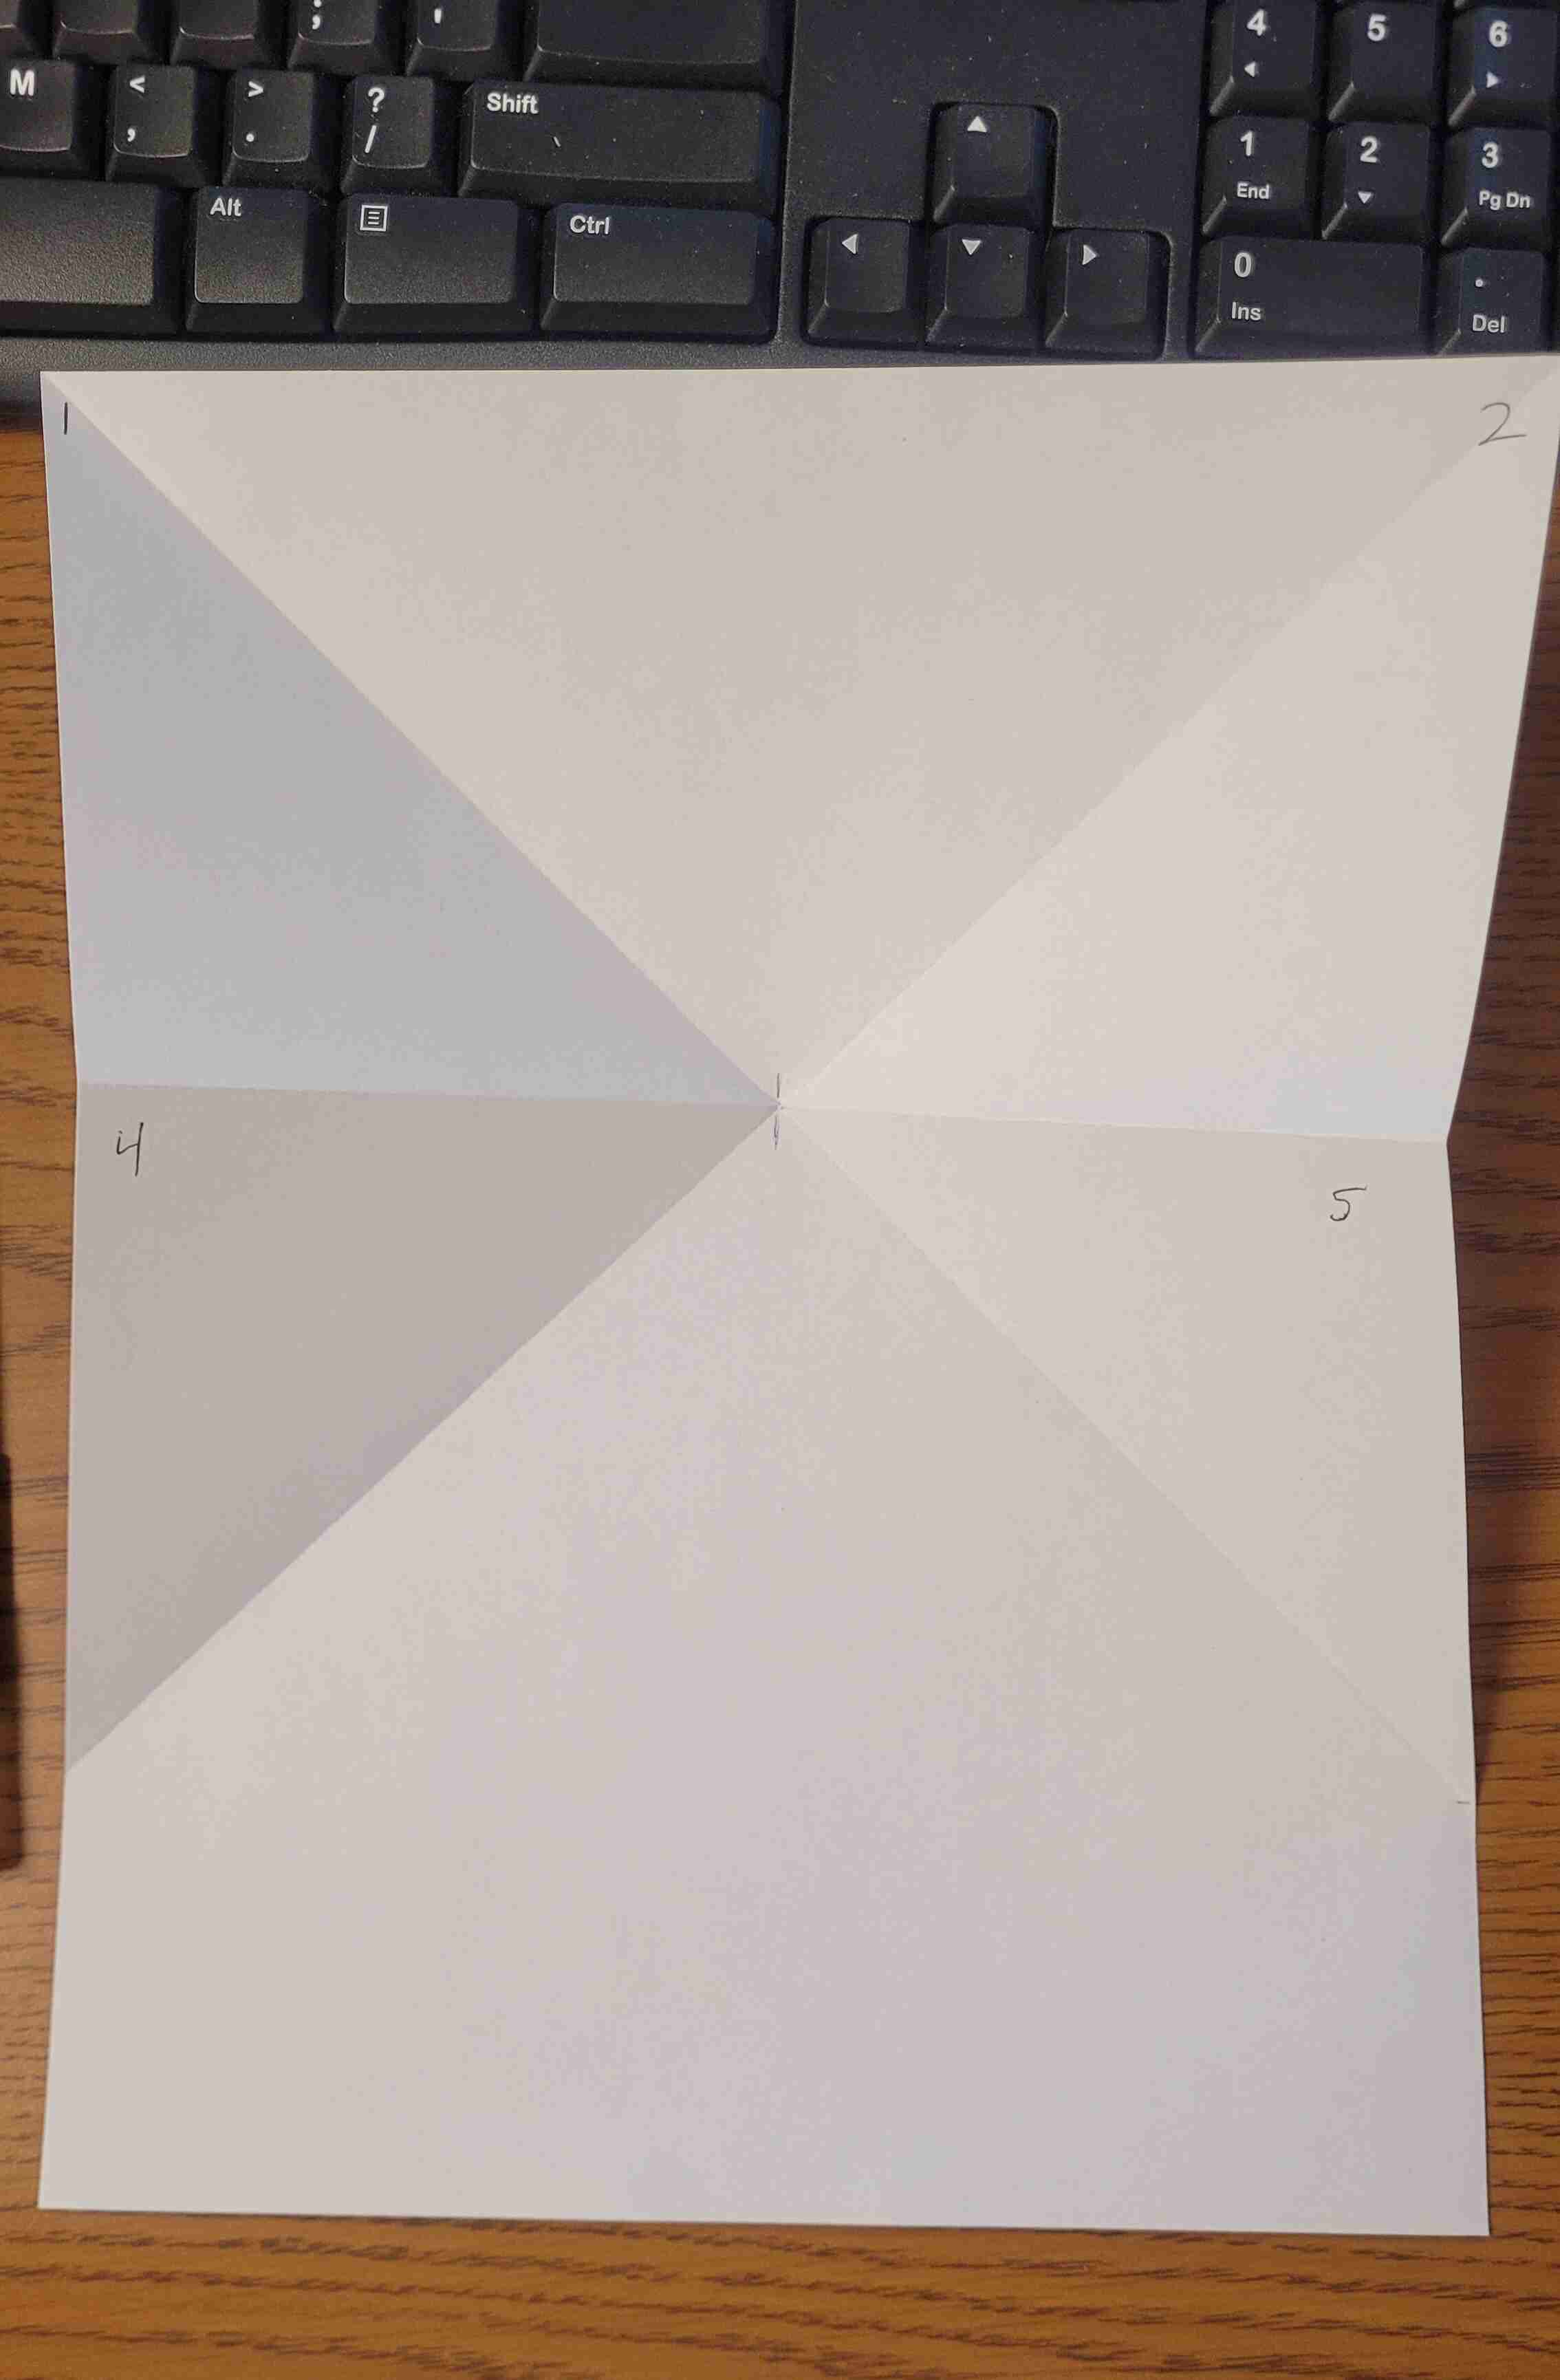
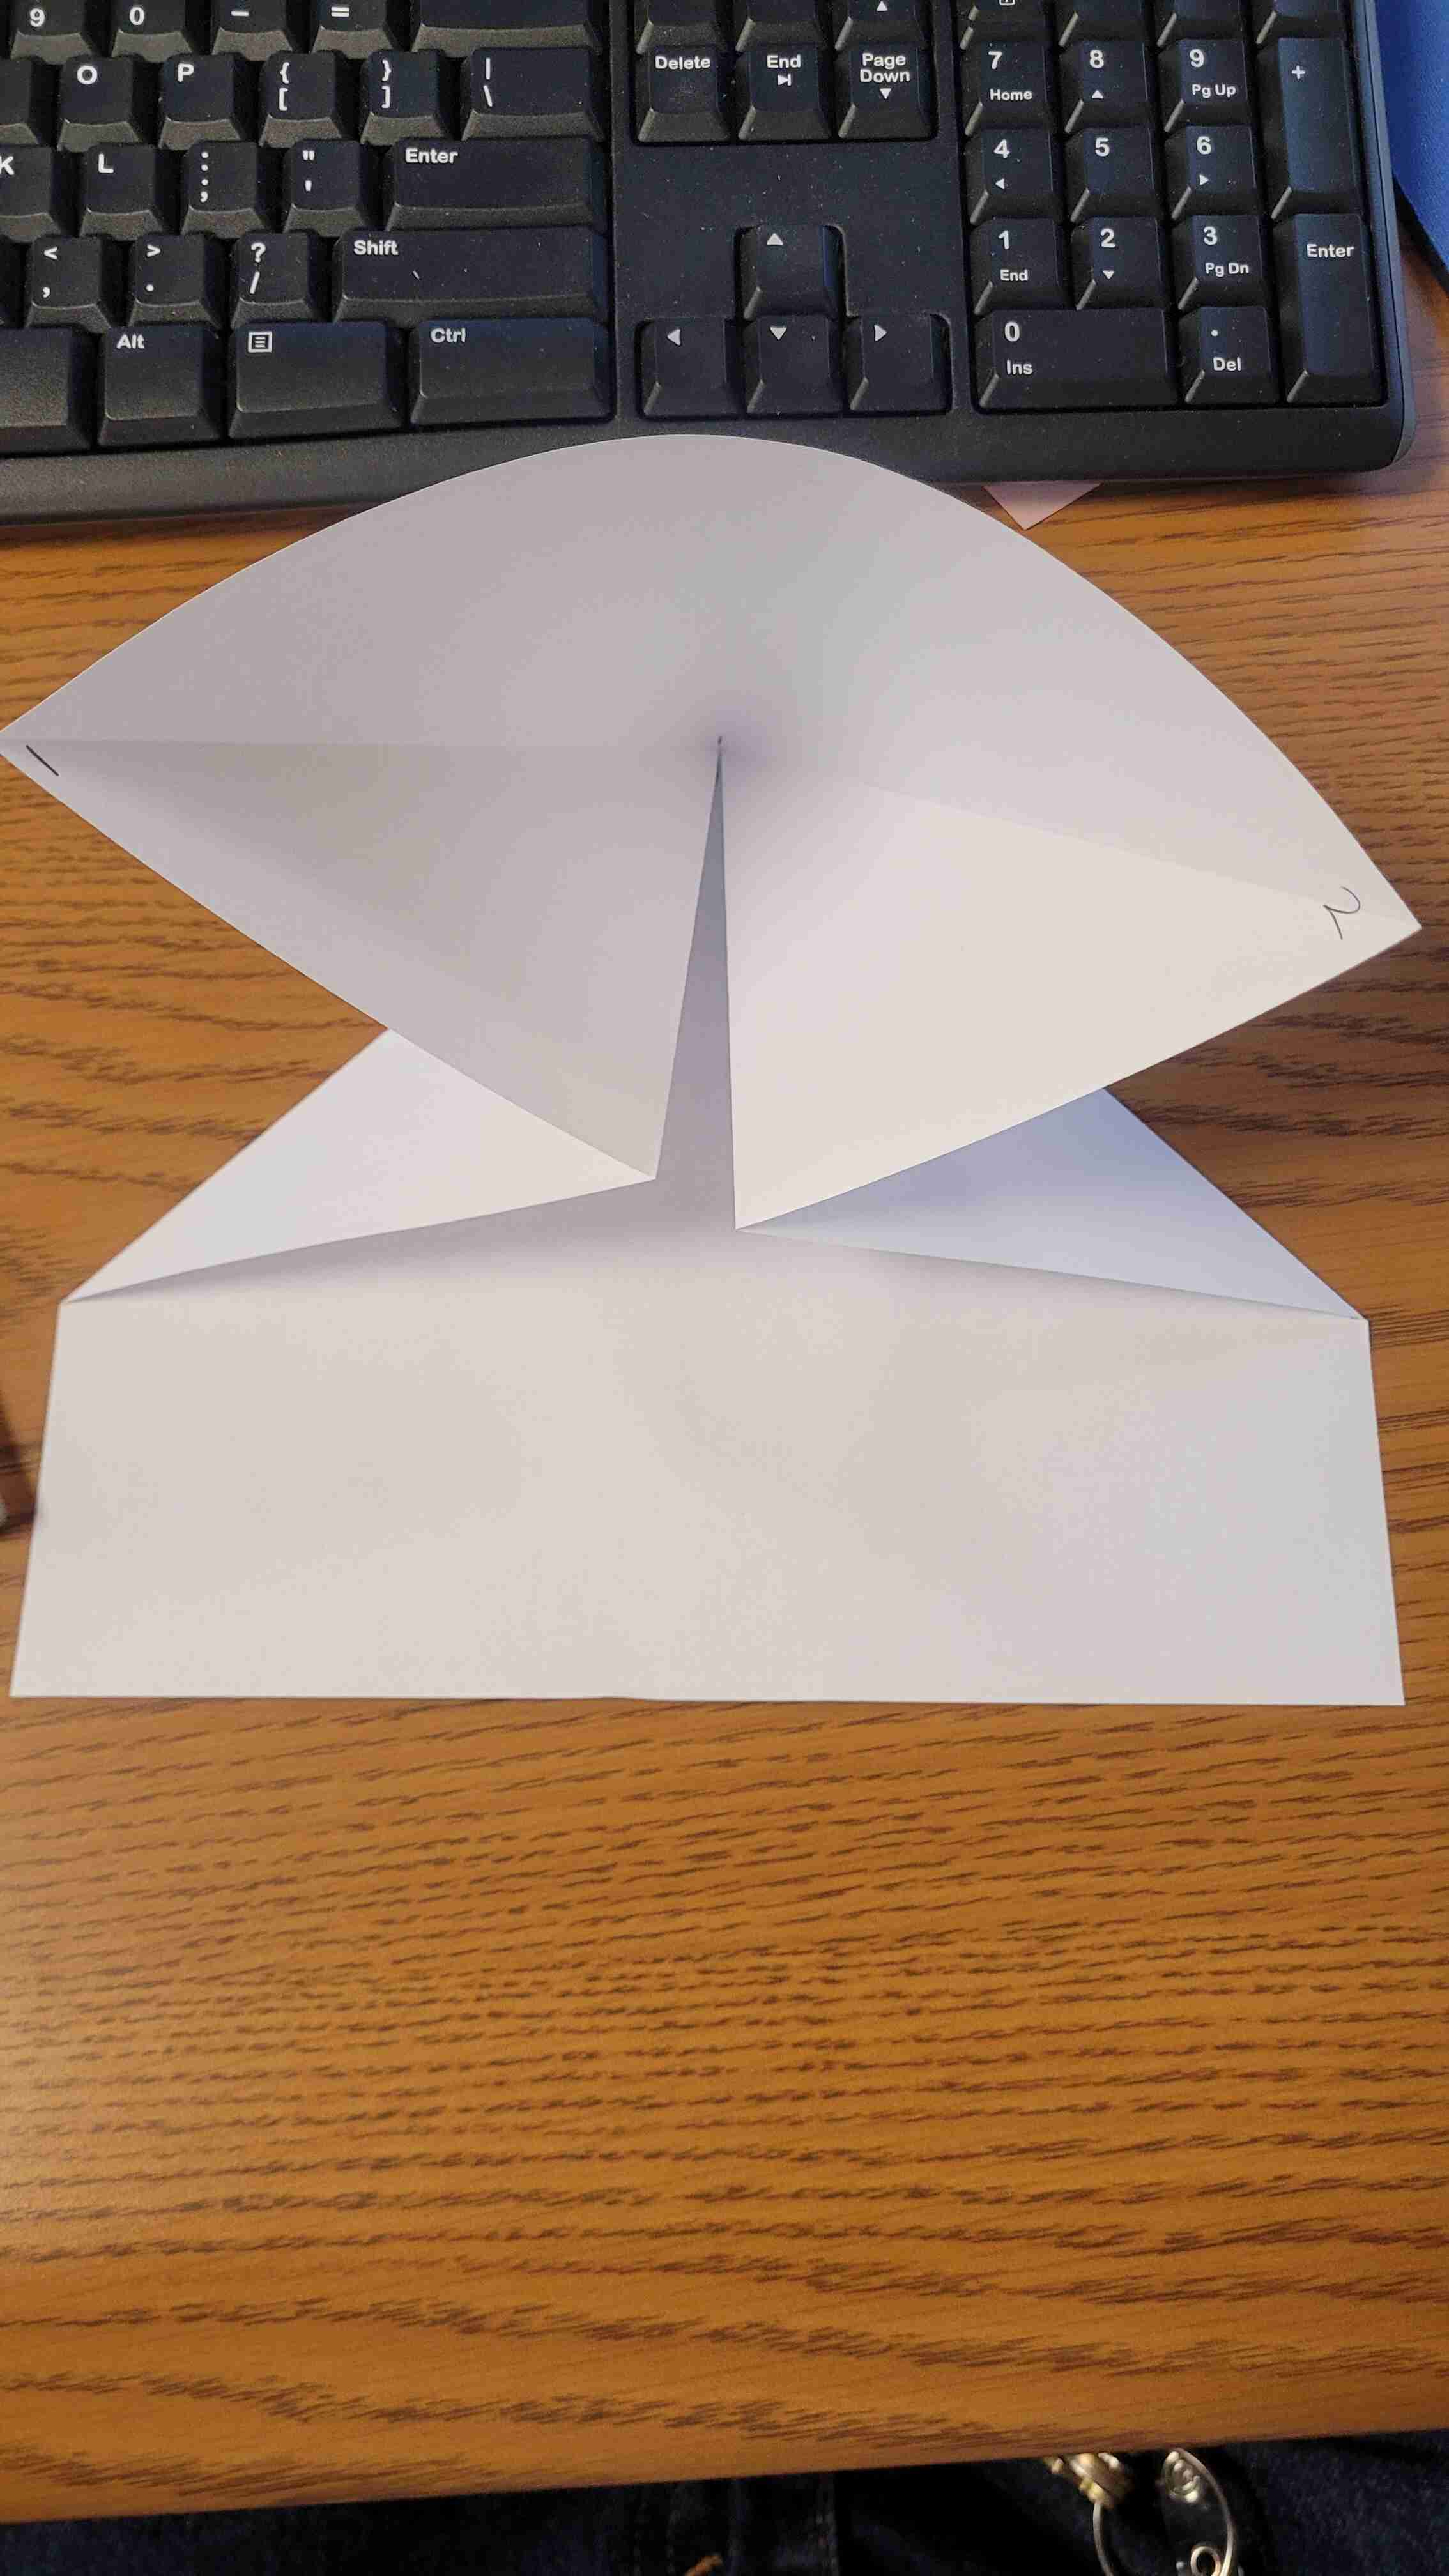
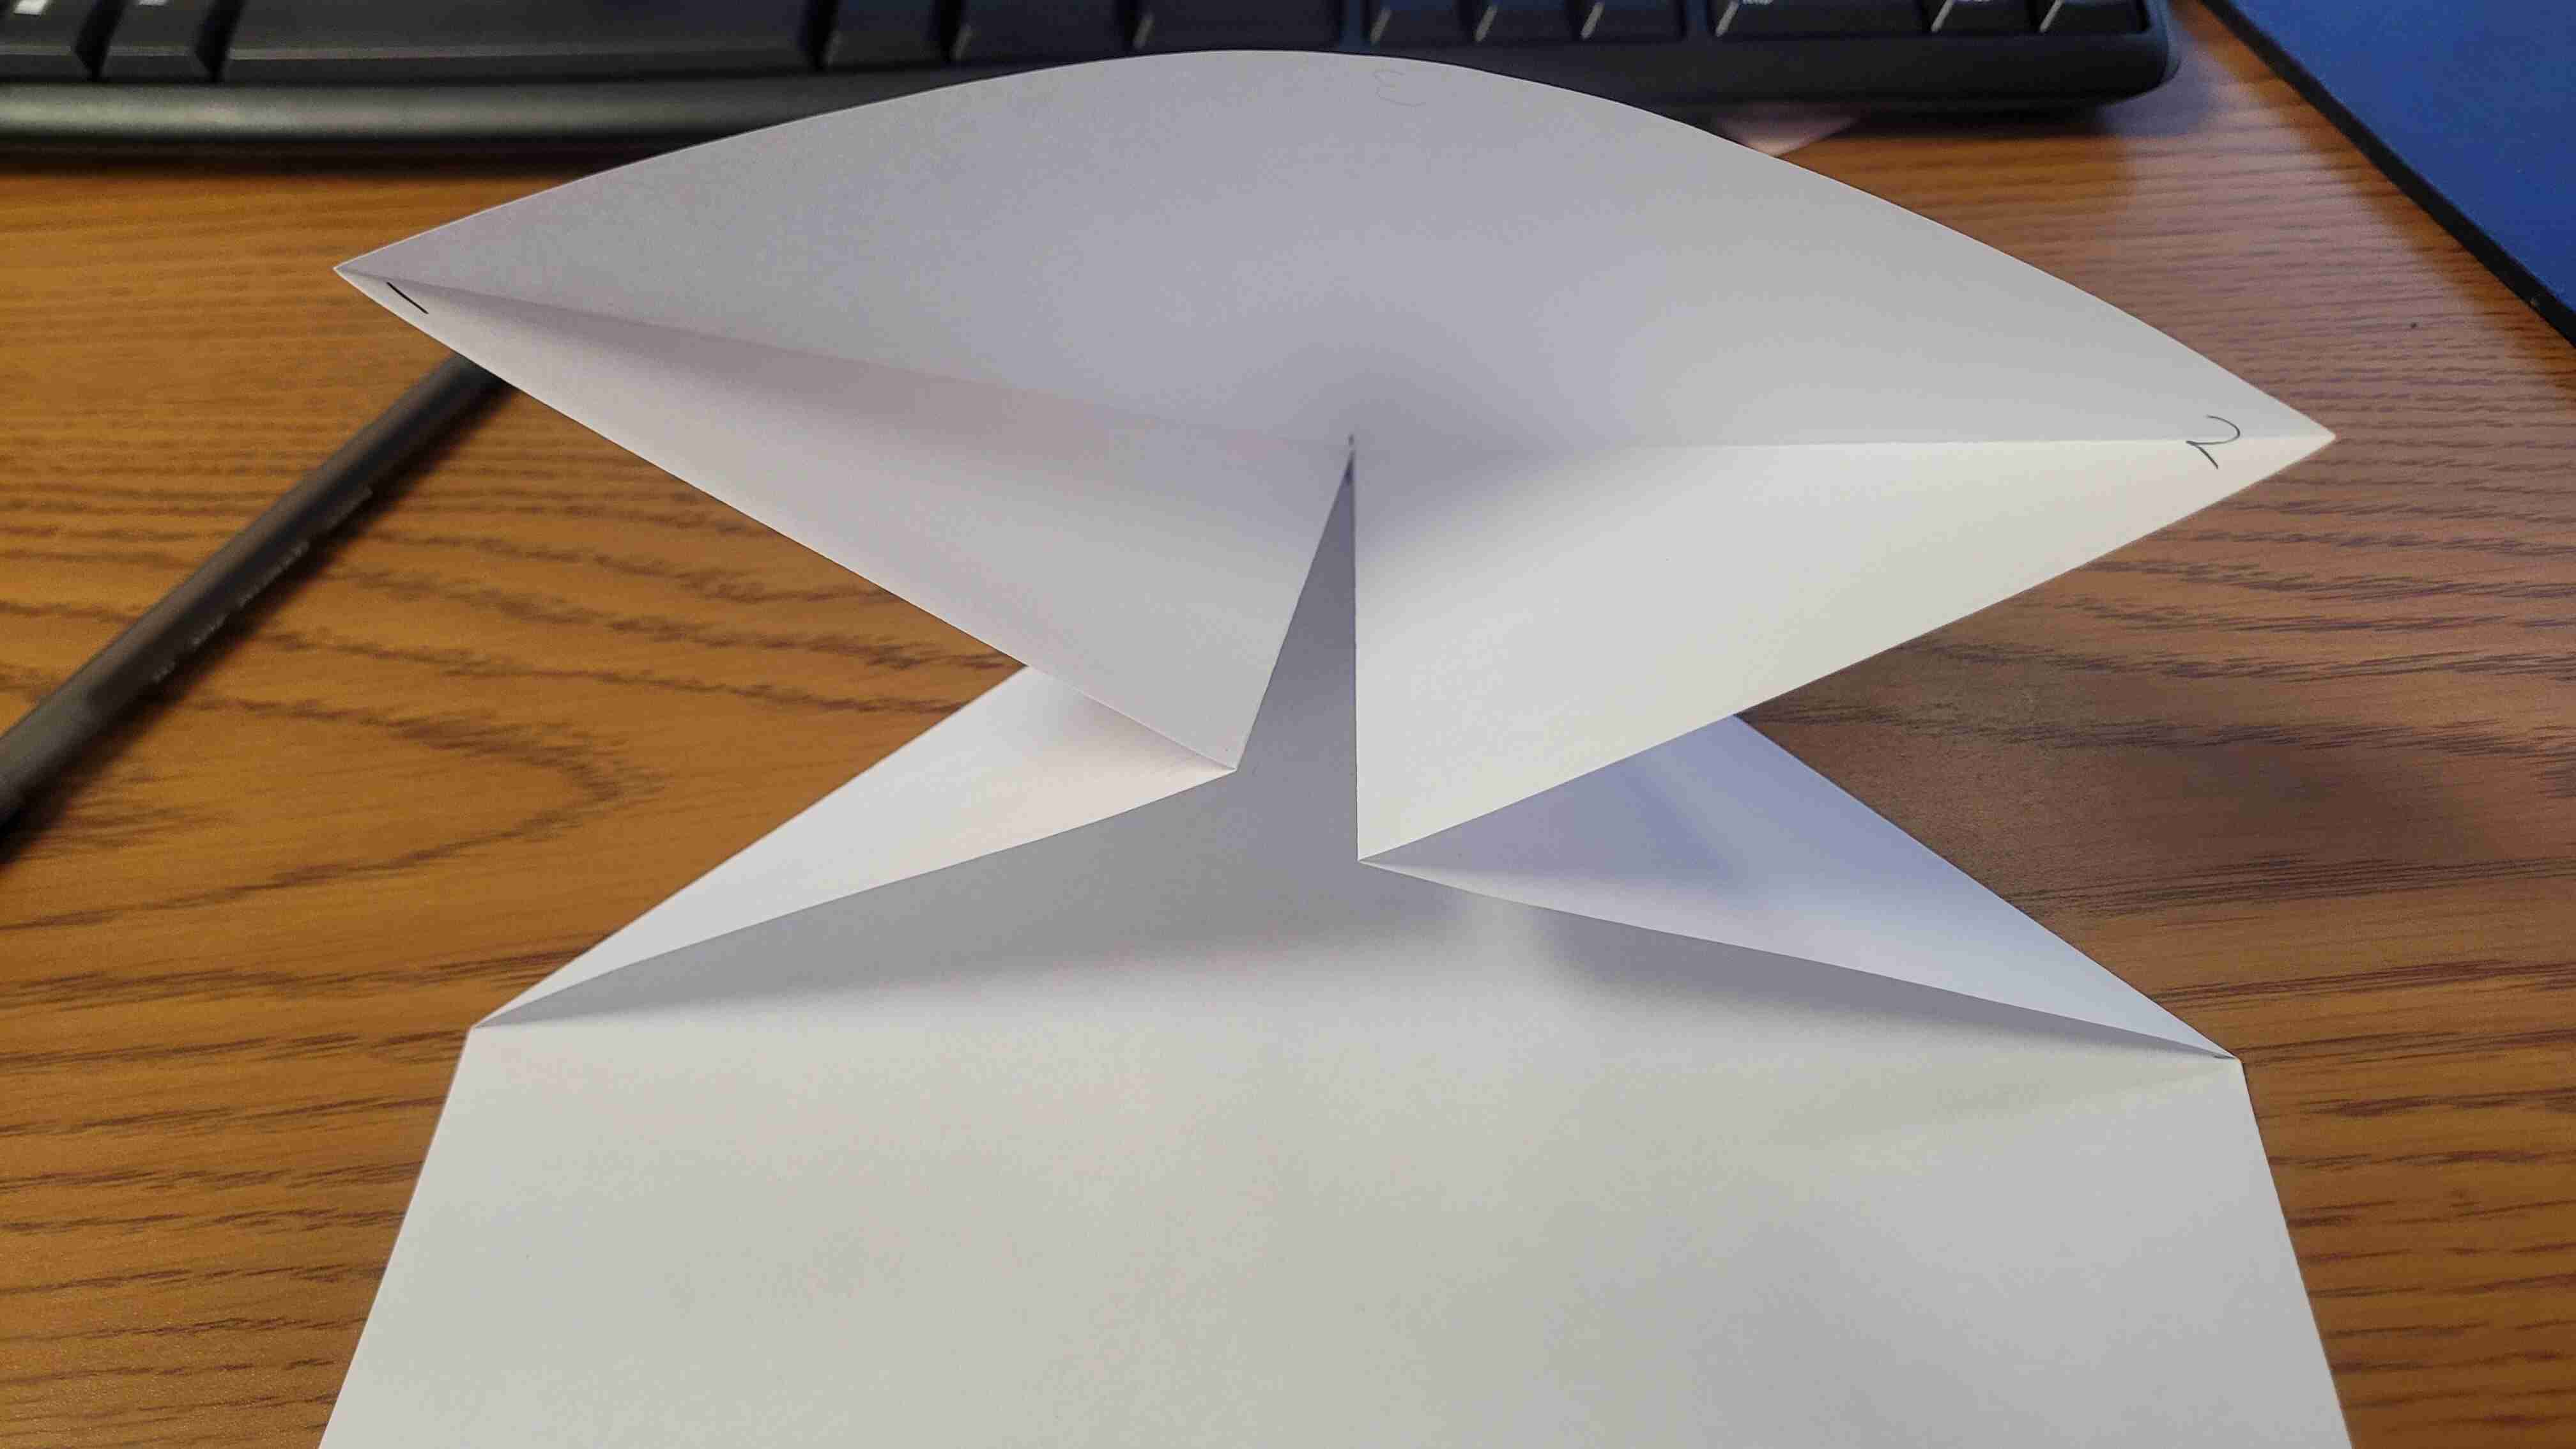
Step 6 - Fold edge 4 and 5 into the middle of the page, following the creases that have been made previously. Press the paper flat.
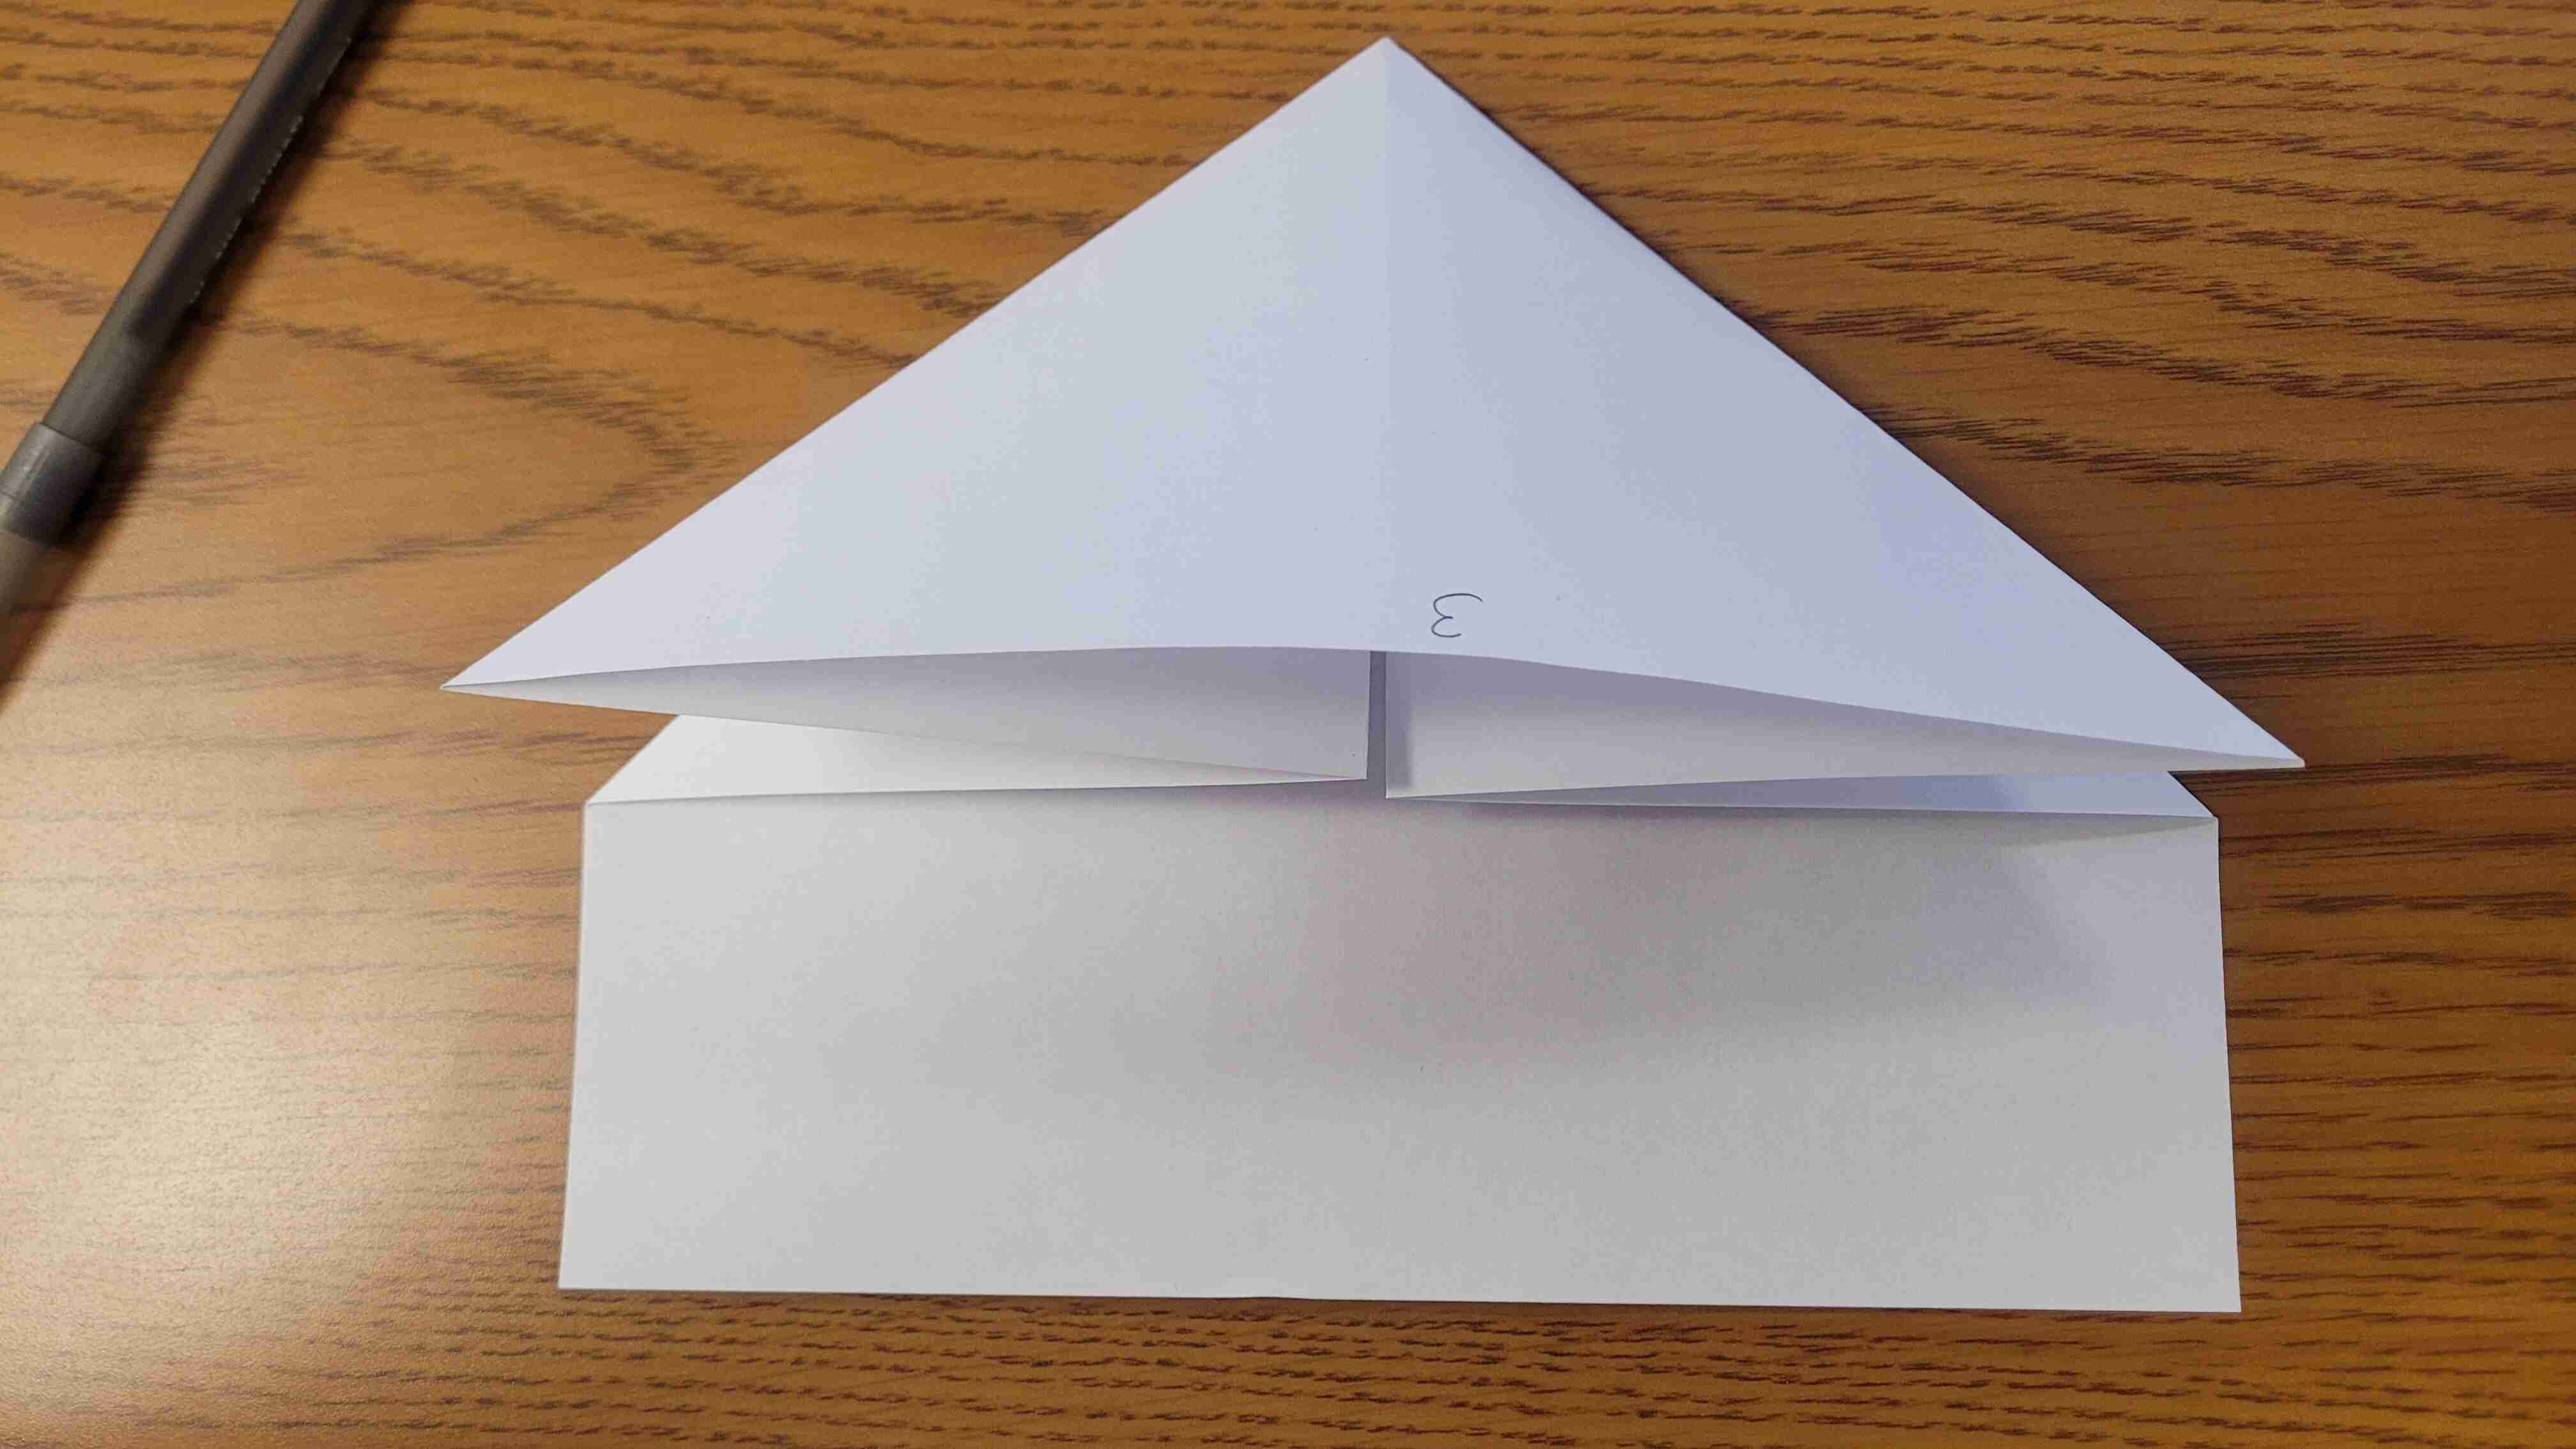
Step 7 - Fold point 6 to the middle of the top point of the paper. Do the same with point 7.
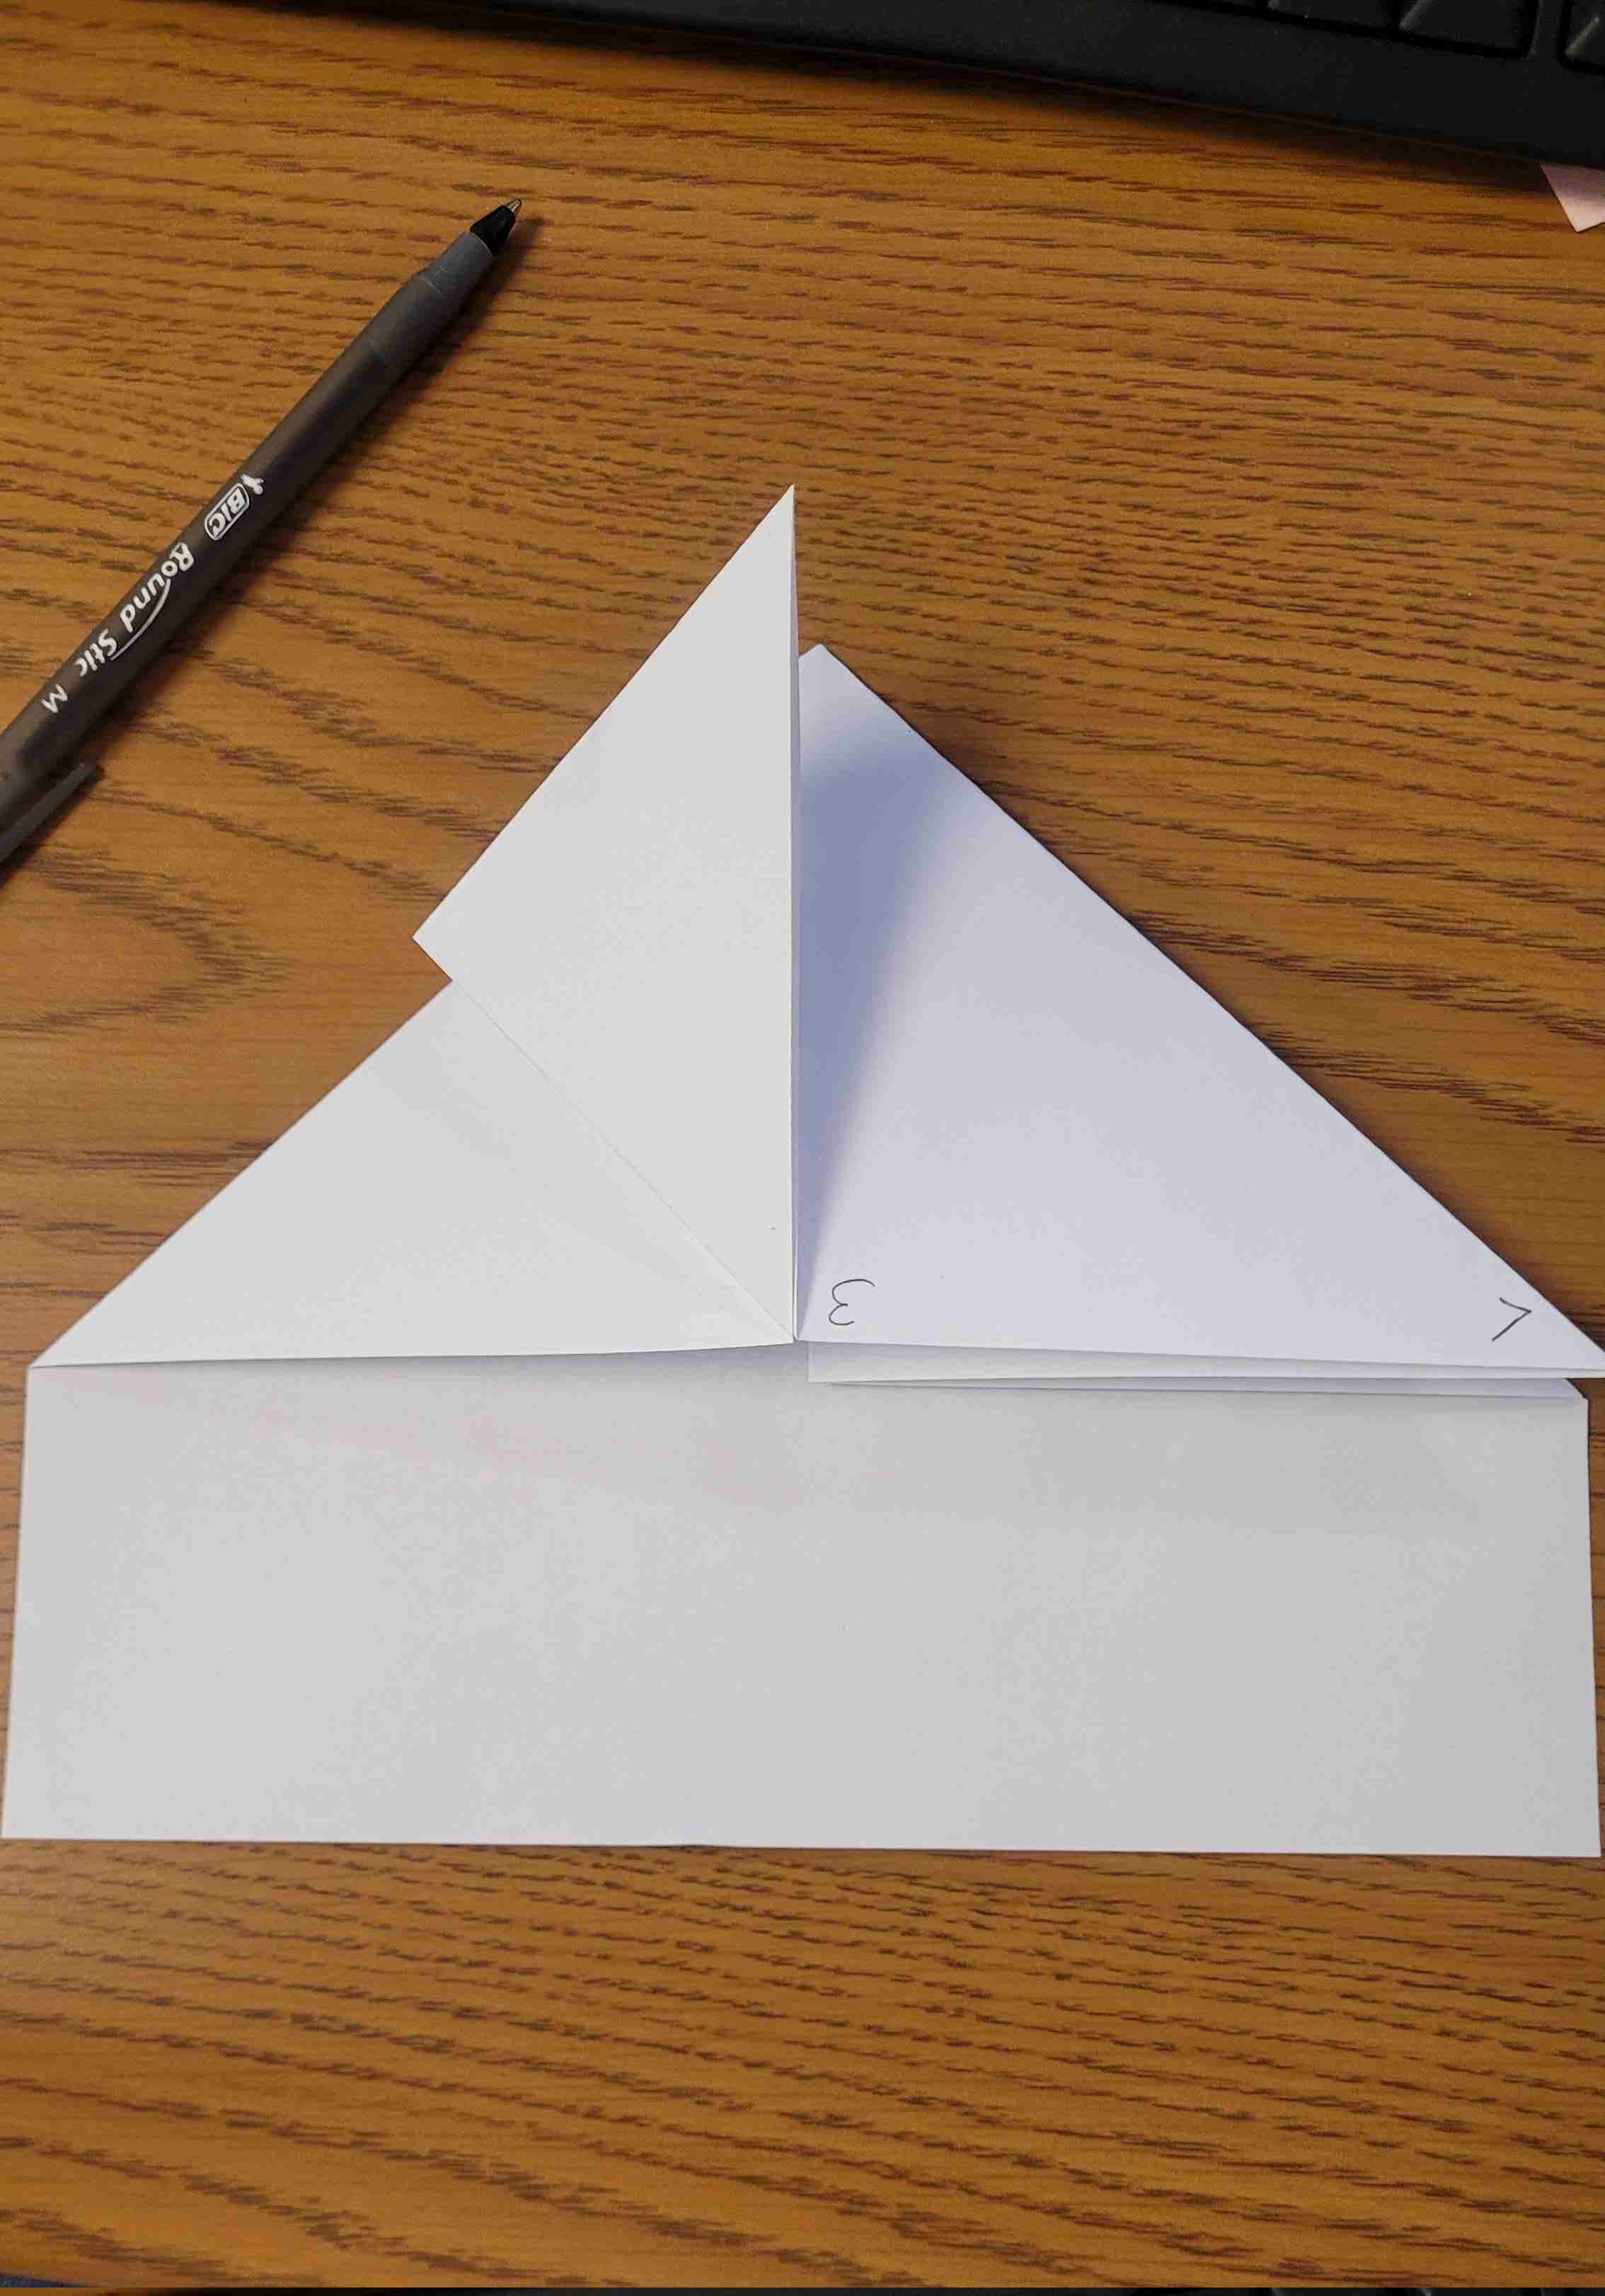
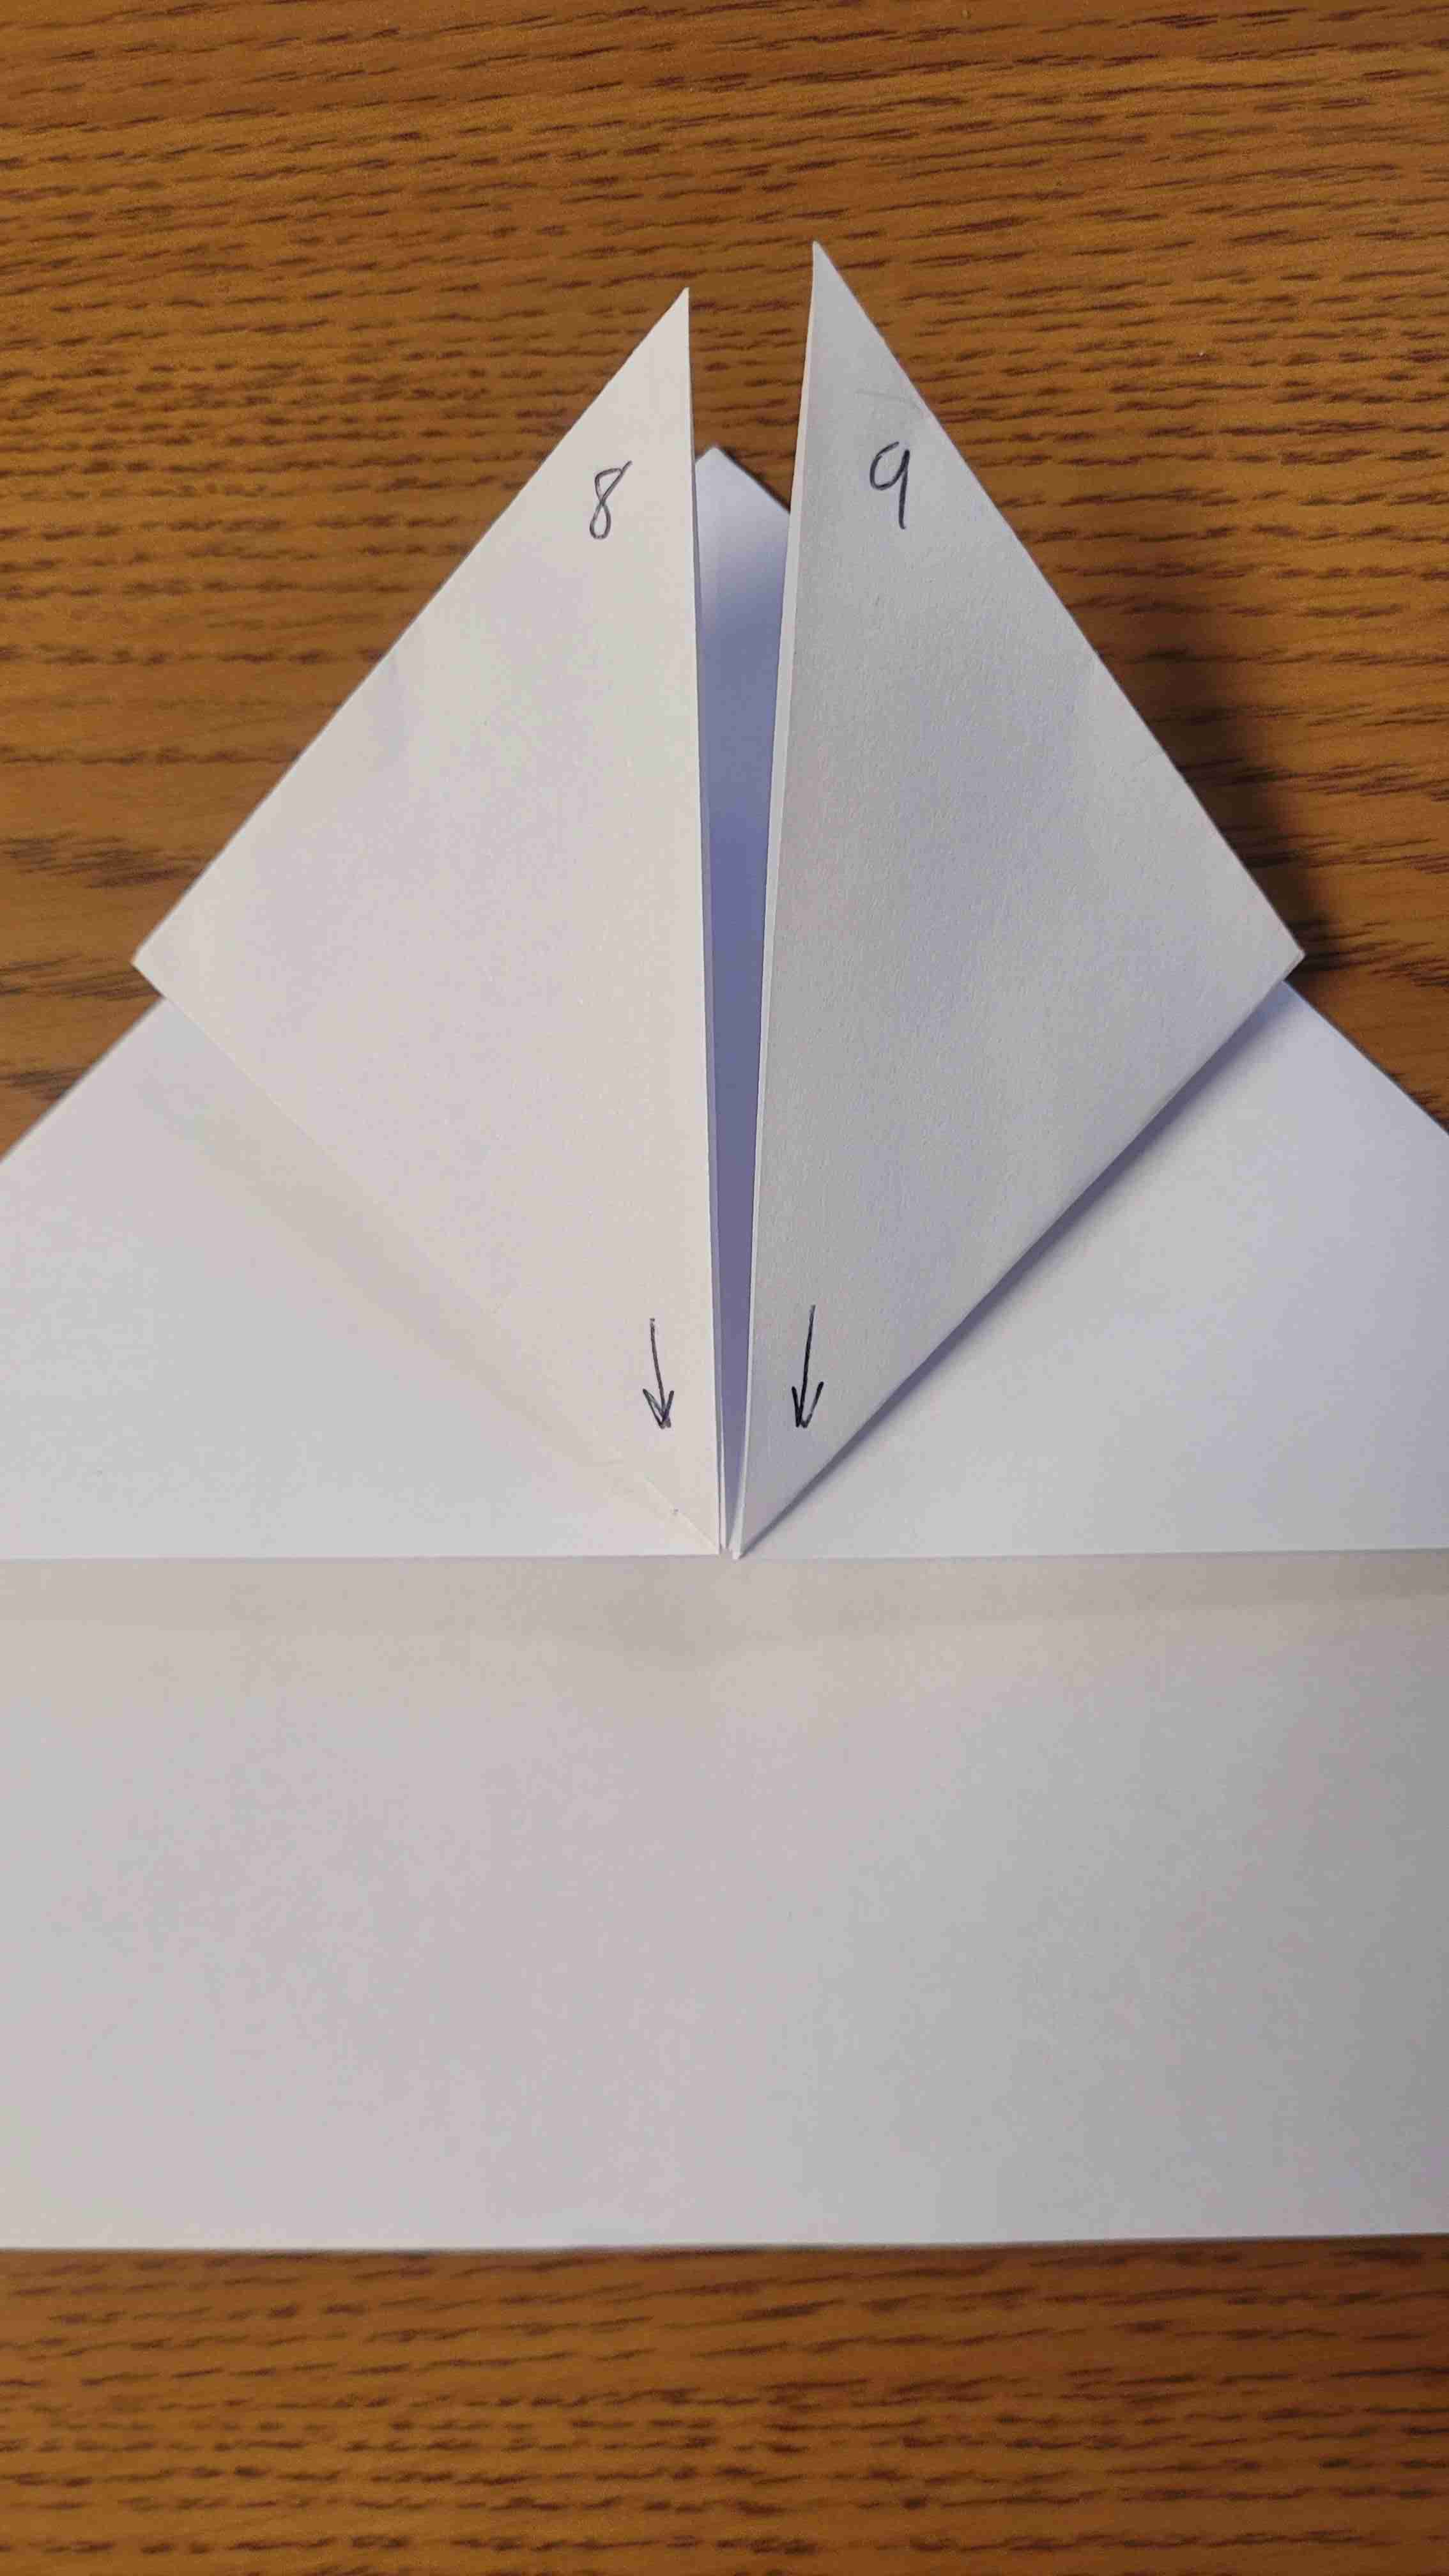
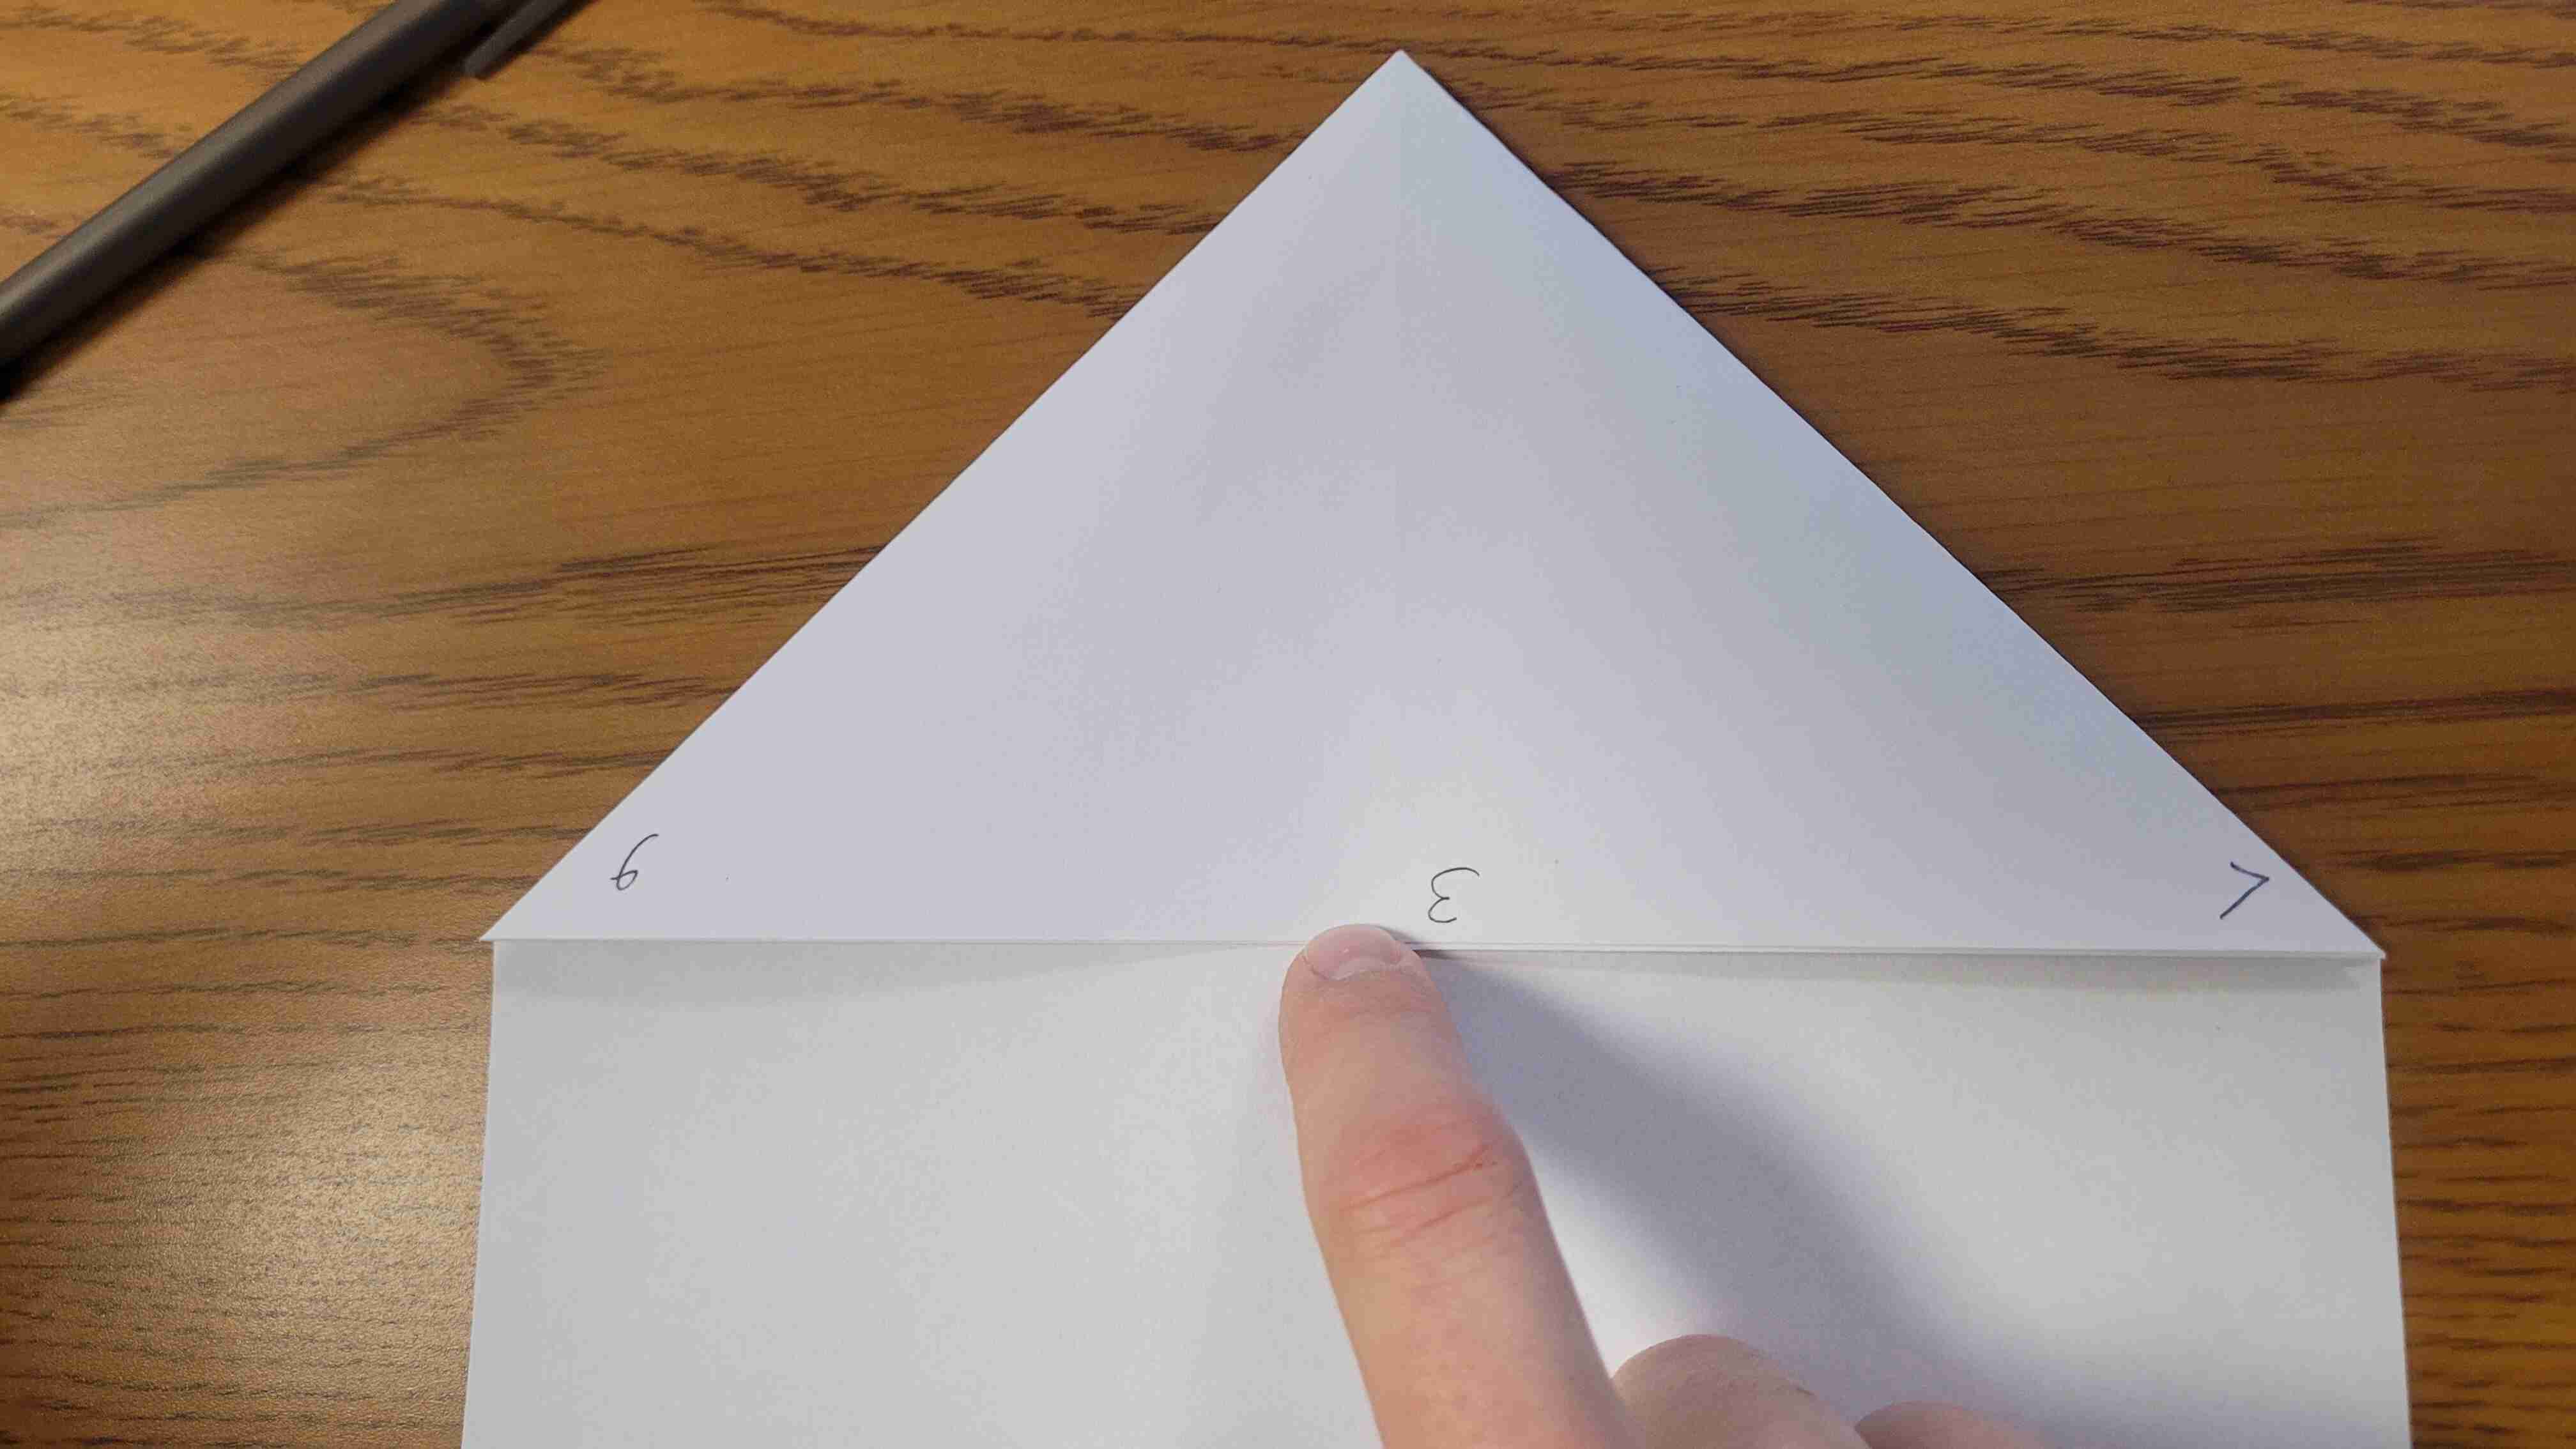
Step 8 - Fold point 8 down to the bottom arrow, as if you were taking this triangle and folding it in half. Do the same with point 9.
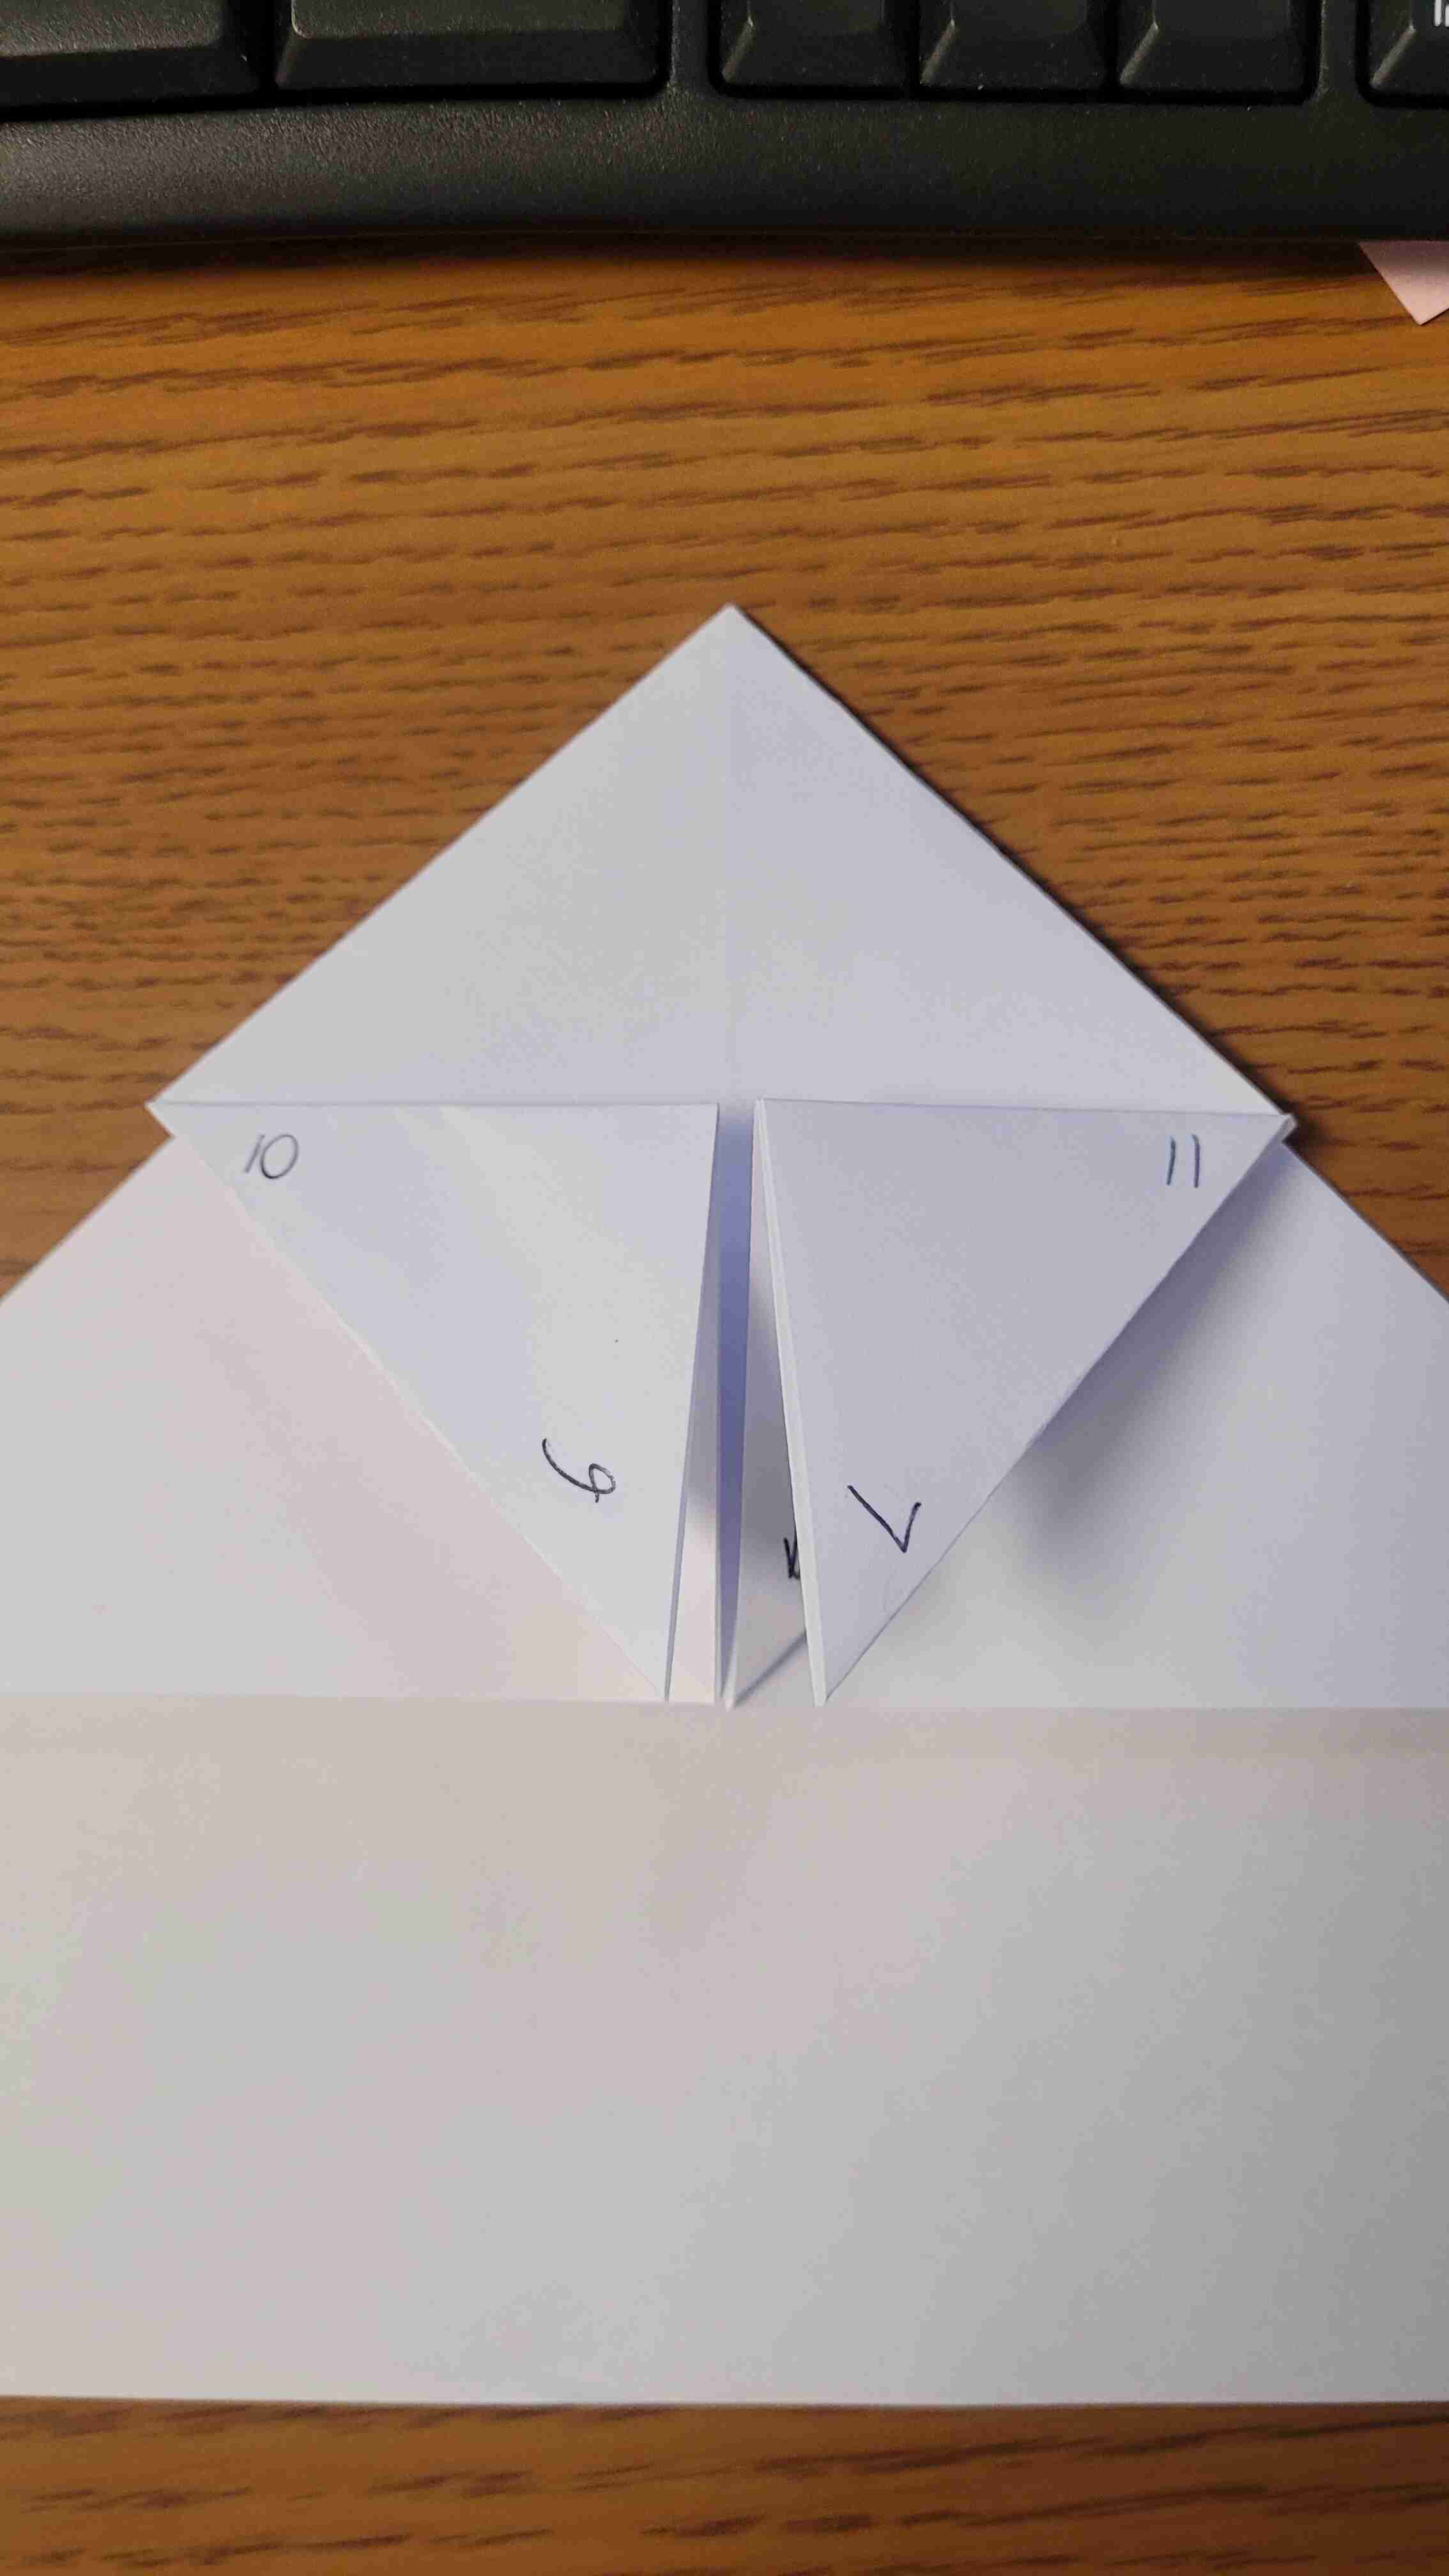
Step 9 - Take edge 10-6, and fold into the middle of the page. Do the same for edge 11-7. Then unfold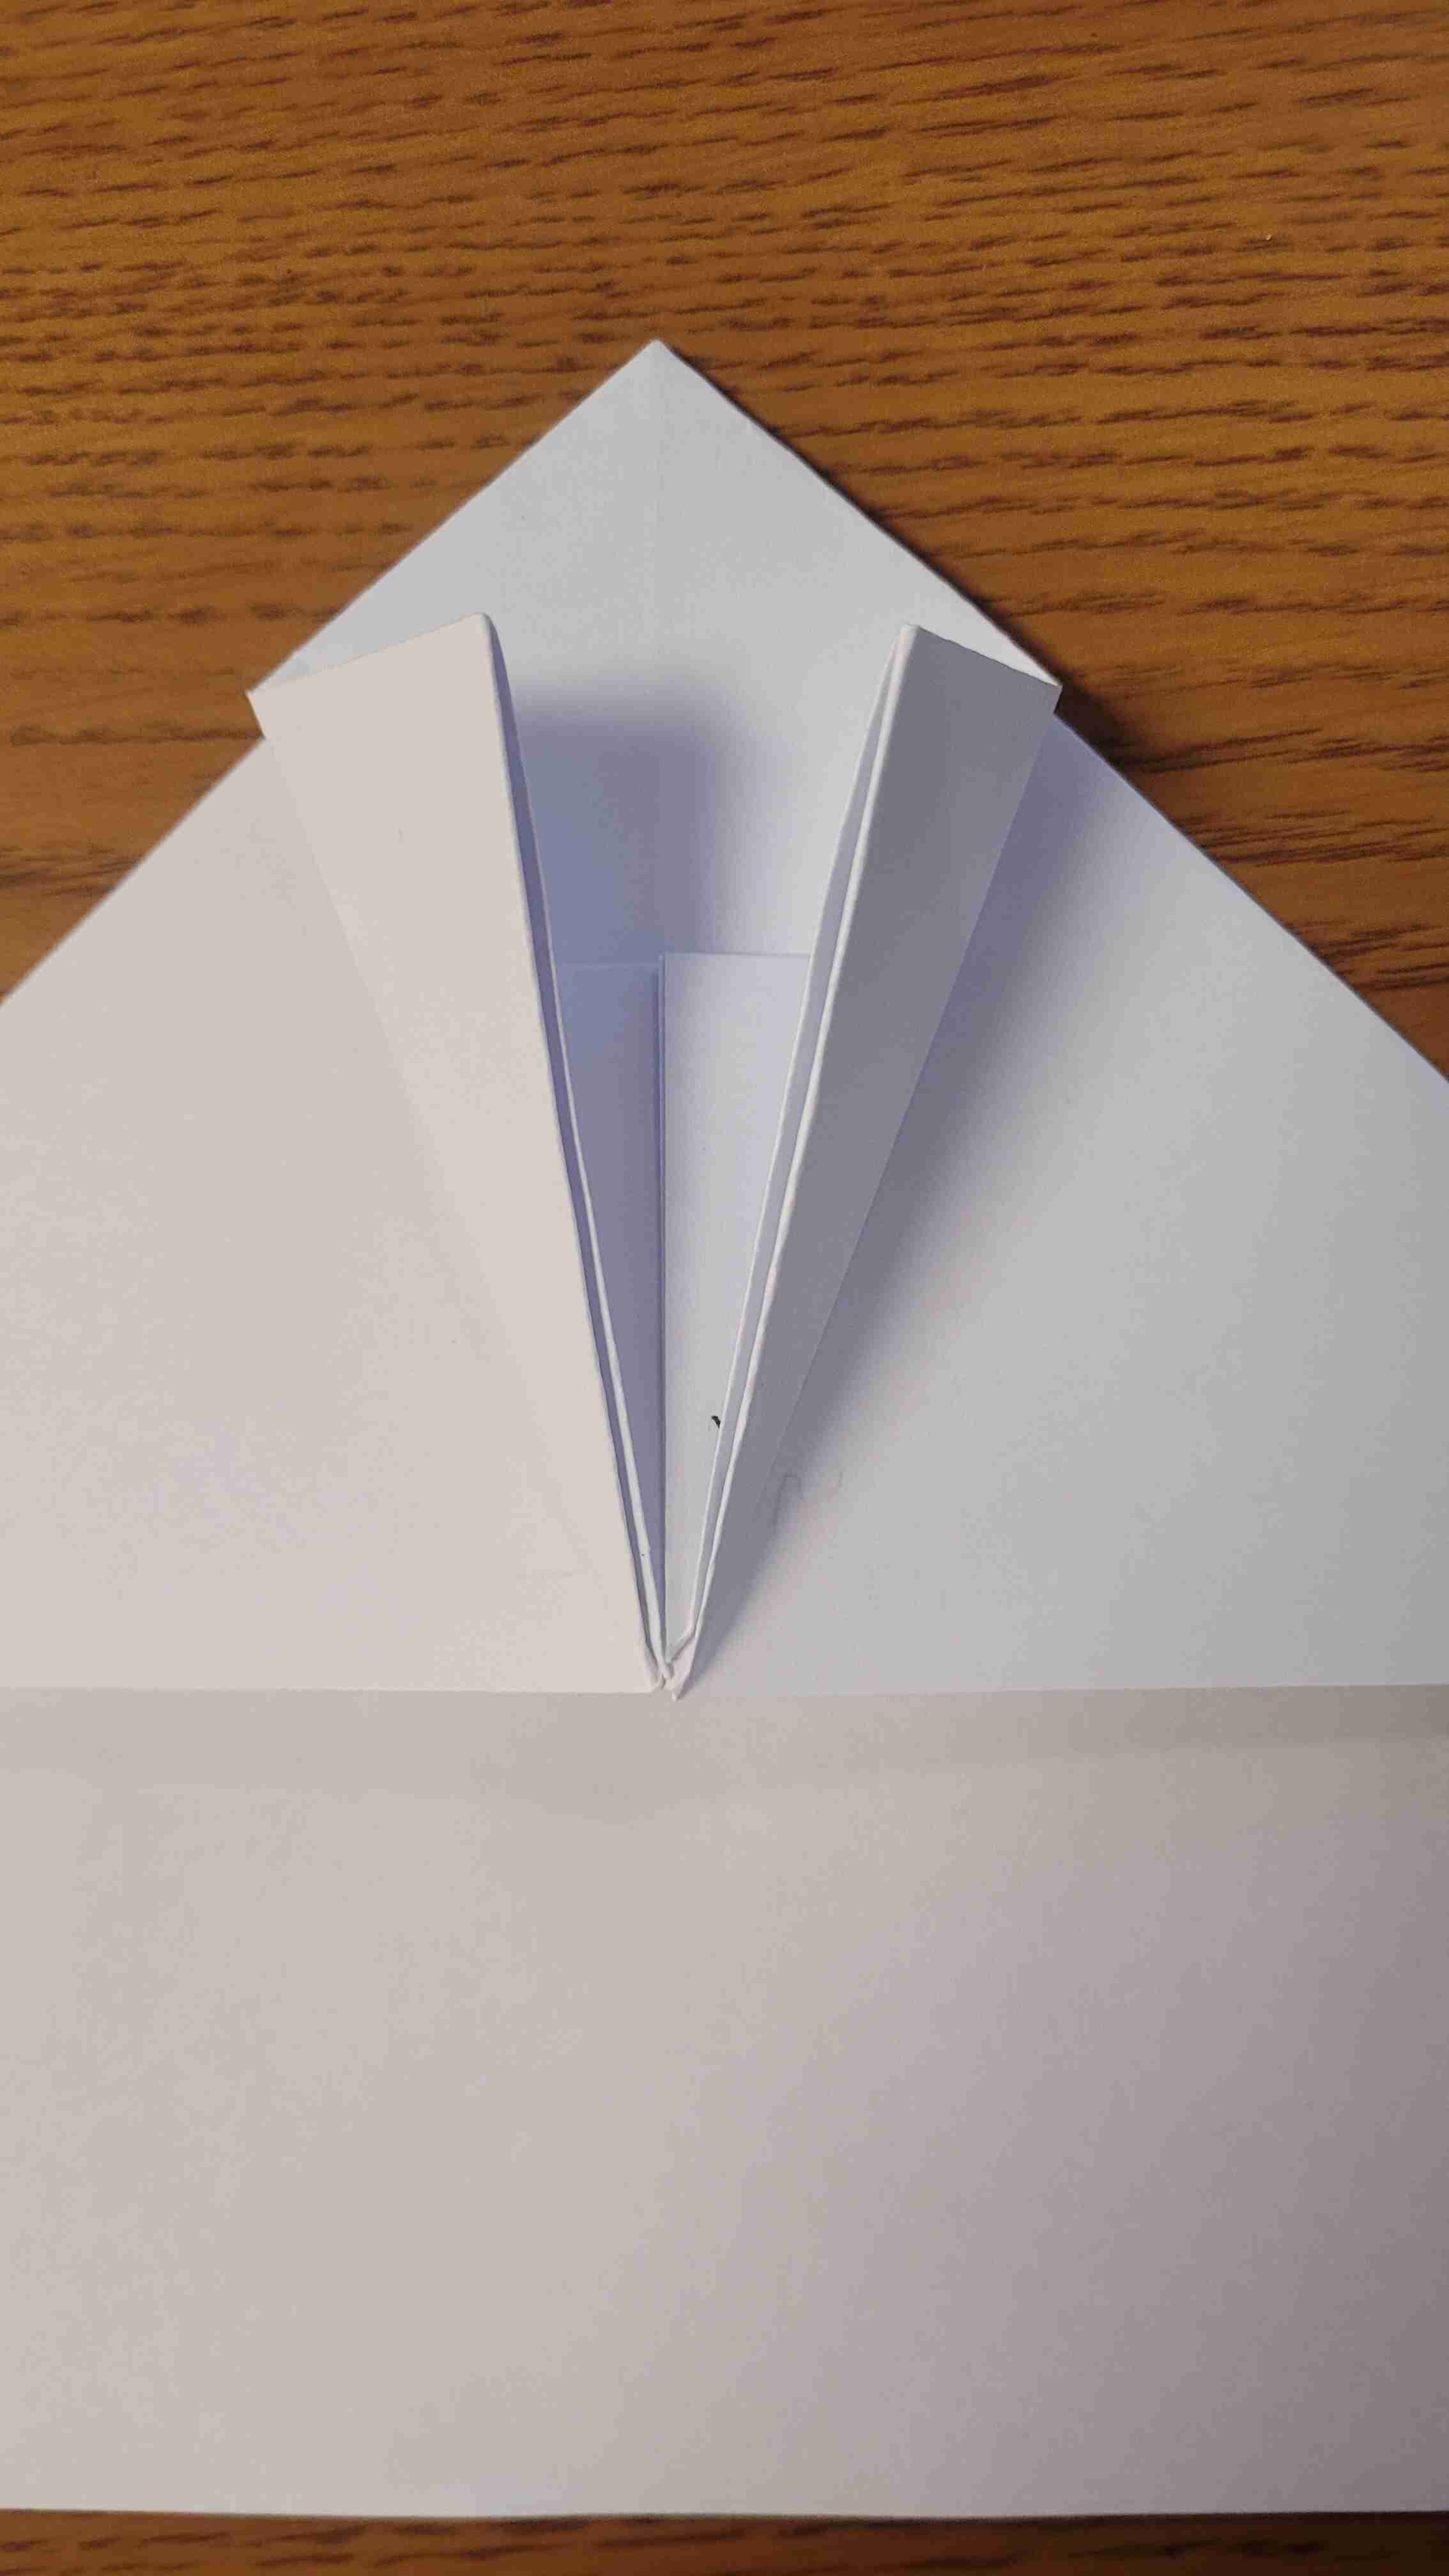
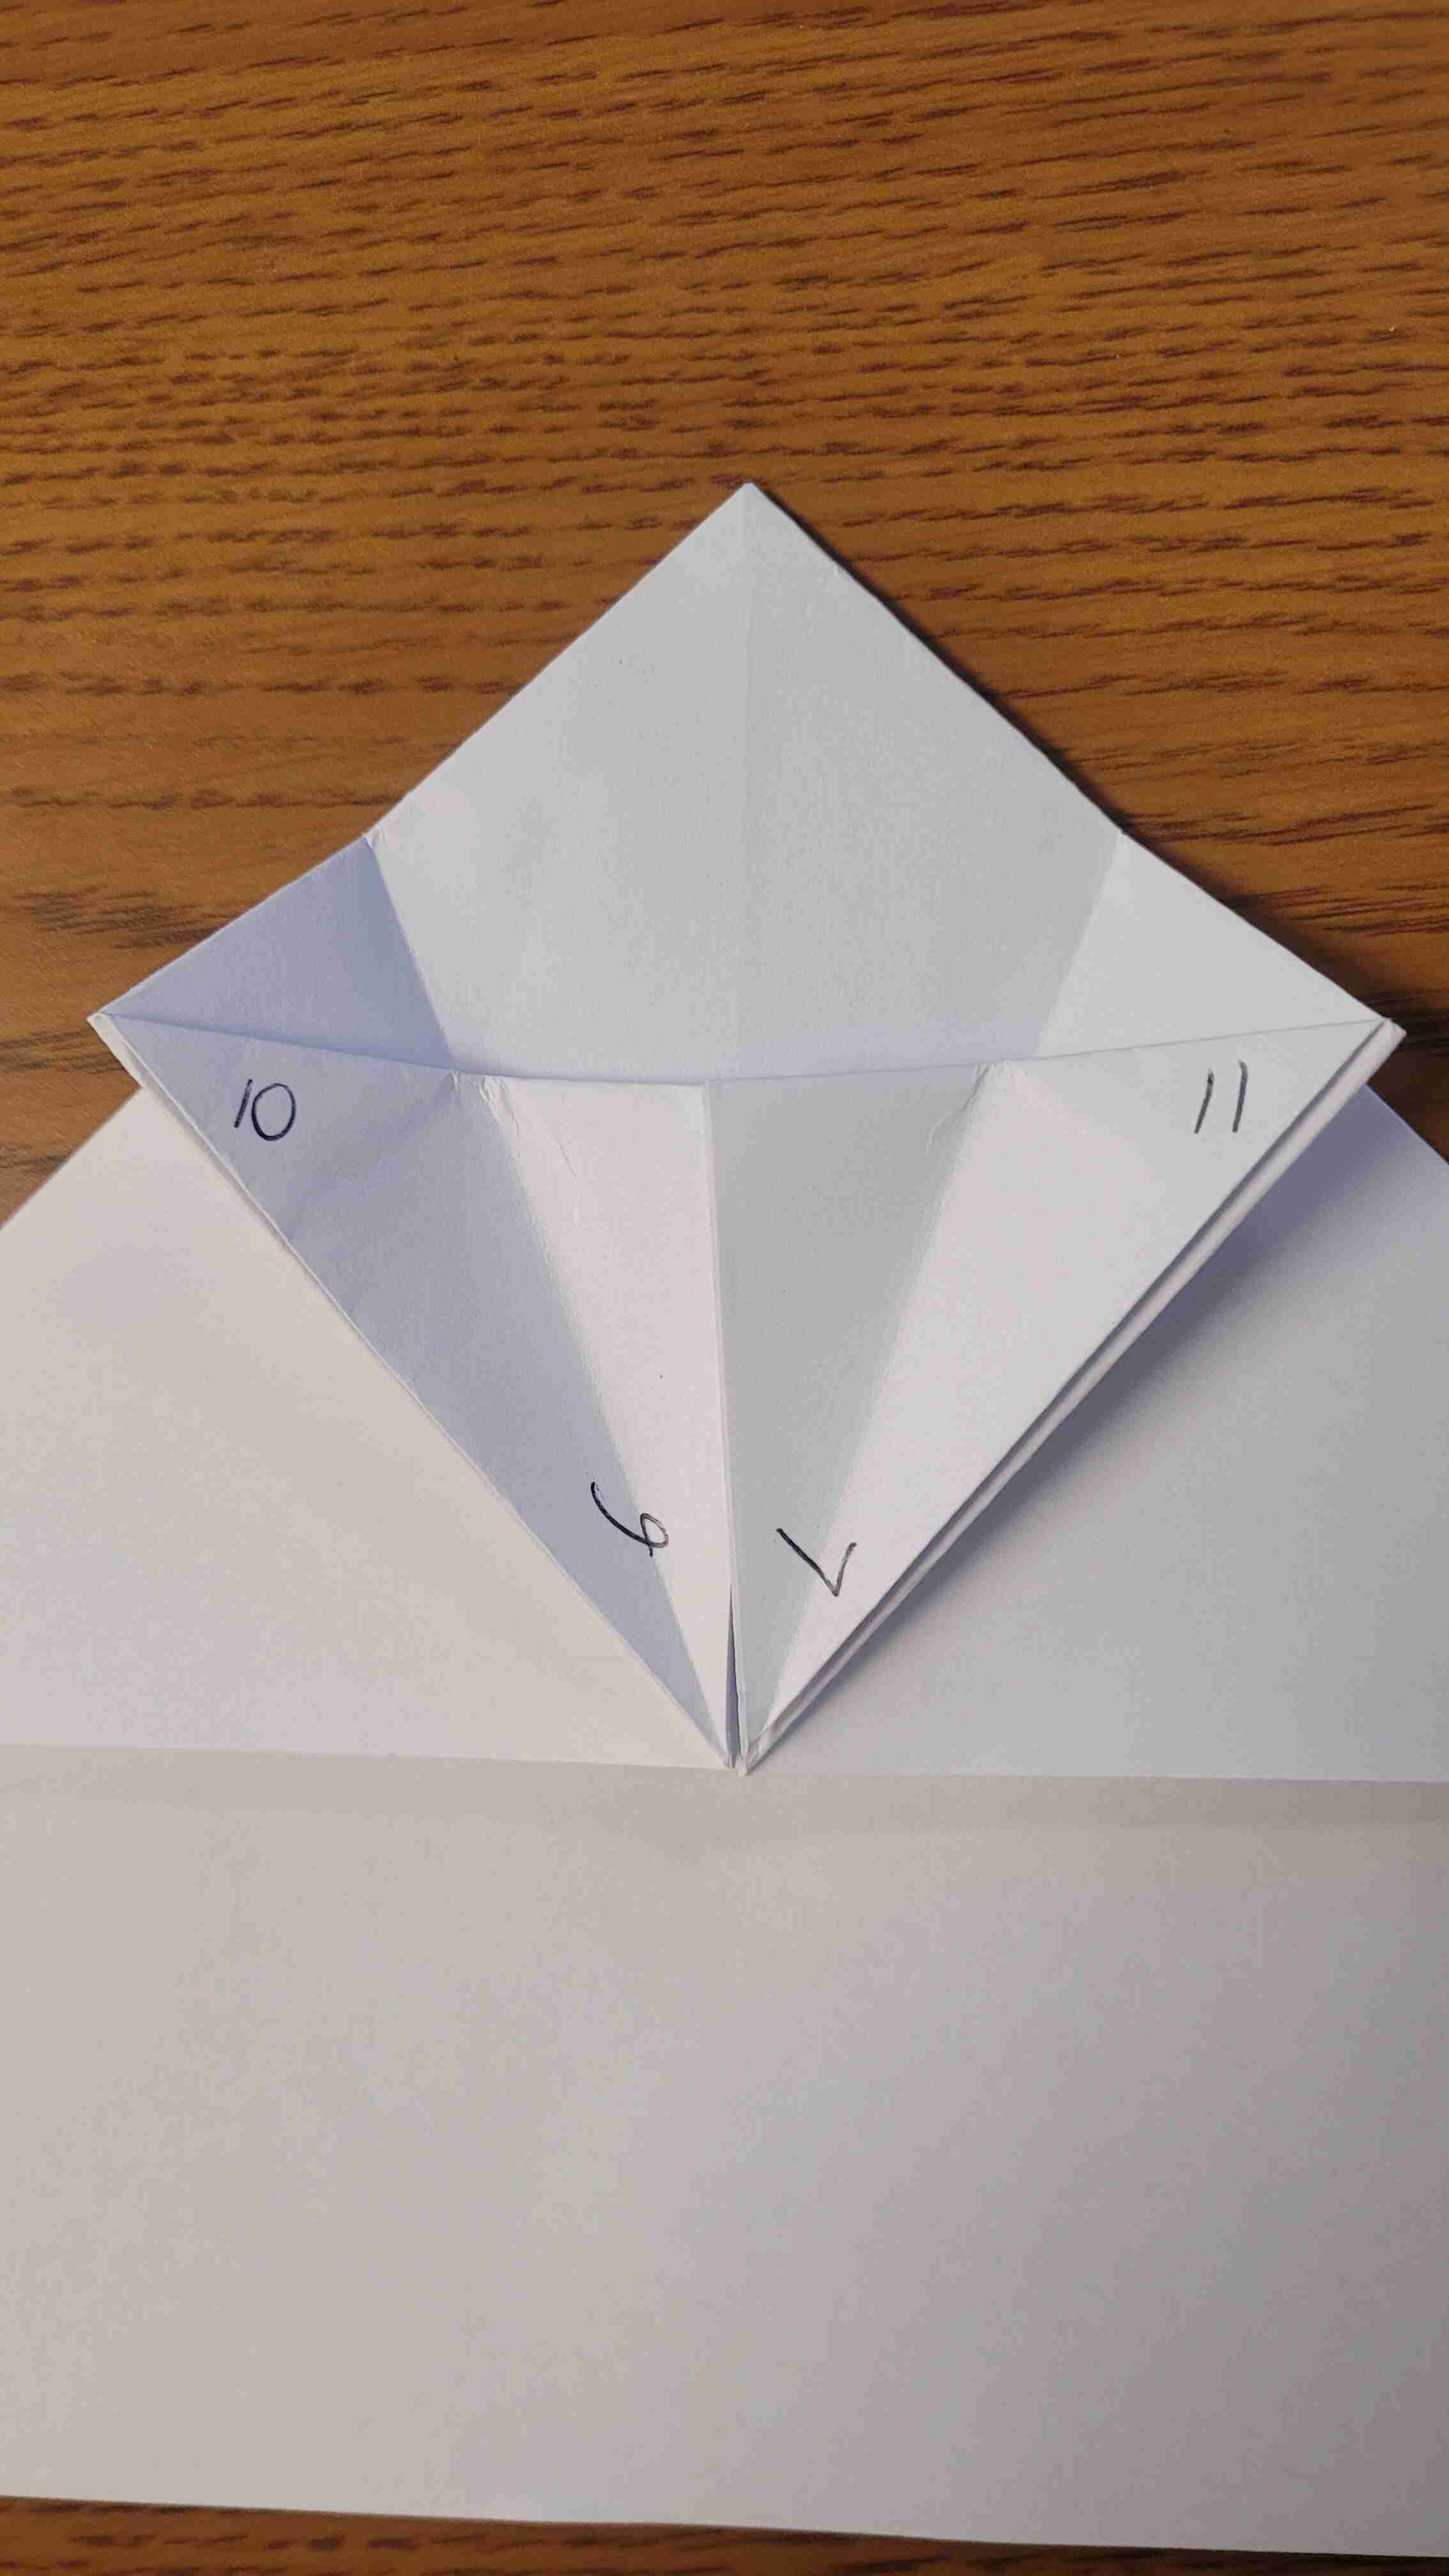
Step 10 - Now take the two opposite edges on top of 10-6 and 11-7 and fold them into the center as well. Then unfold.
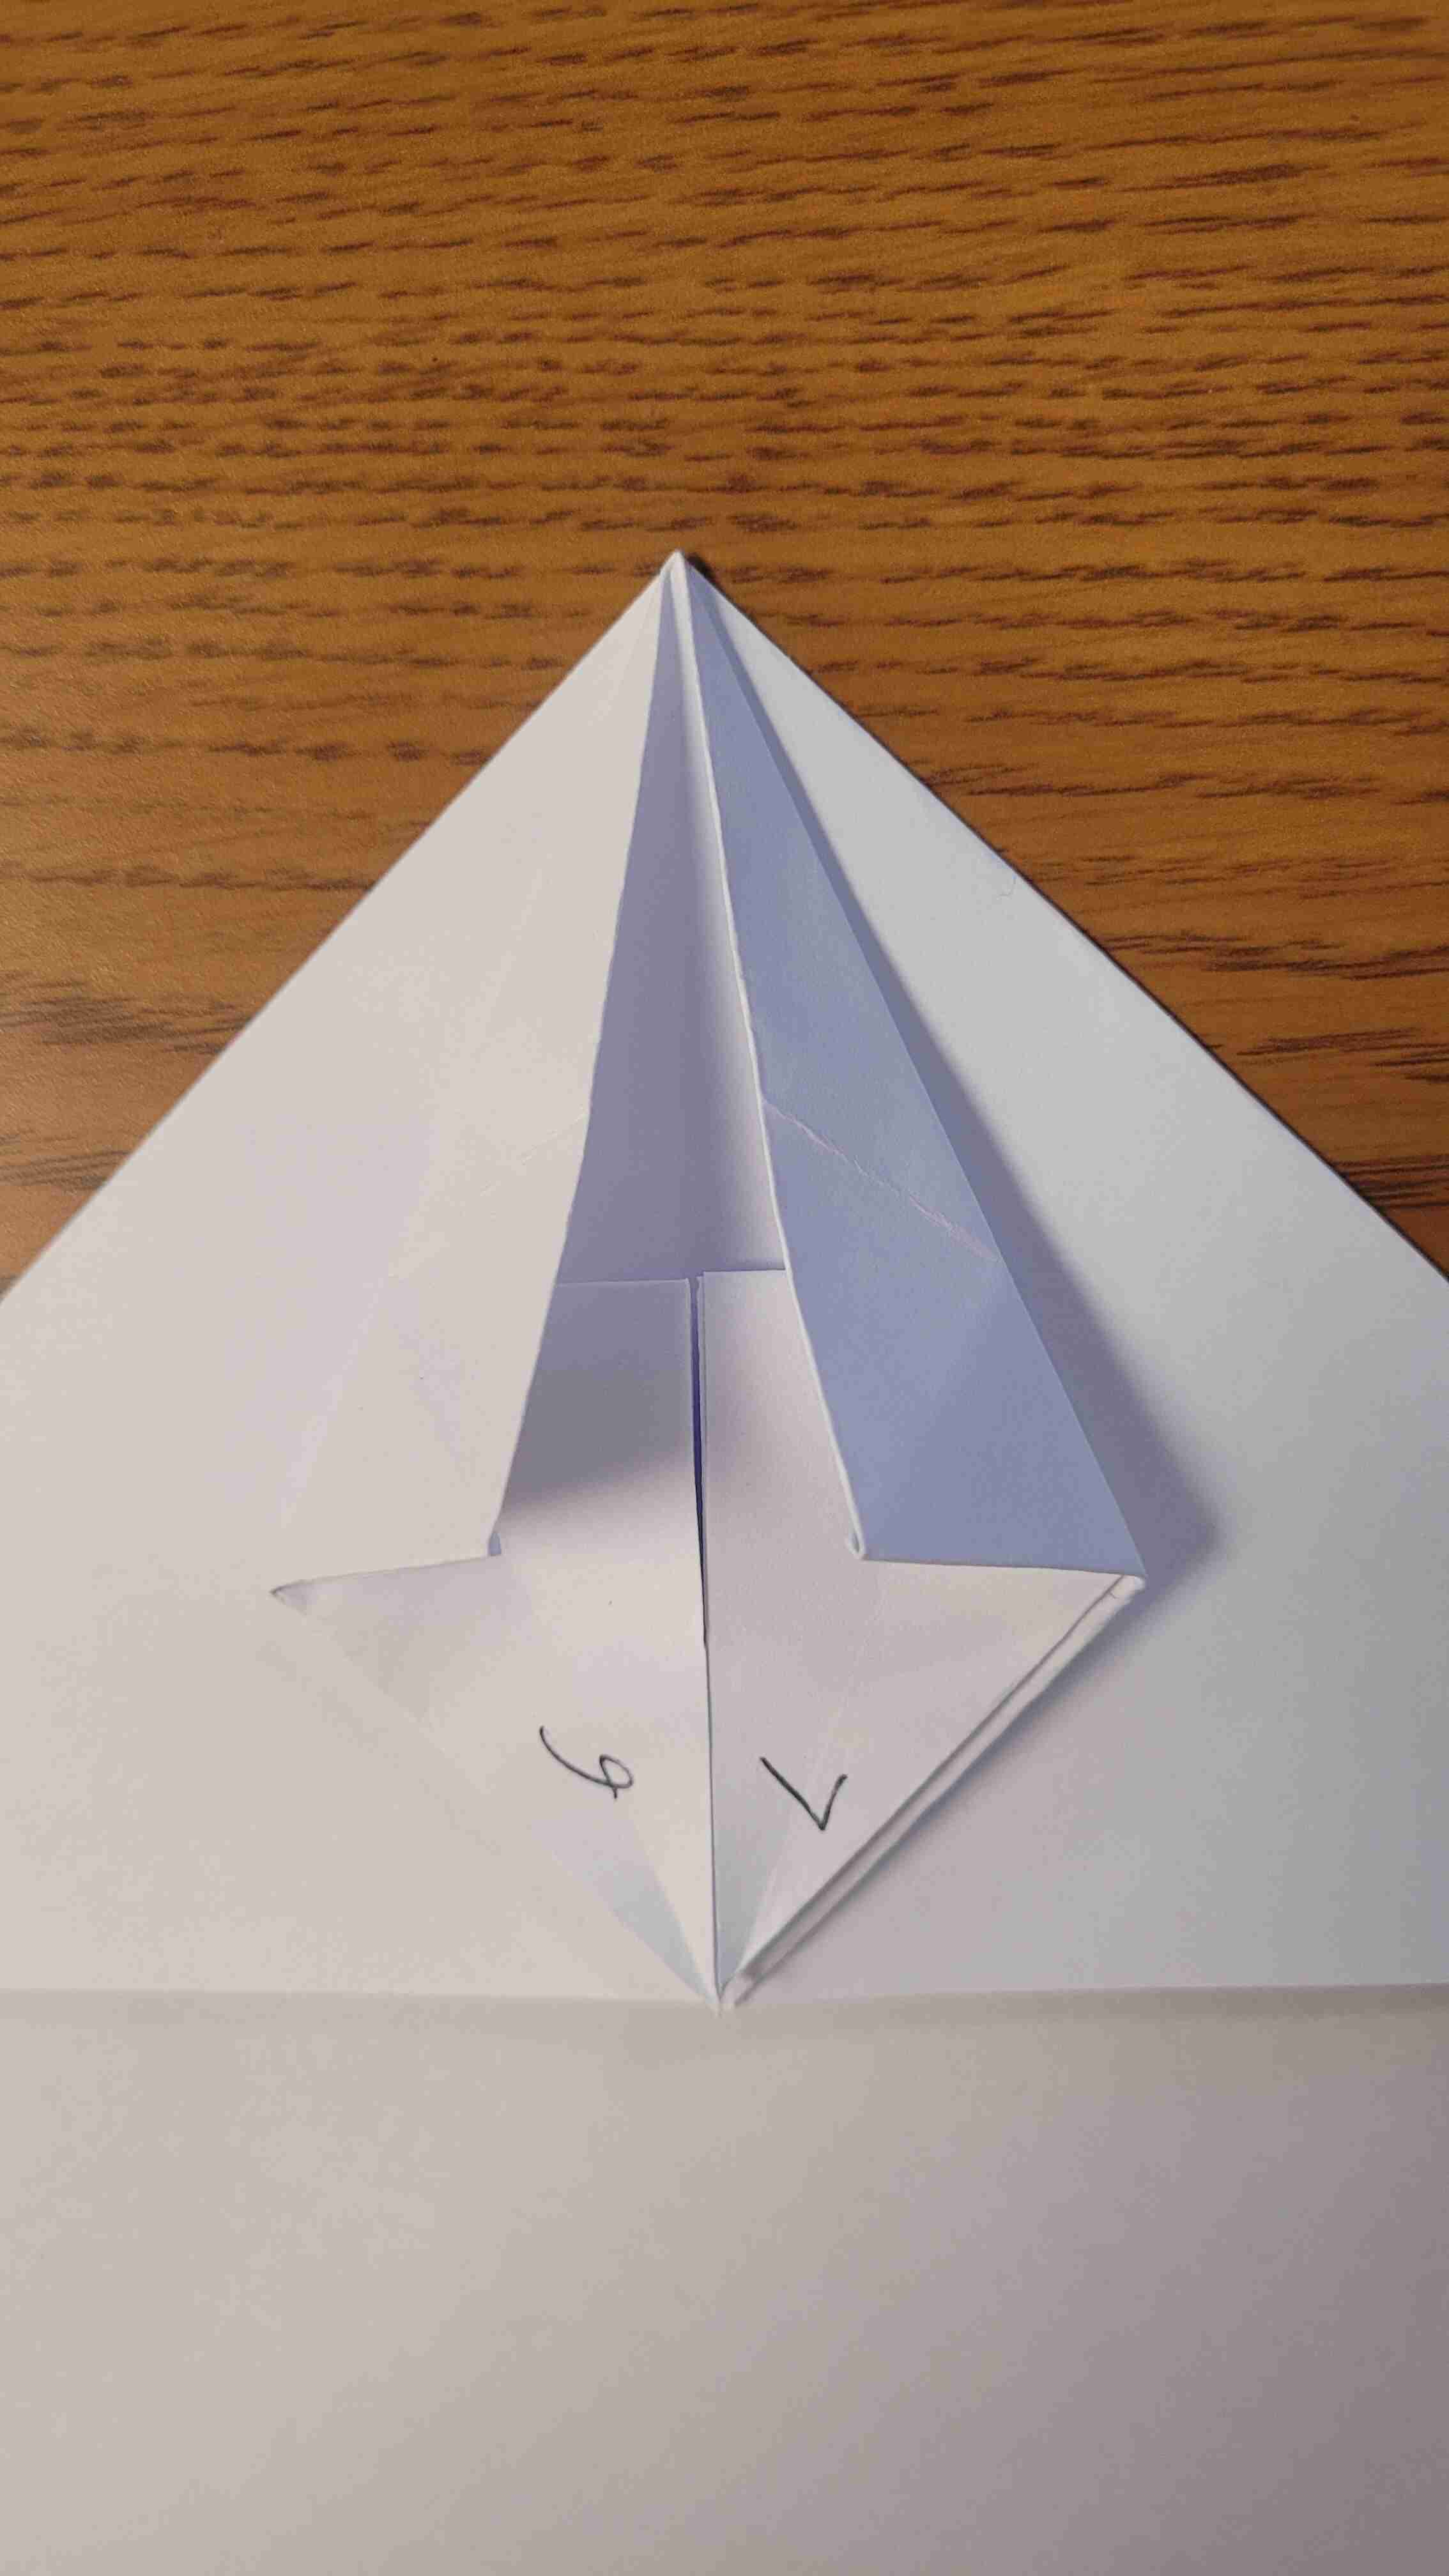
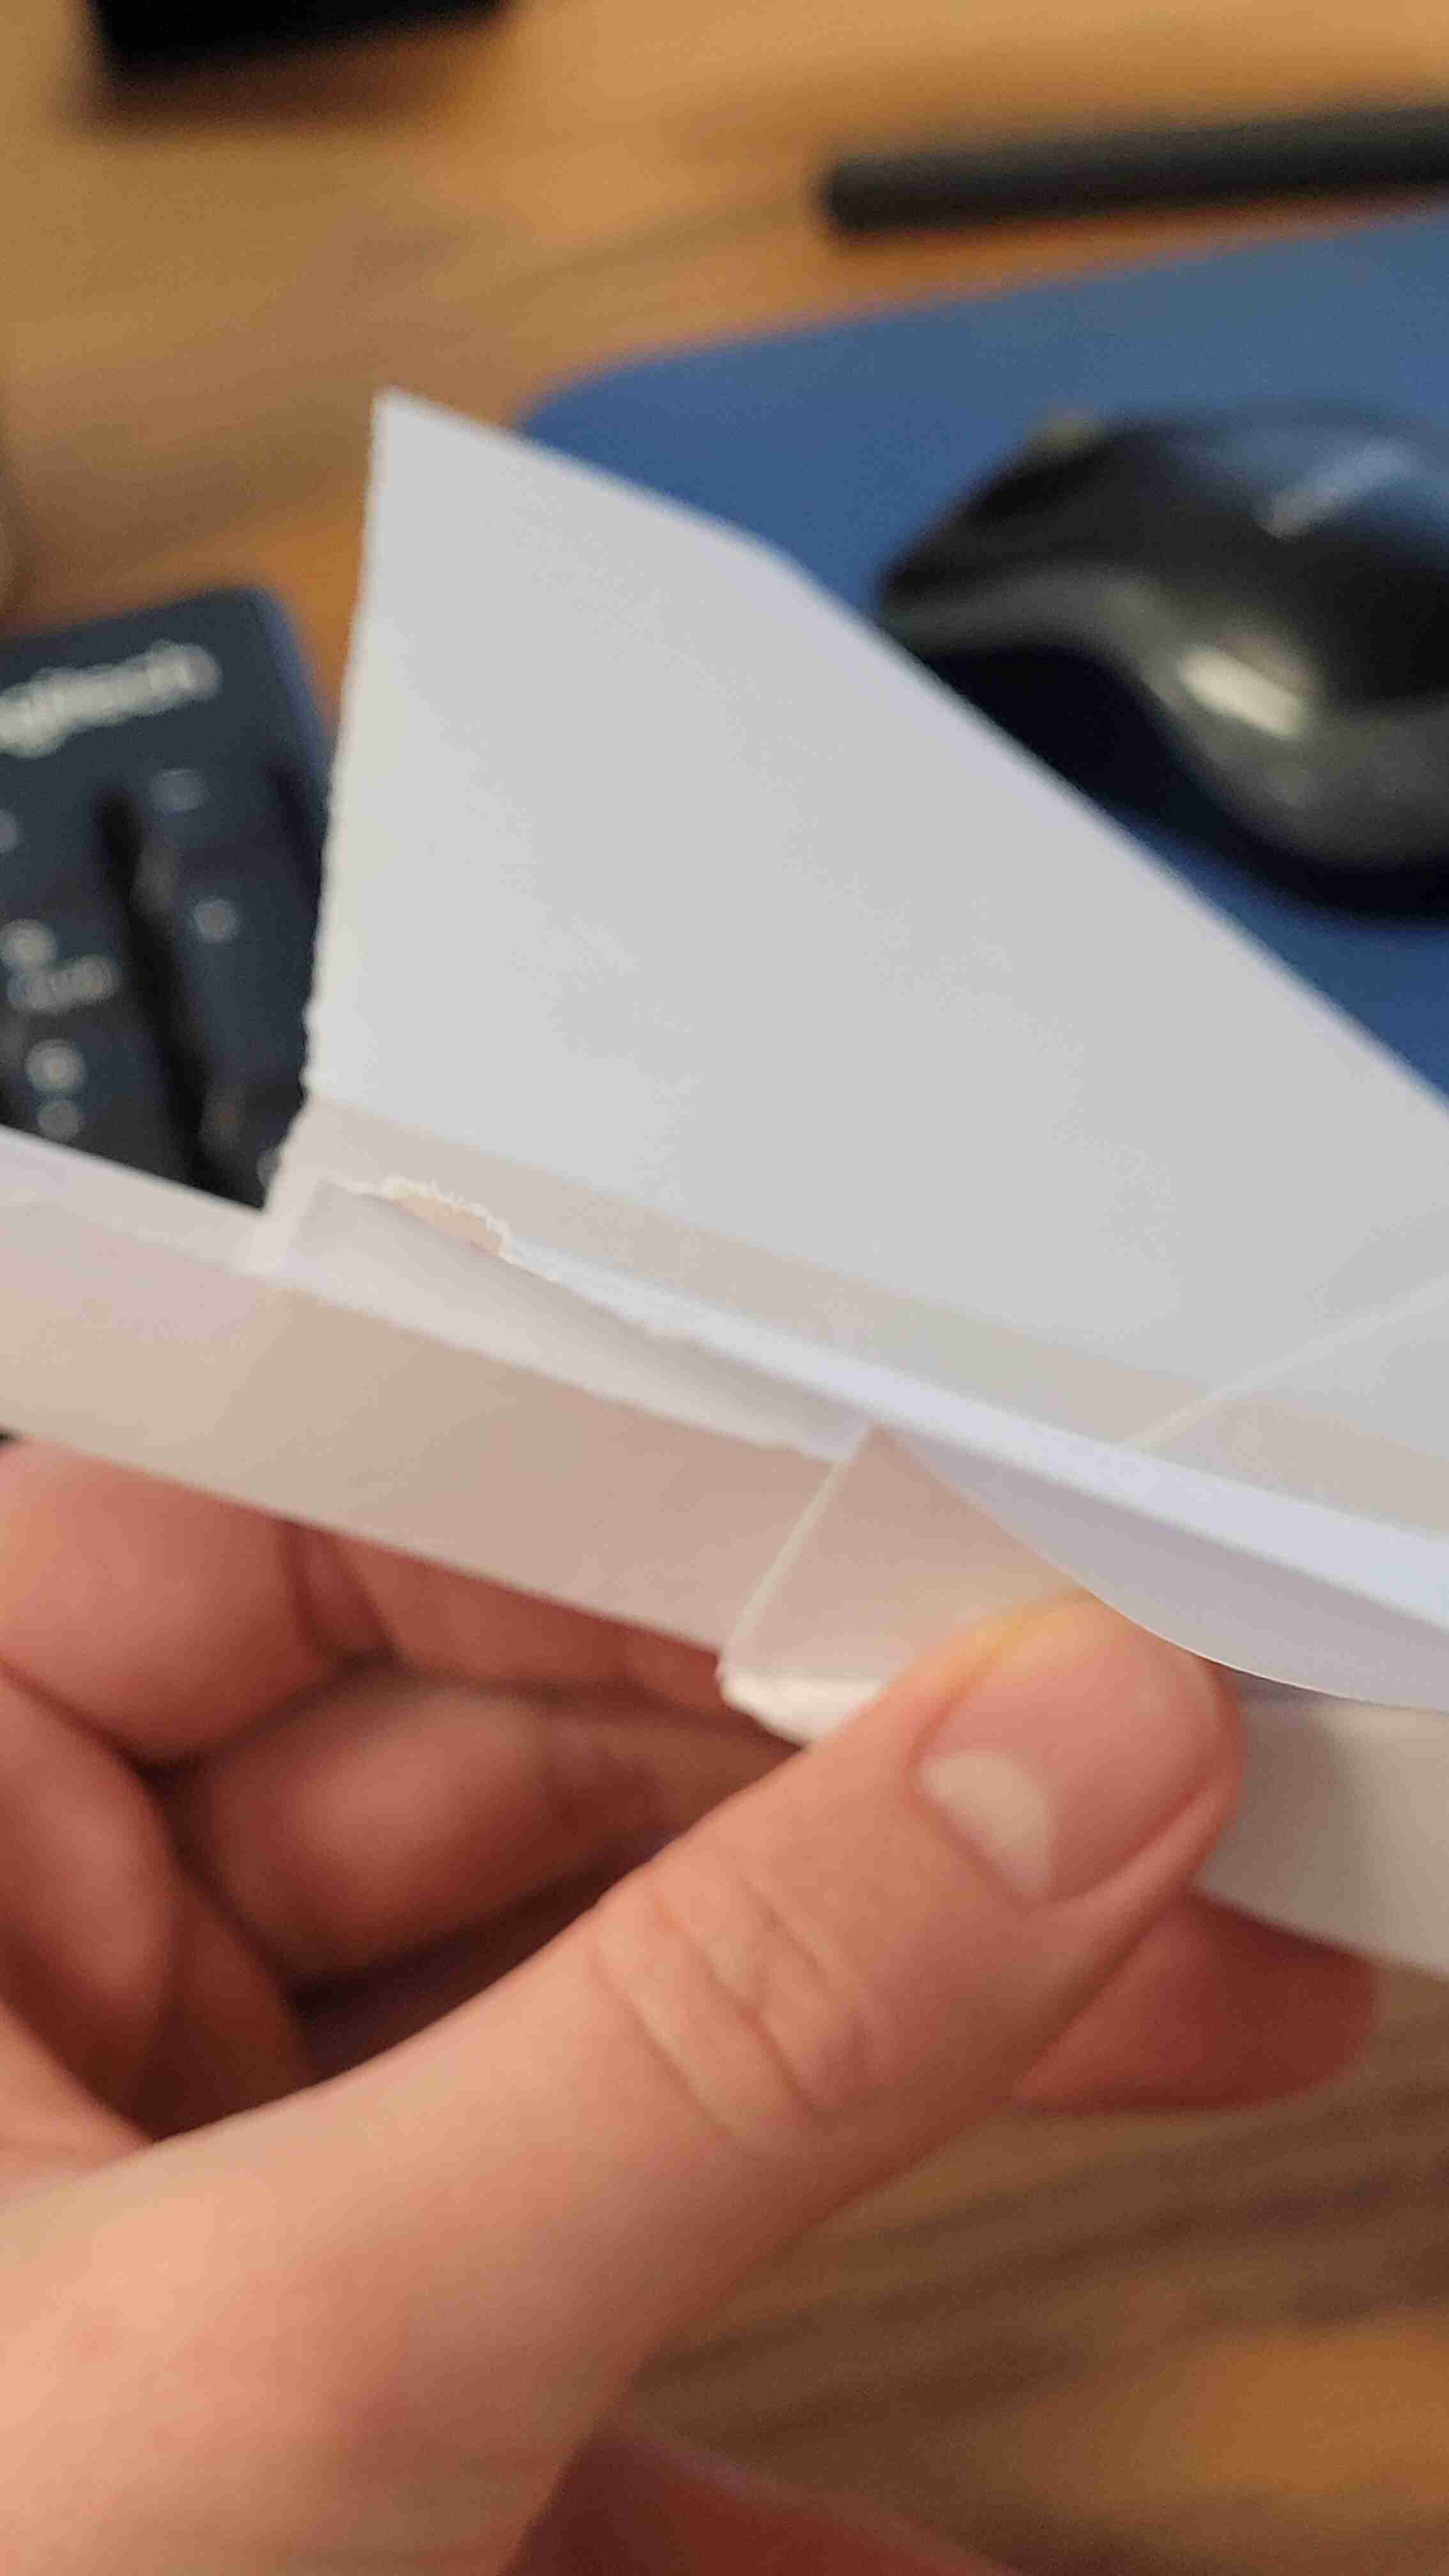
This next step forms the nose of your plane. The sharper you keep the points the nicer the plane will look and glide. It's a bit tricky and took me a while to get consistent with getting decently sharp points. Depending on how sharp you have made all the previous folds will determine how easy it is to get a sharp point. I don't always get a super sharp point, and as you will see below, the folds I have made could have been sharper, but the plane still flies.
Step 11 - Fold in half at the point of corner 10 (along where I have made a line), allowing the top, thinner paper to fold under the thicker paper. Do the same for corner 11. Press flat.
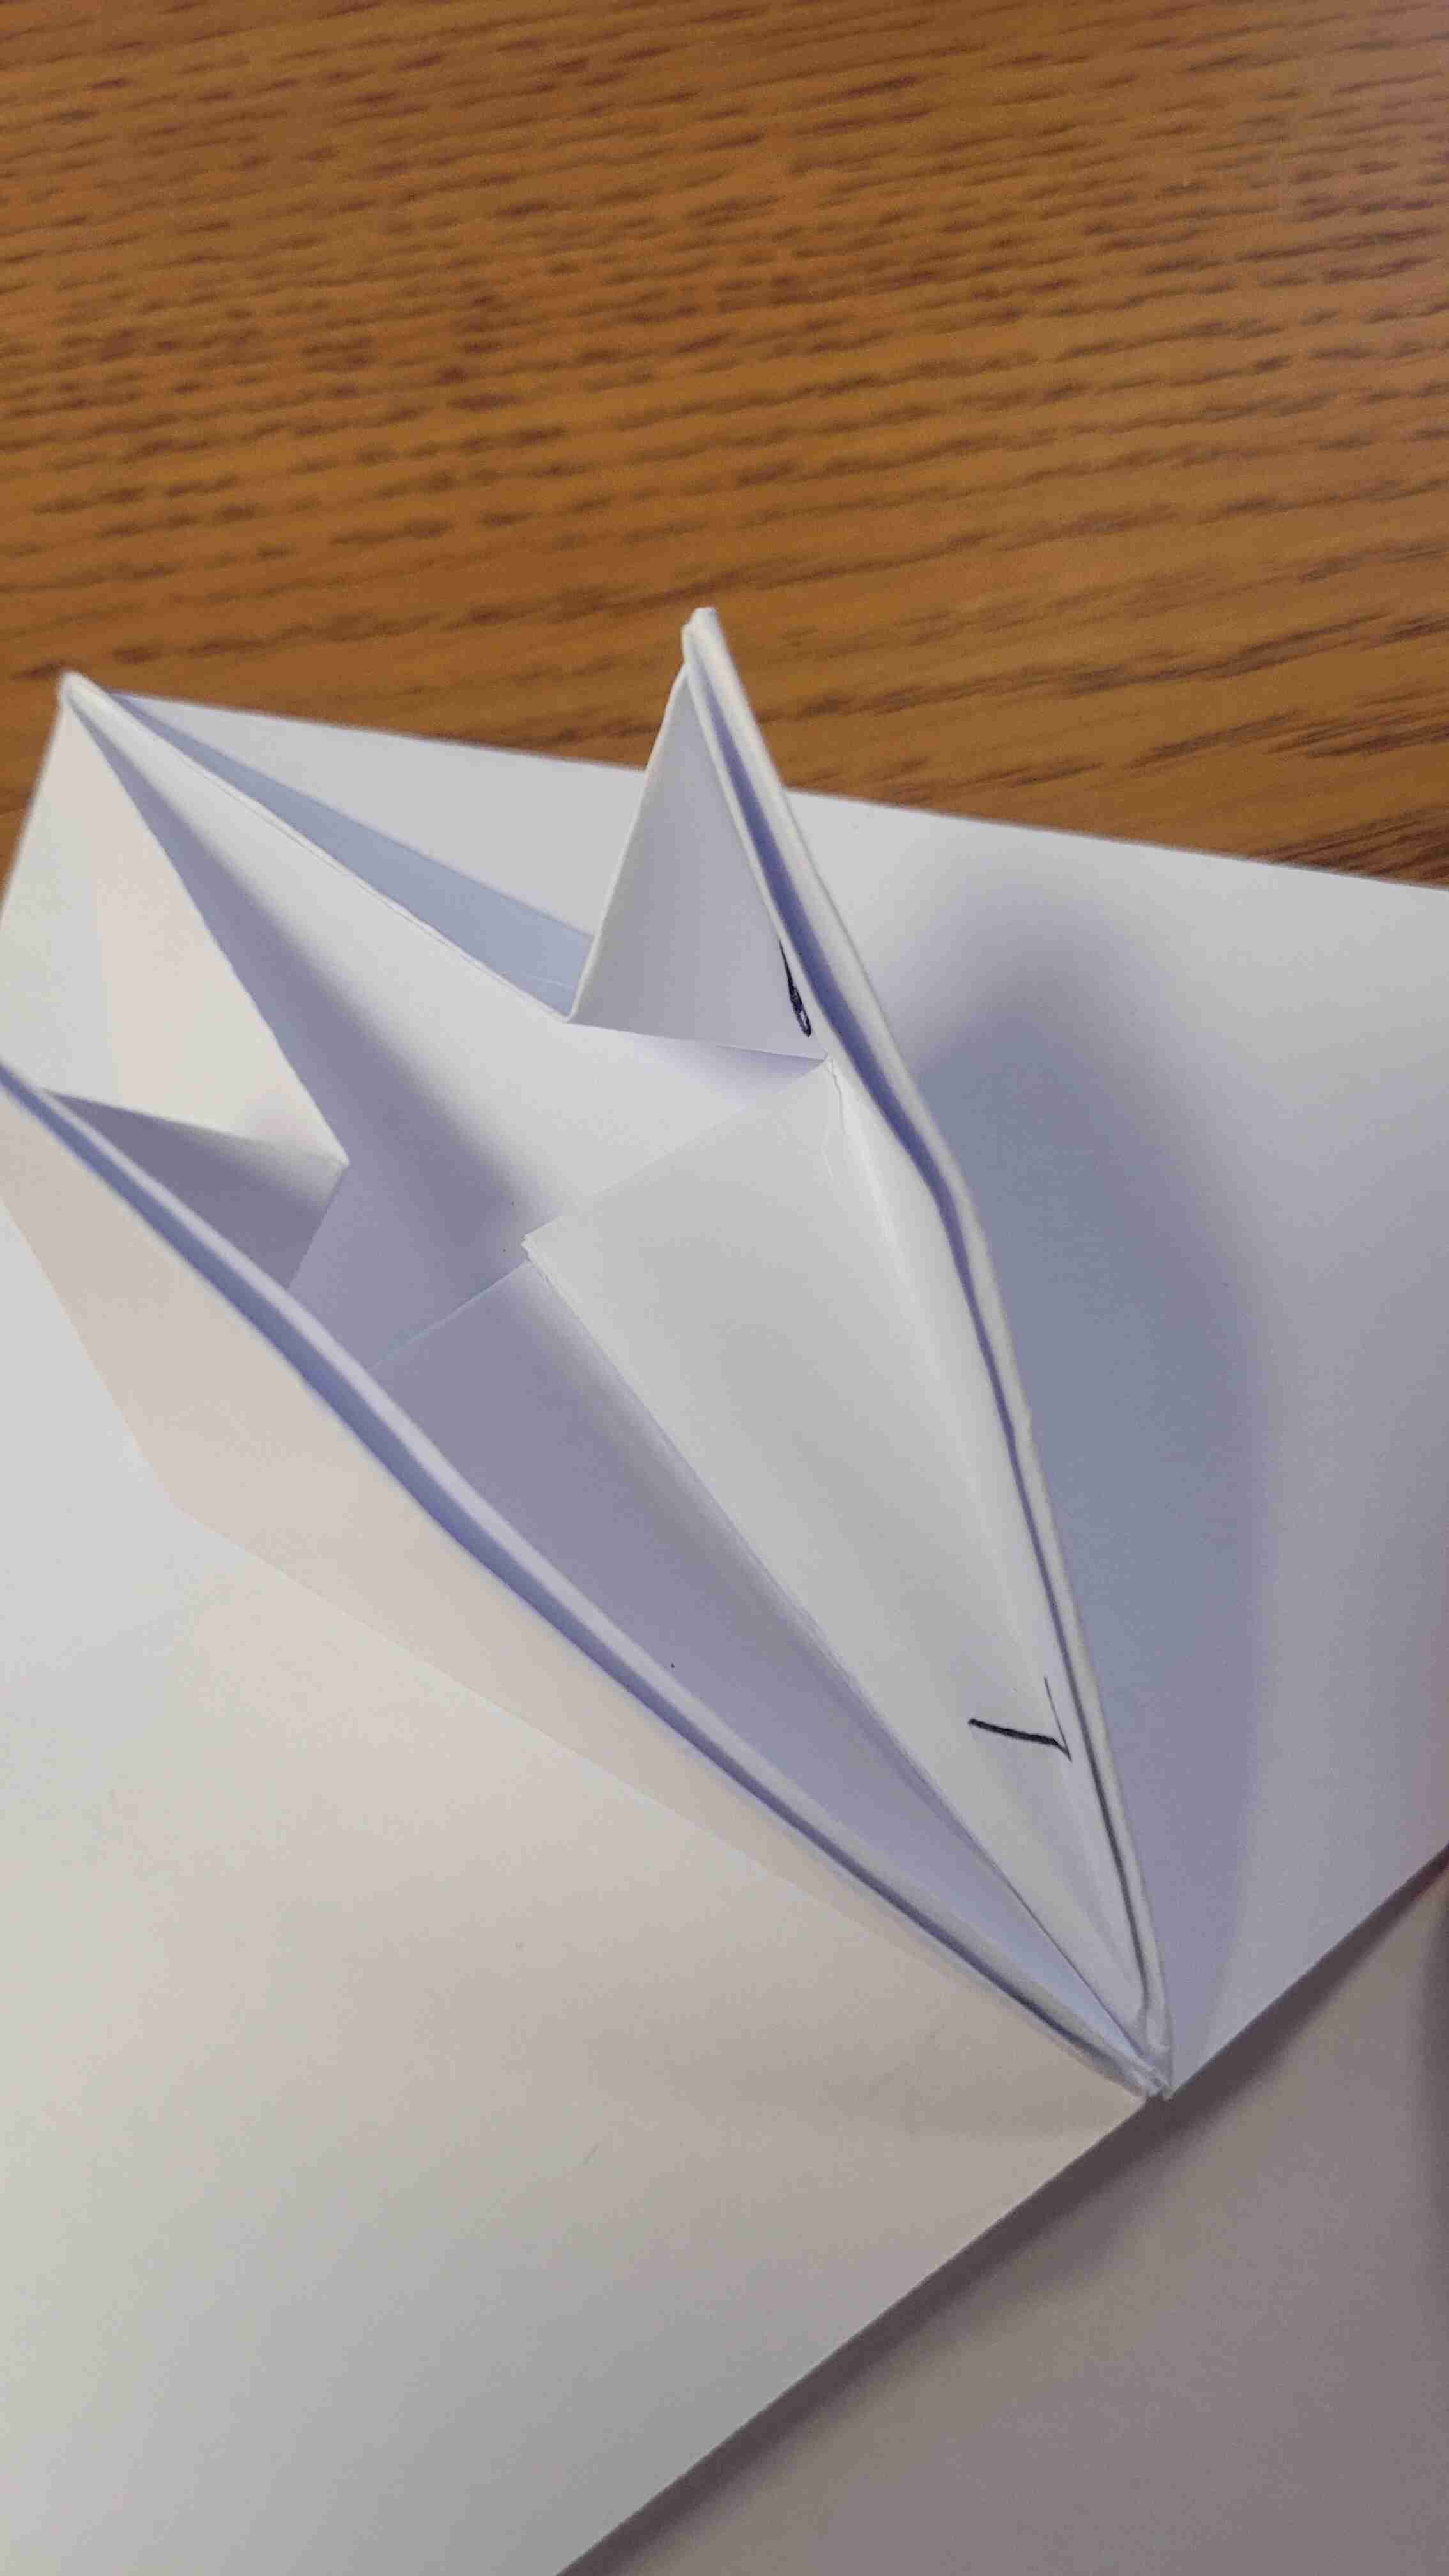
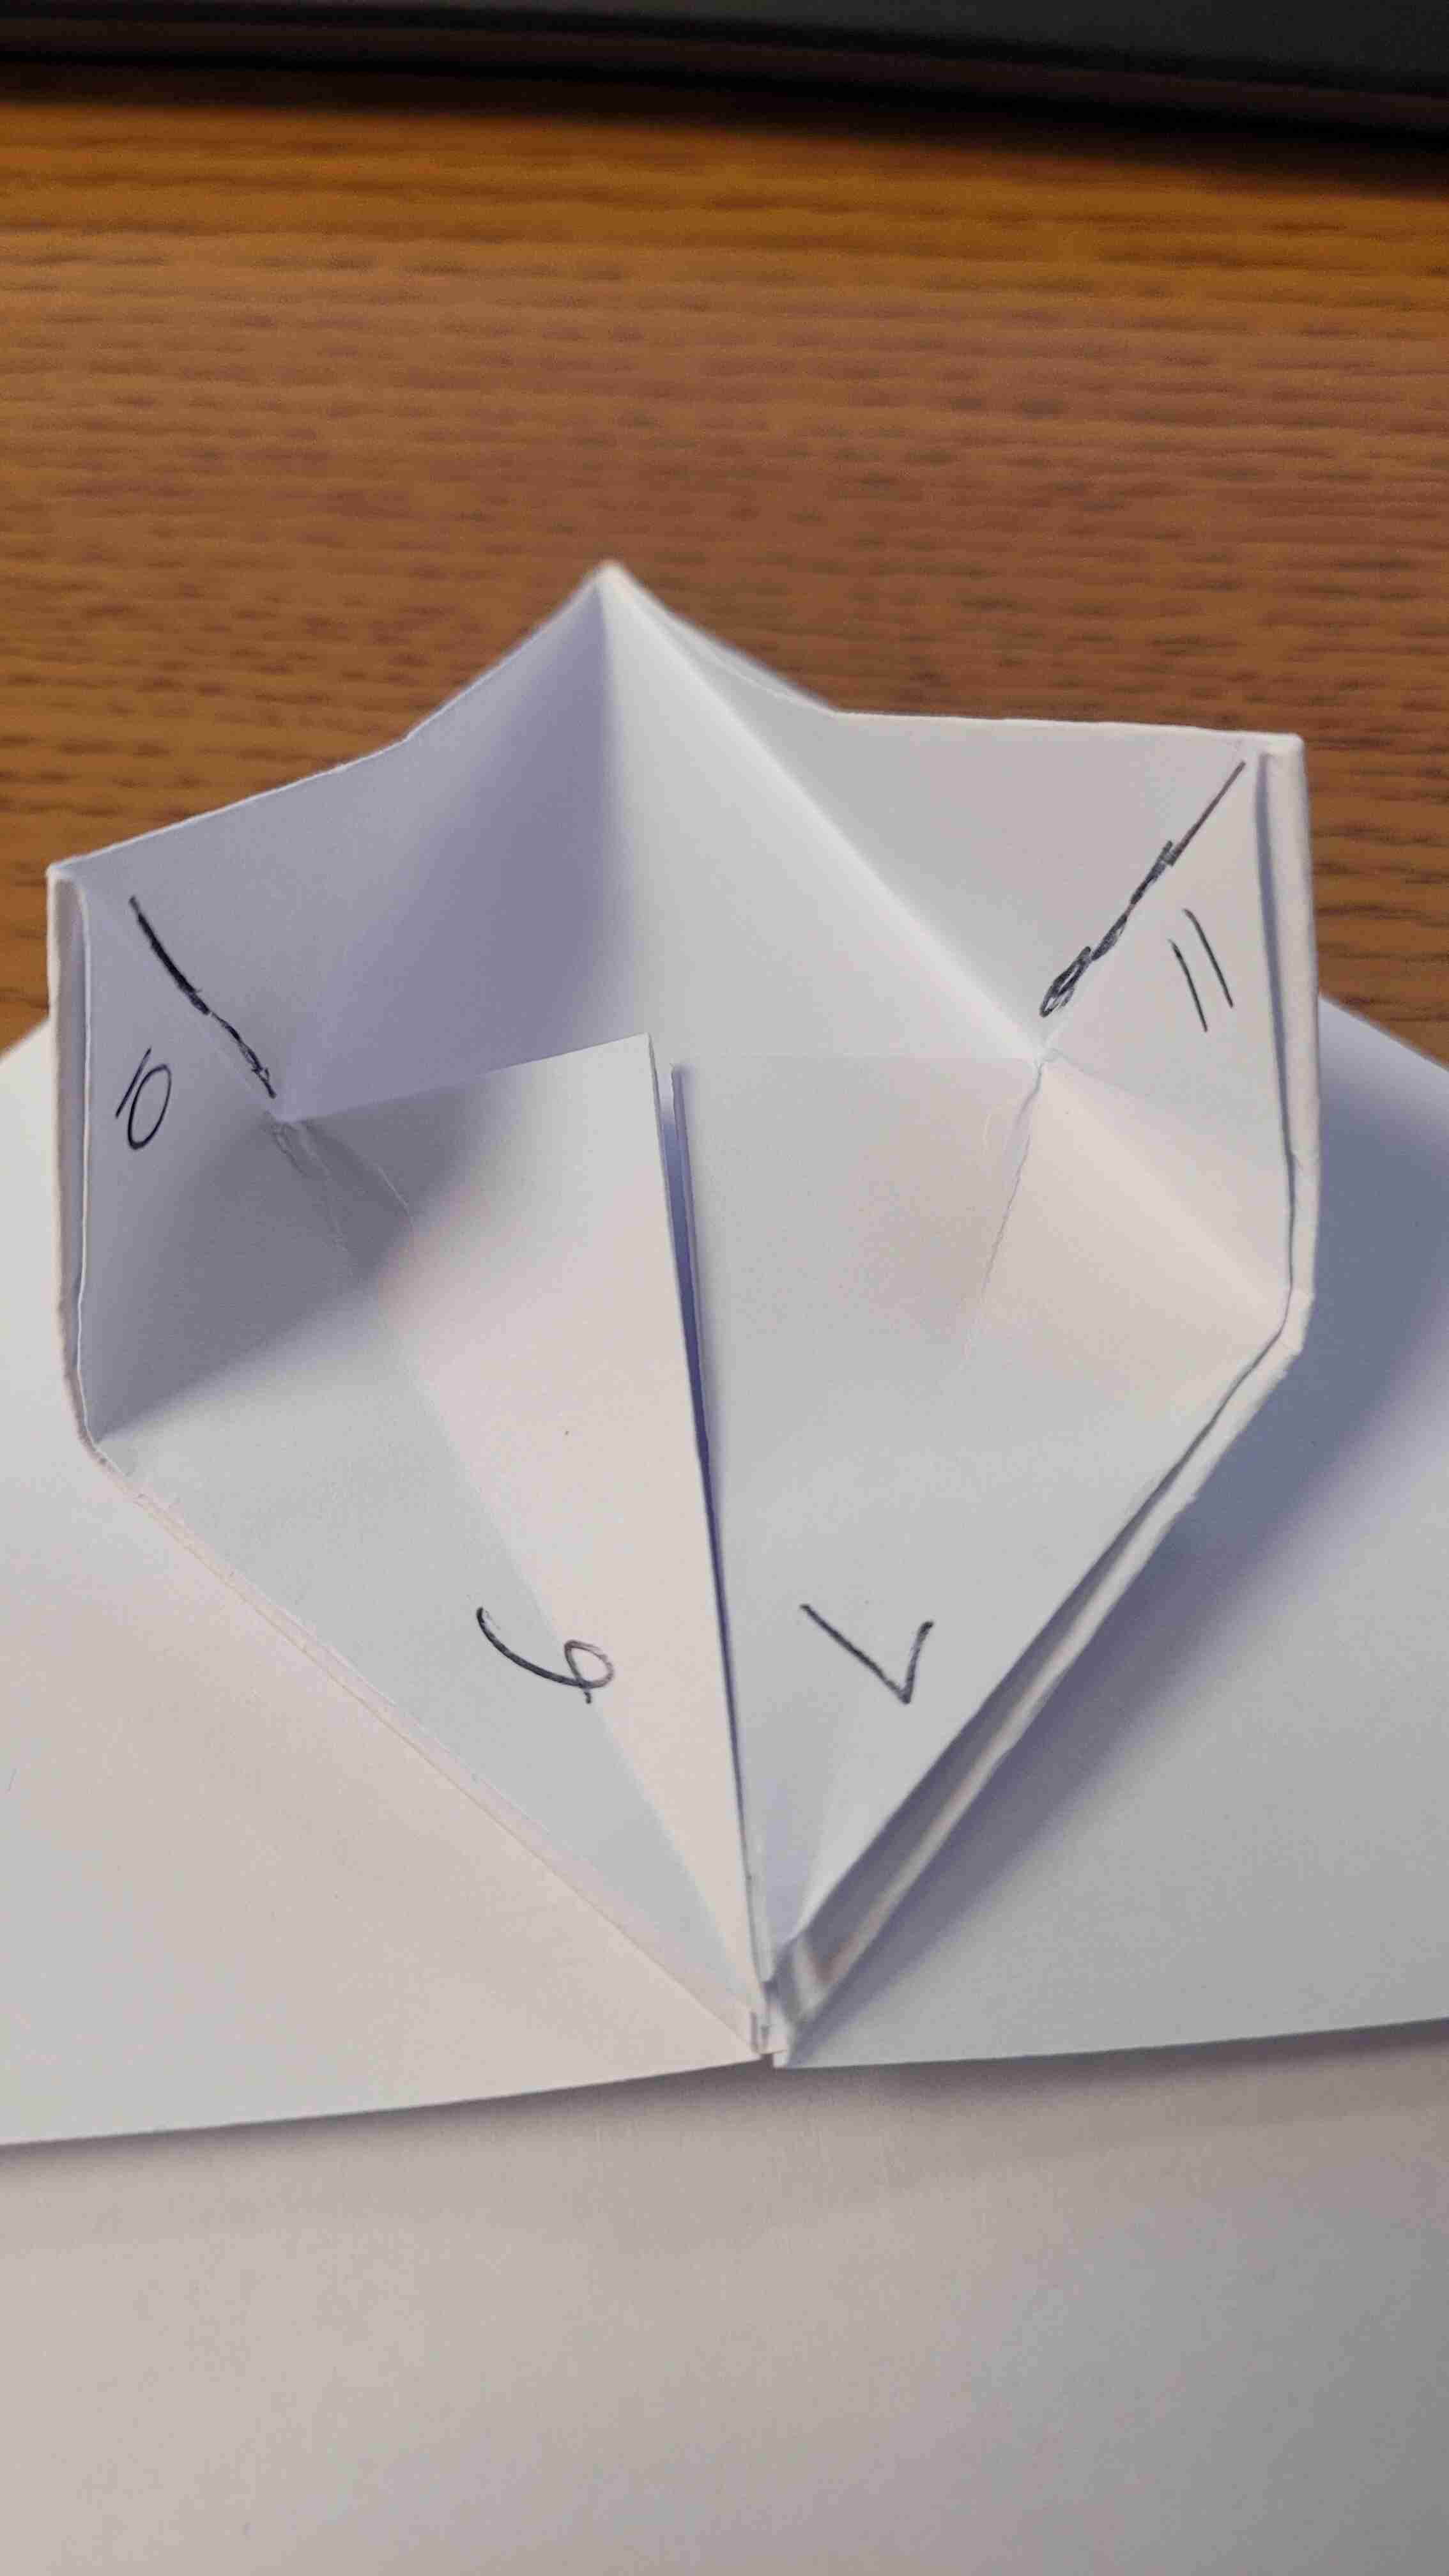
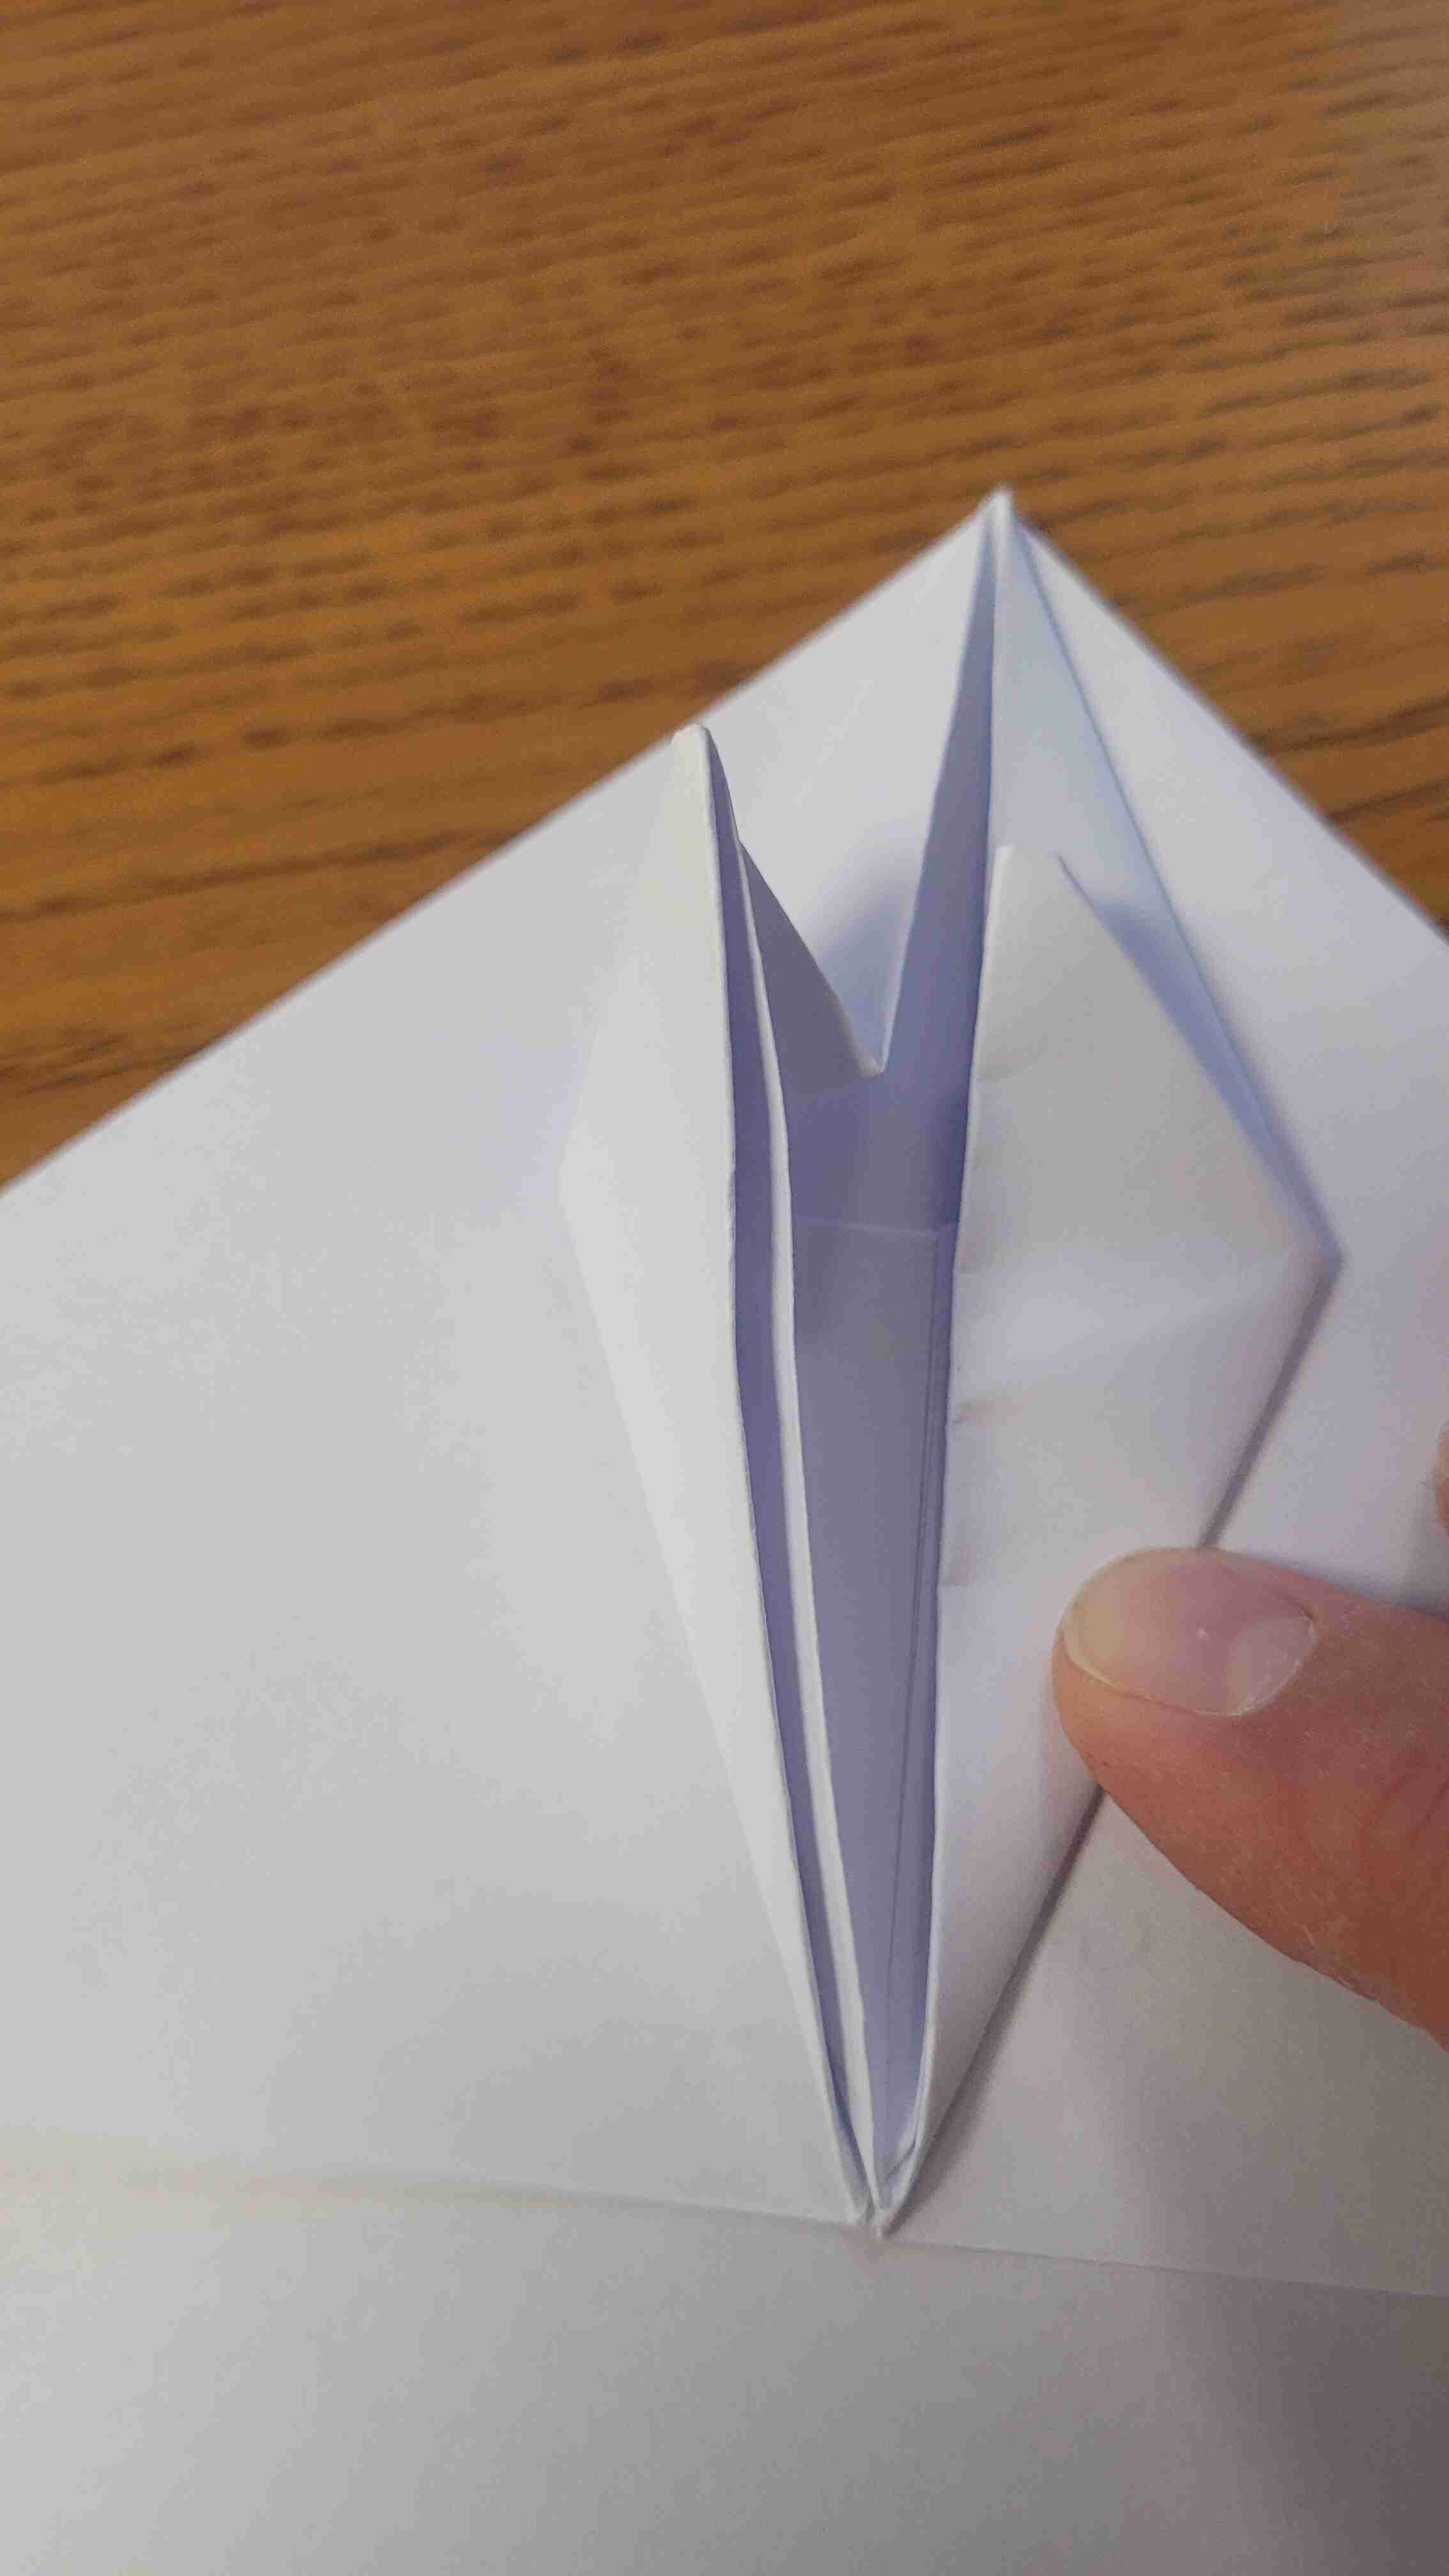
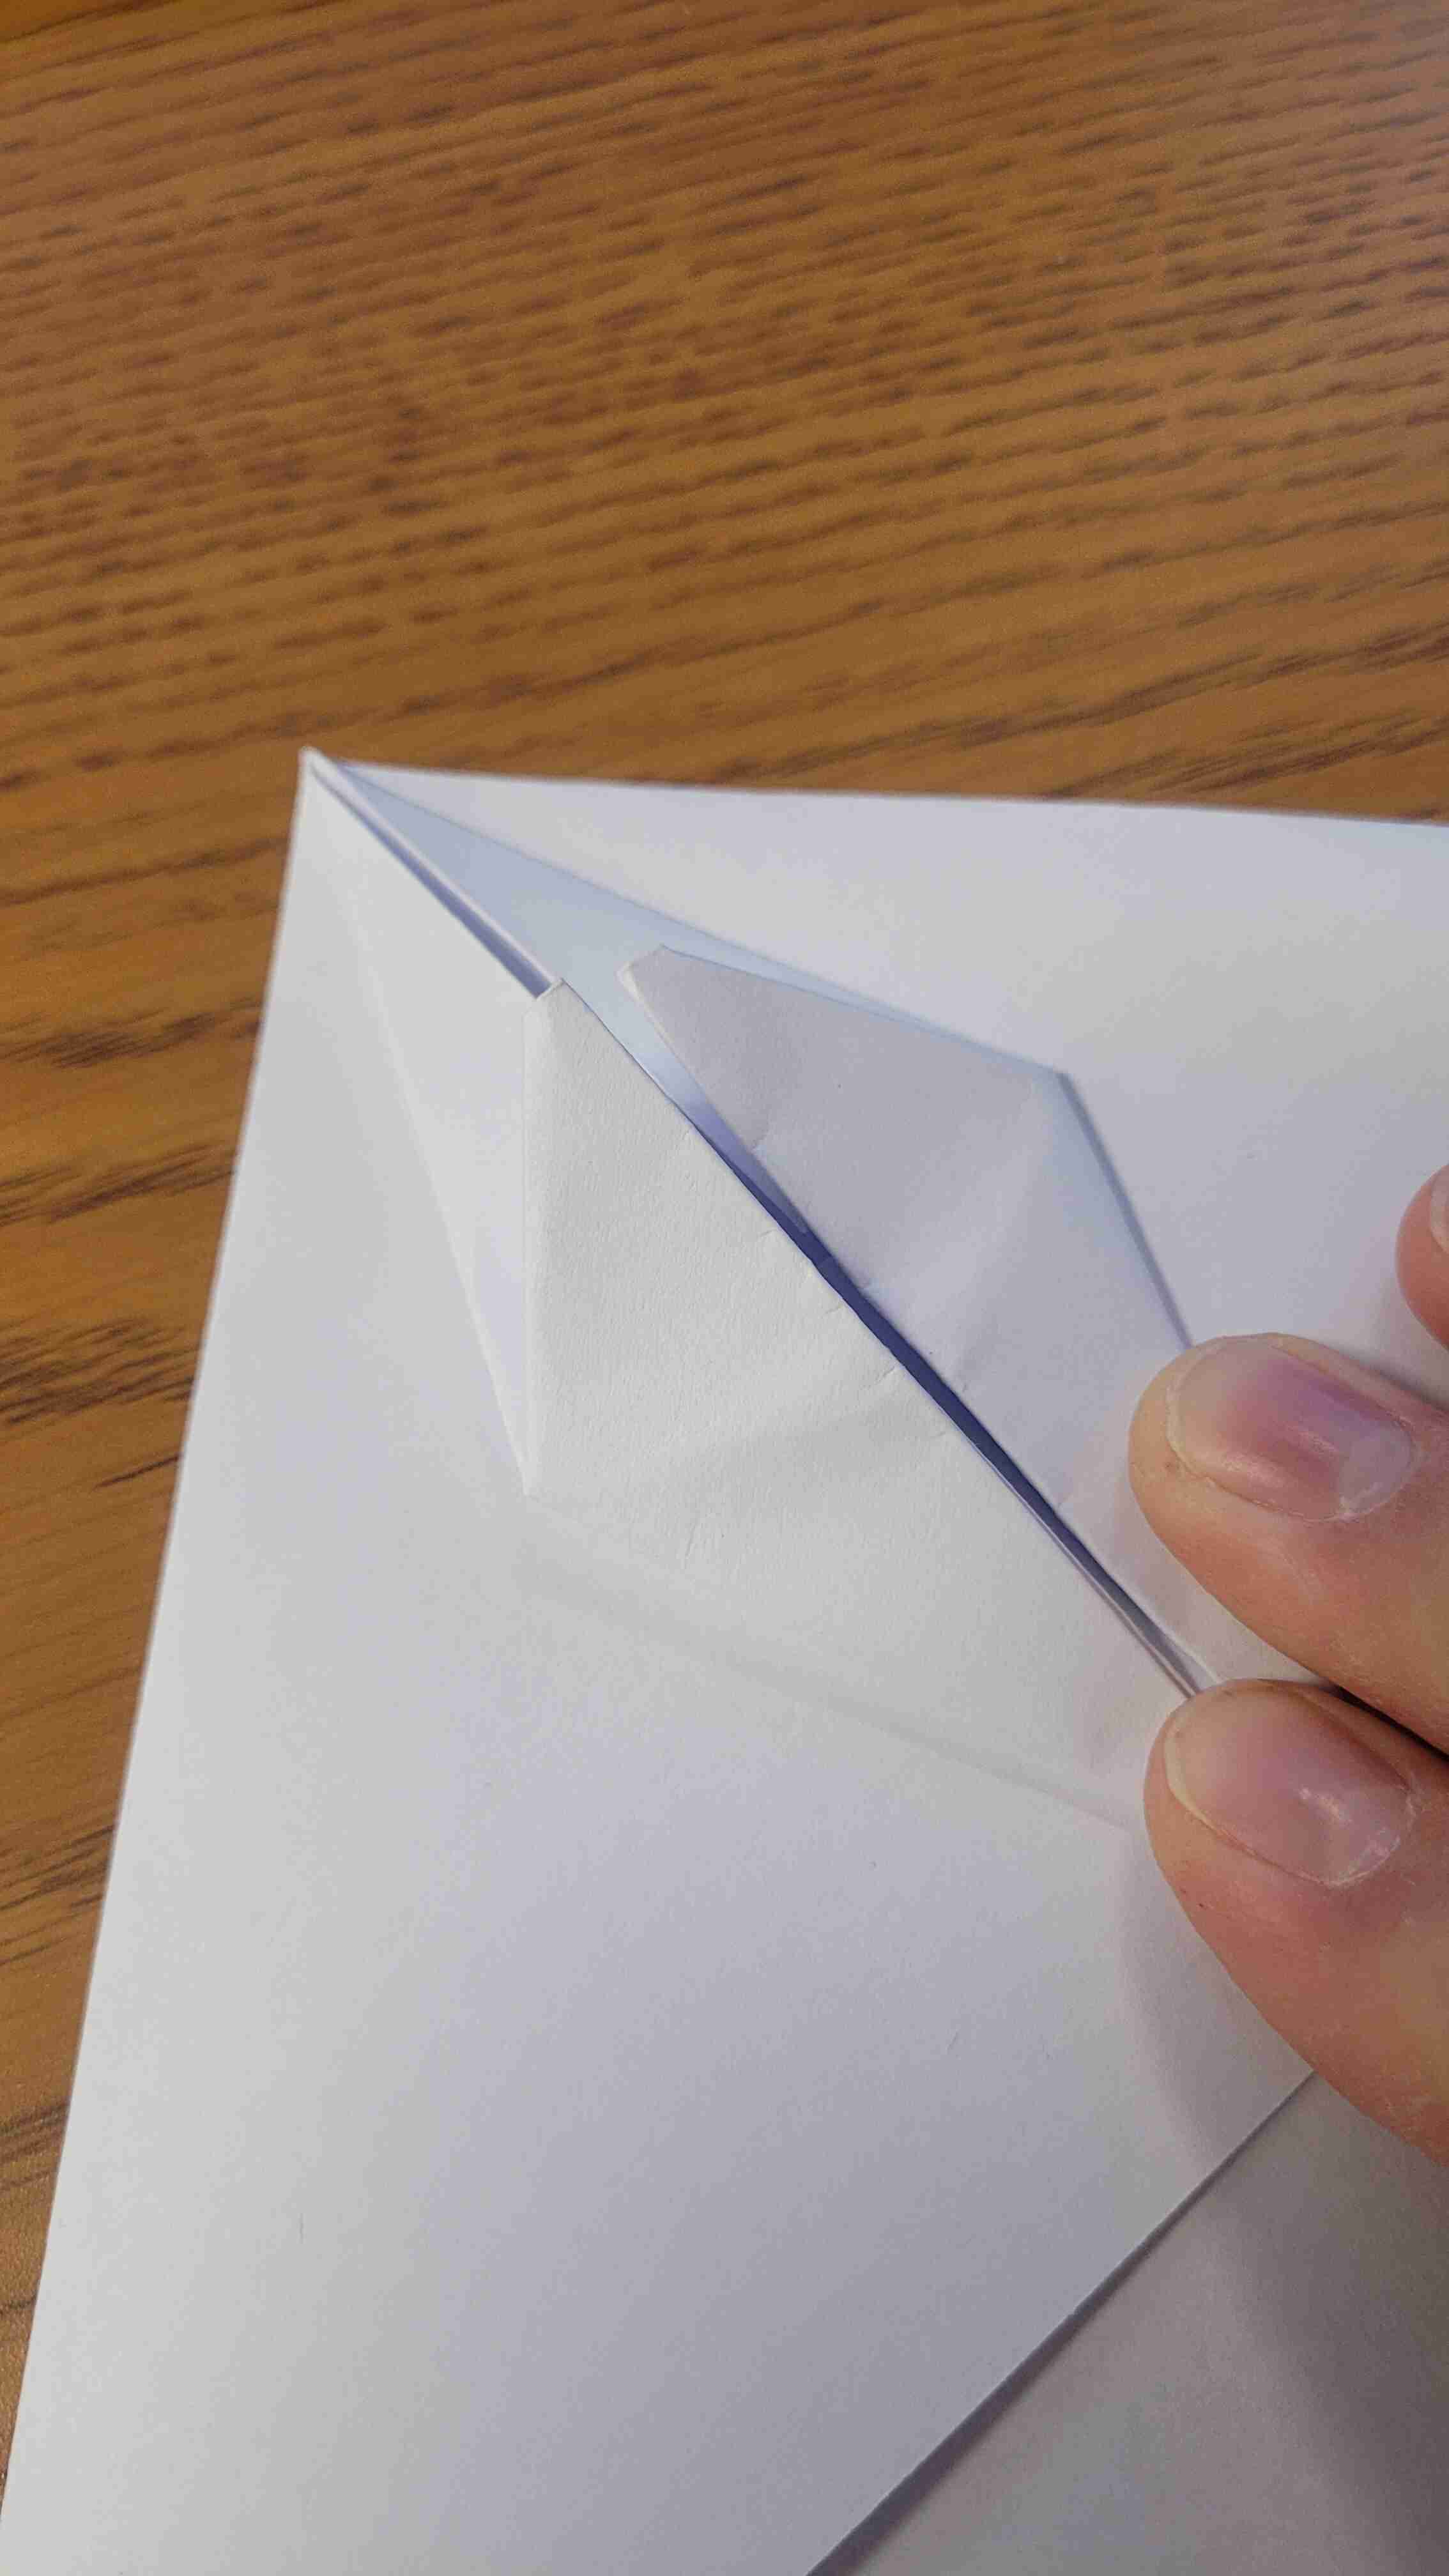
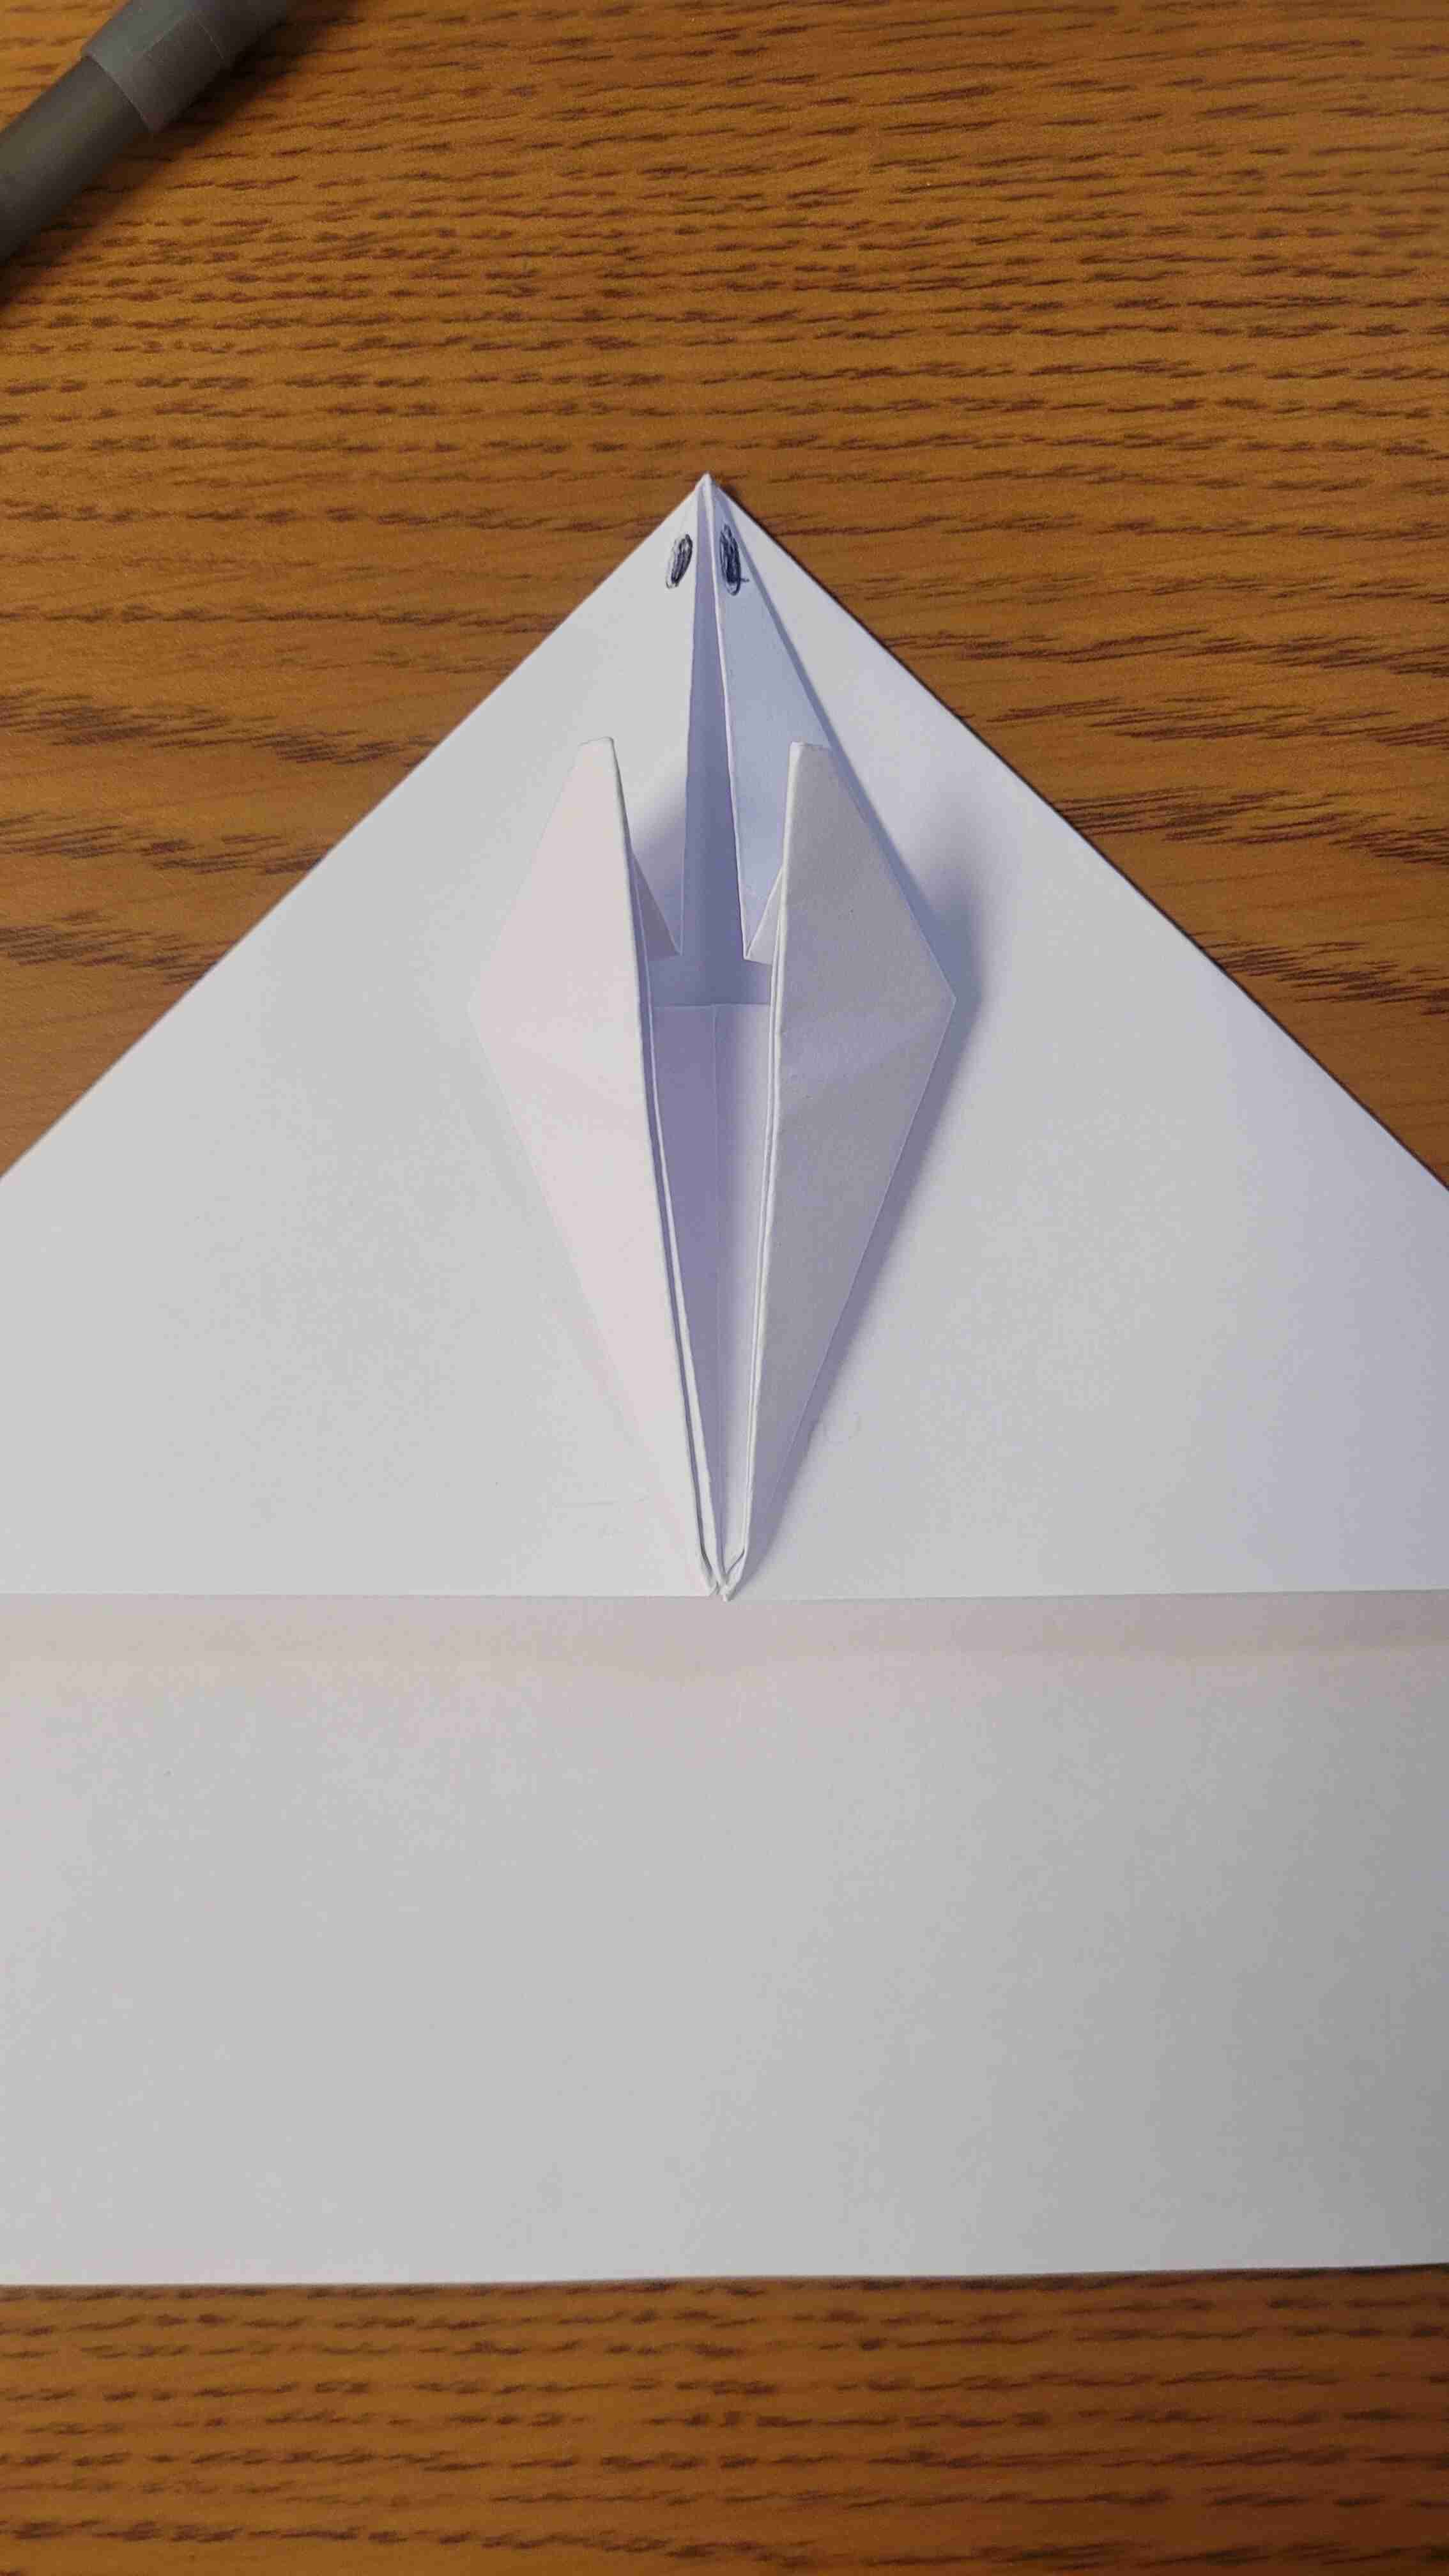
Step 12 - Flip over the paper. Fold point 12 down to expose the points of the plane we have made, pull back af far as you can while keeping the points jutting out straight.
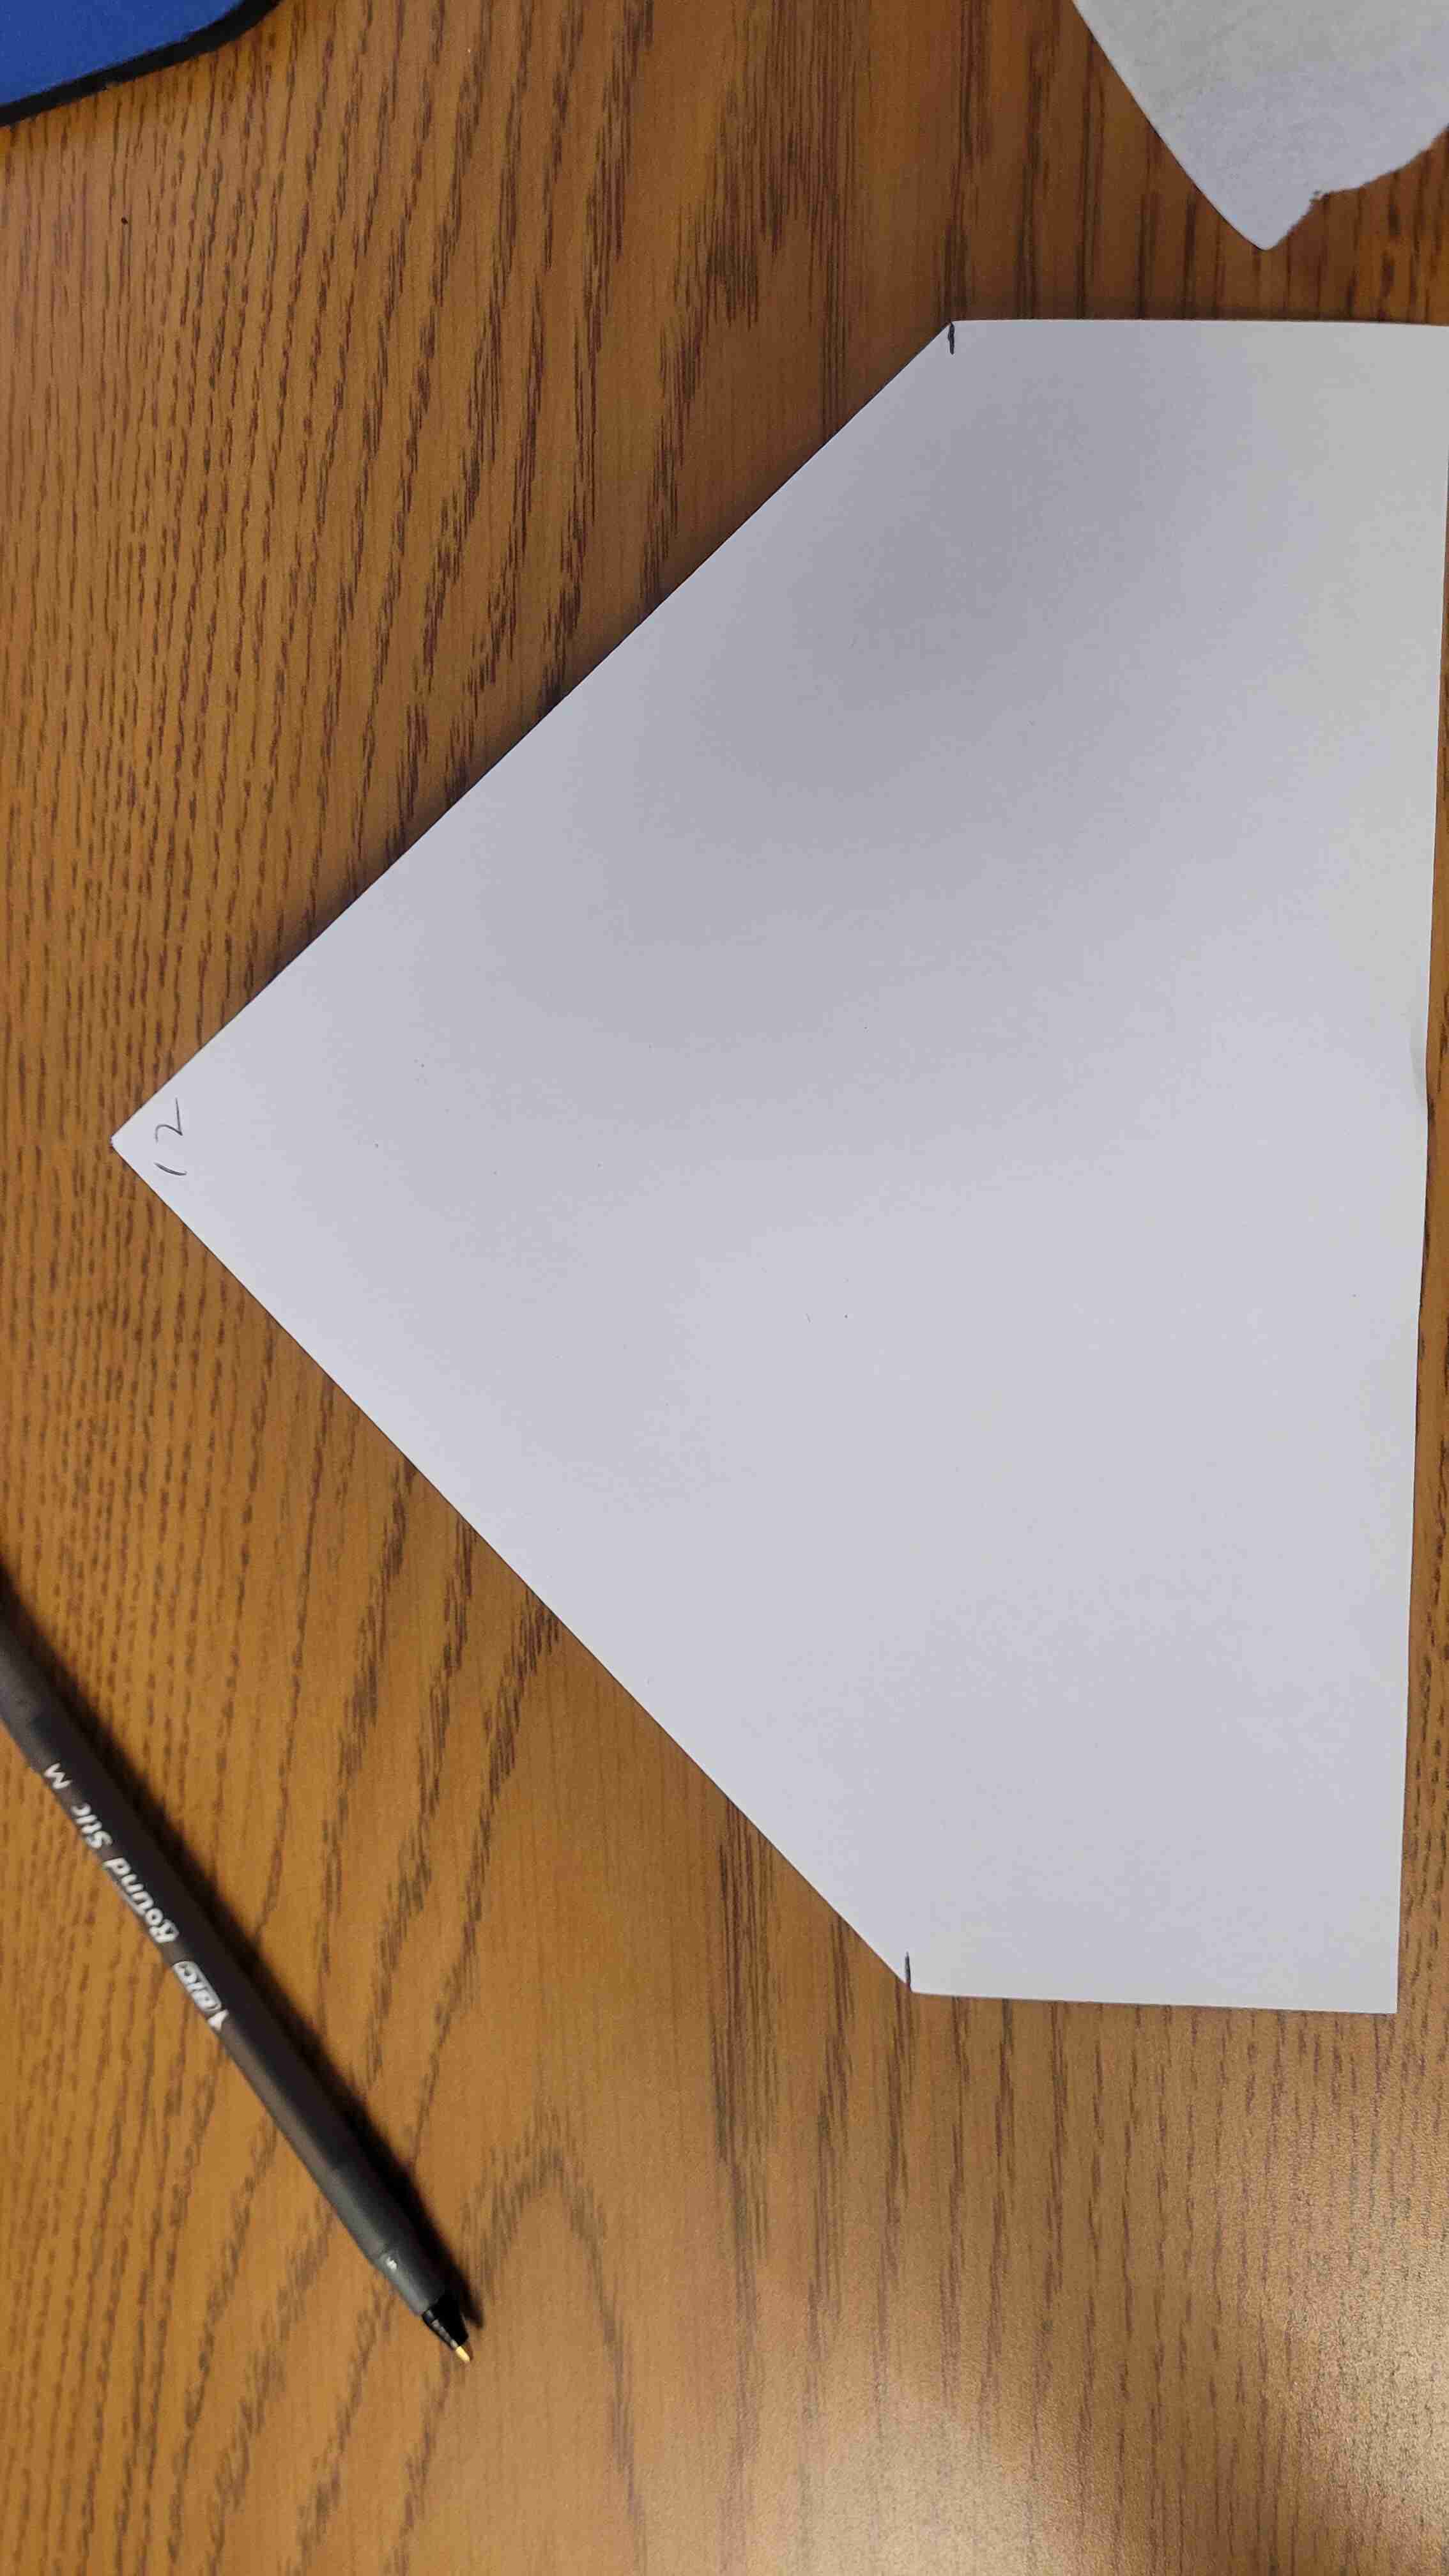
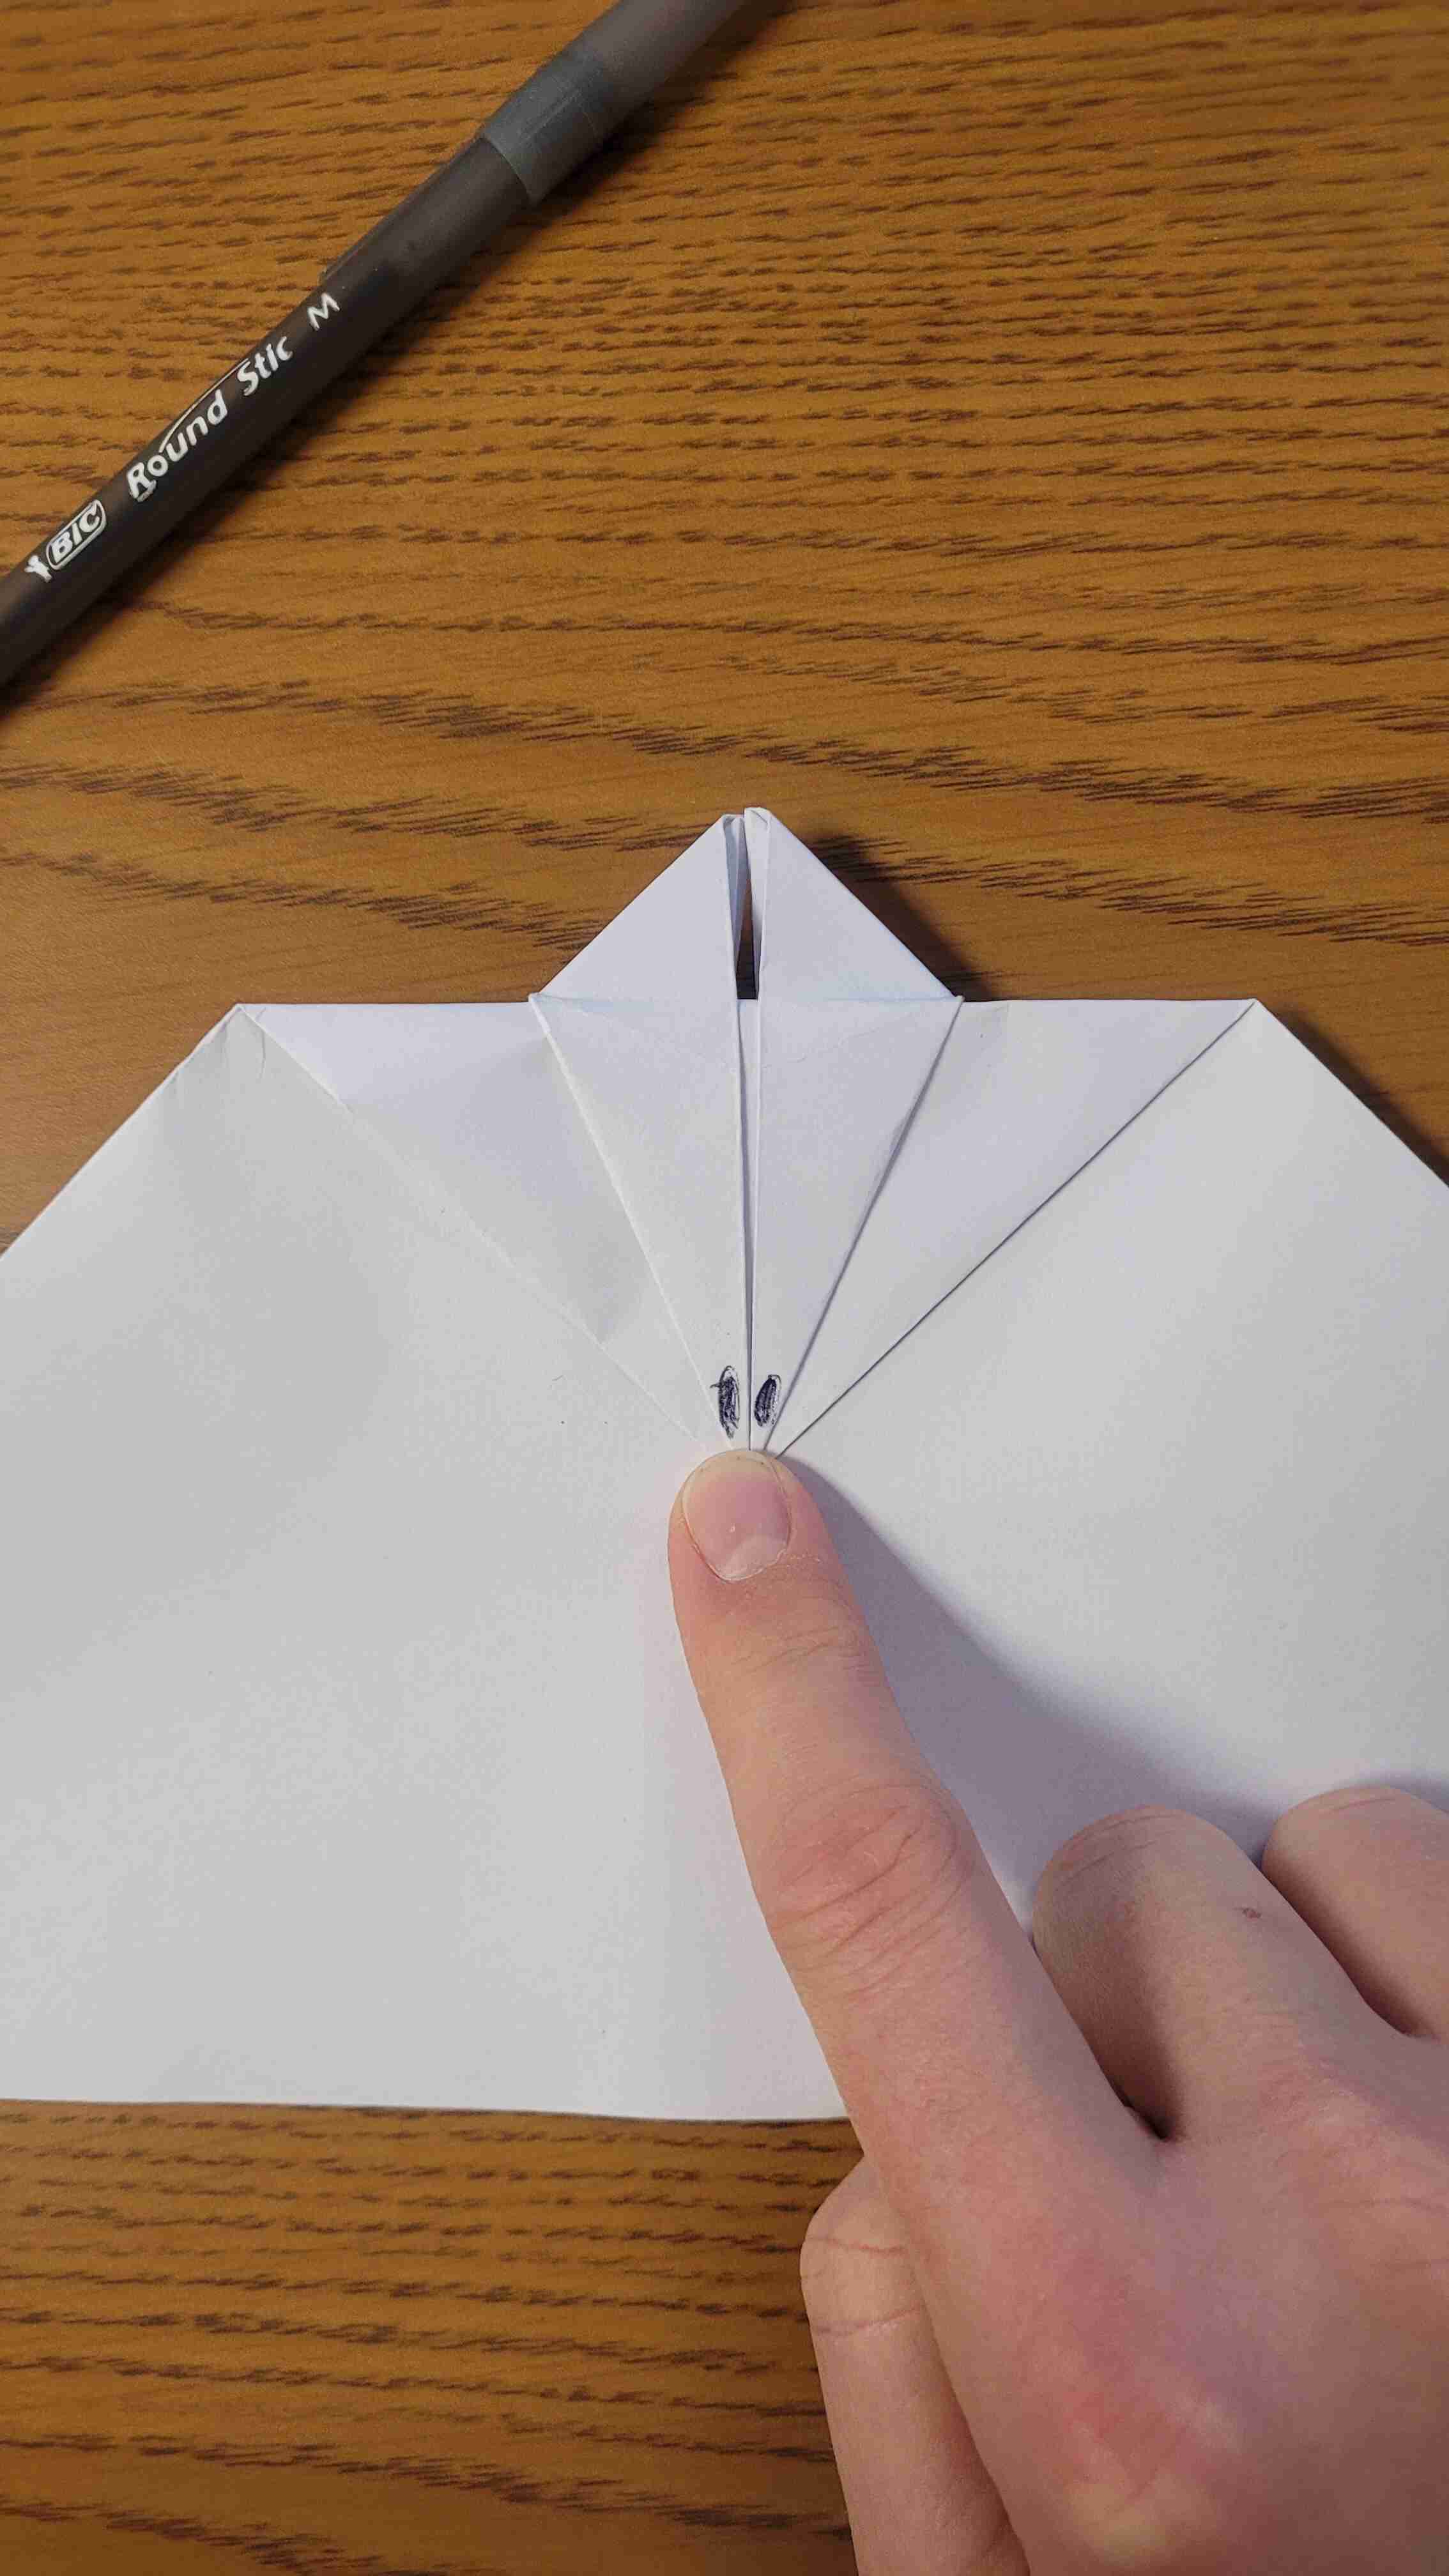
Step 13 - Flip over the paper. Fold edge 13 up to where the folds for the nose starts.
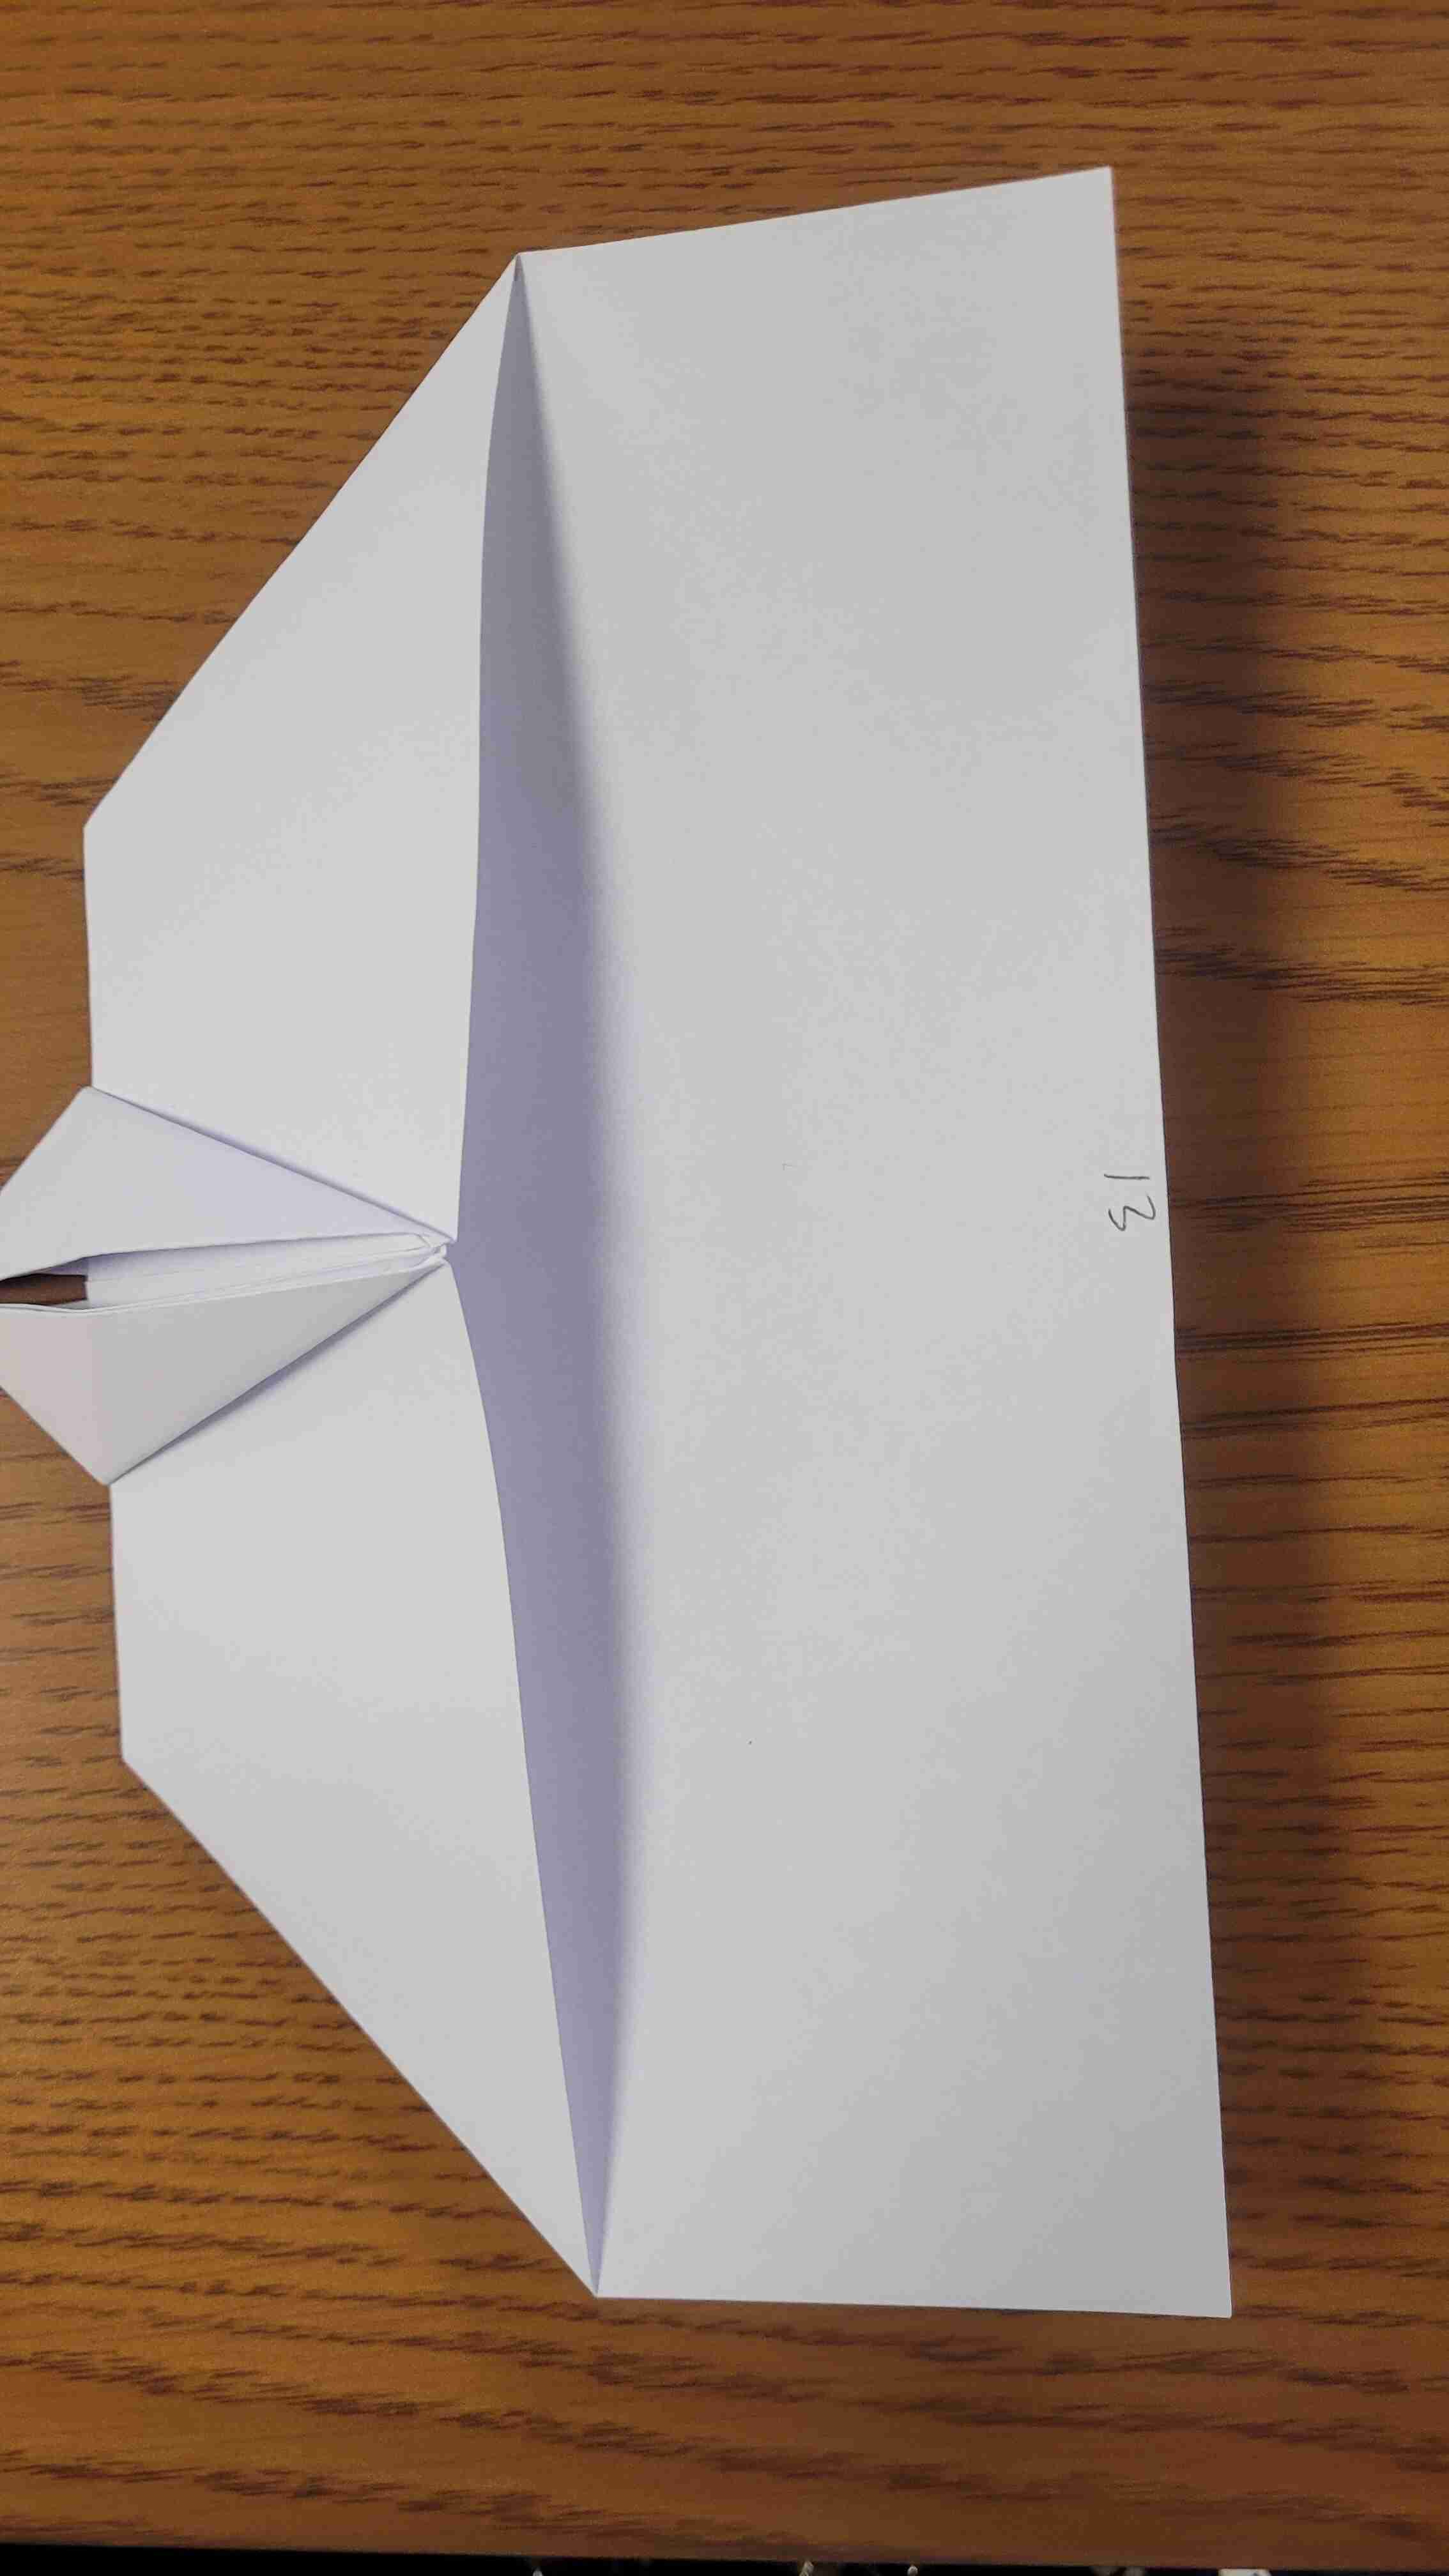
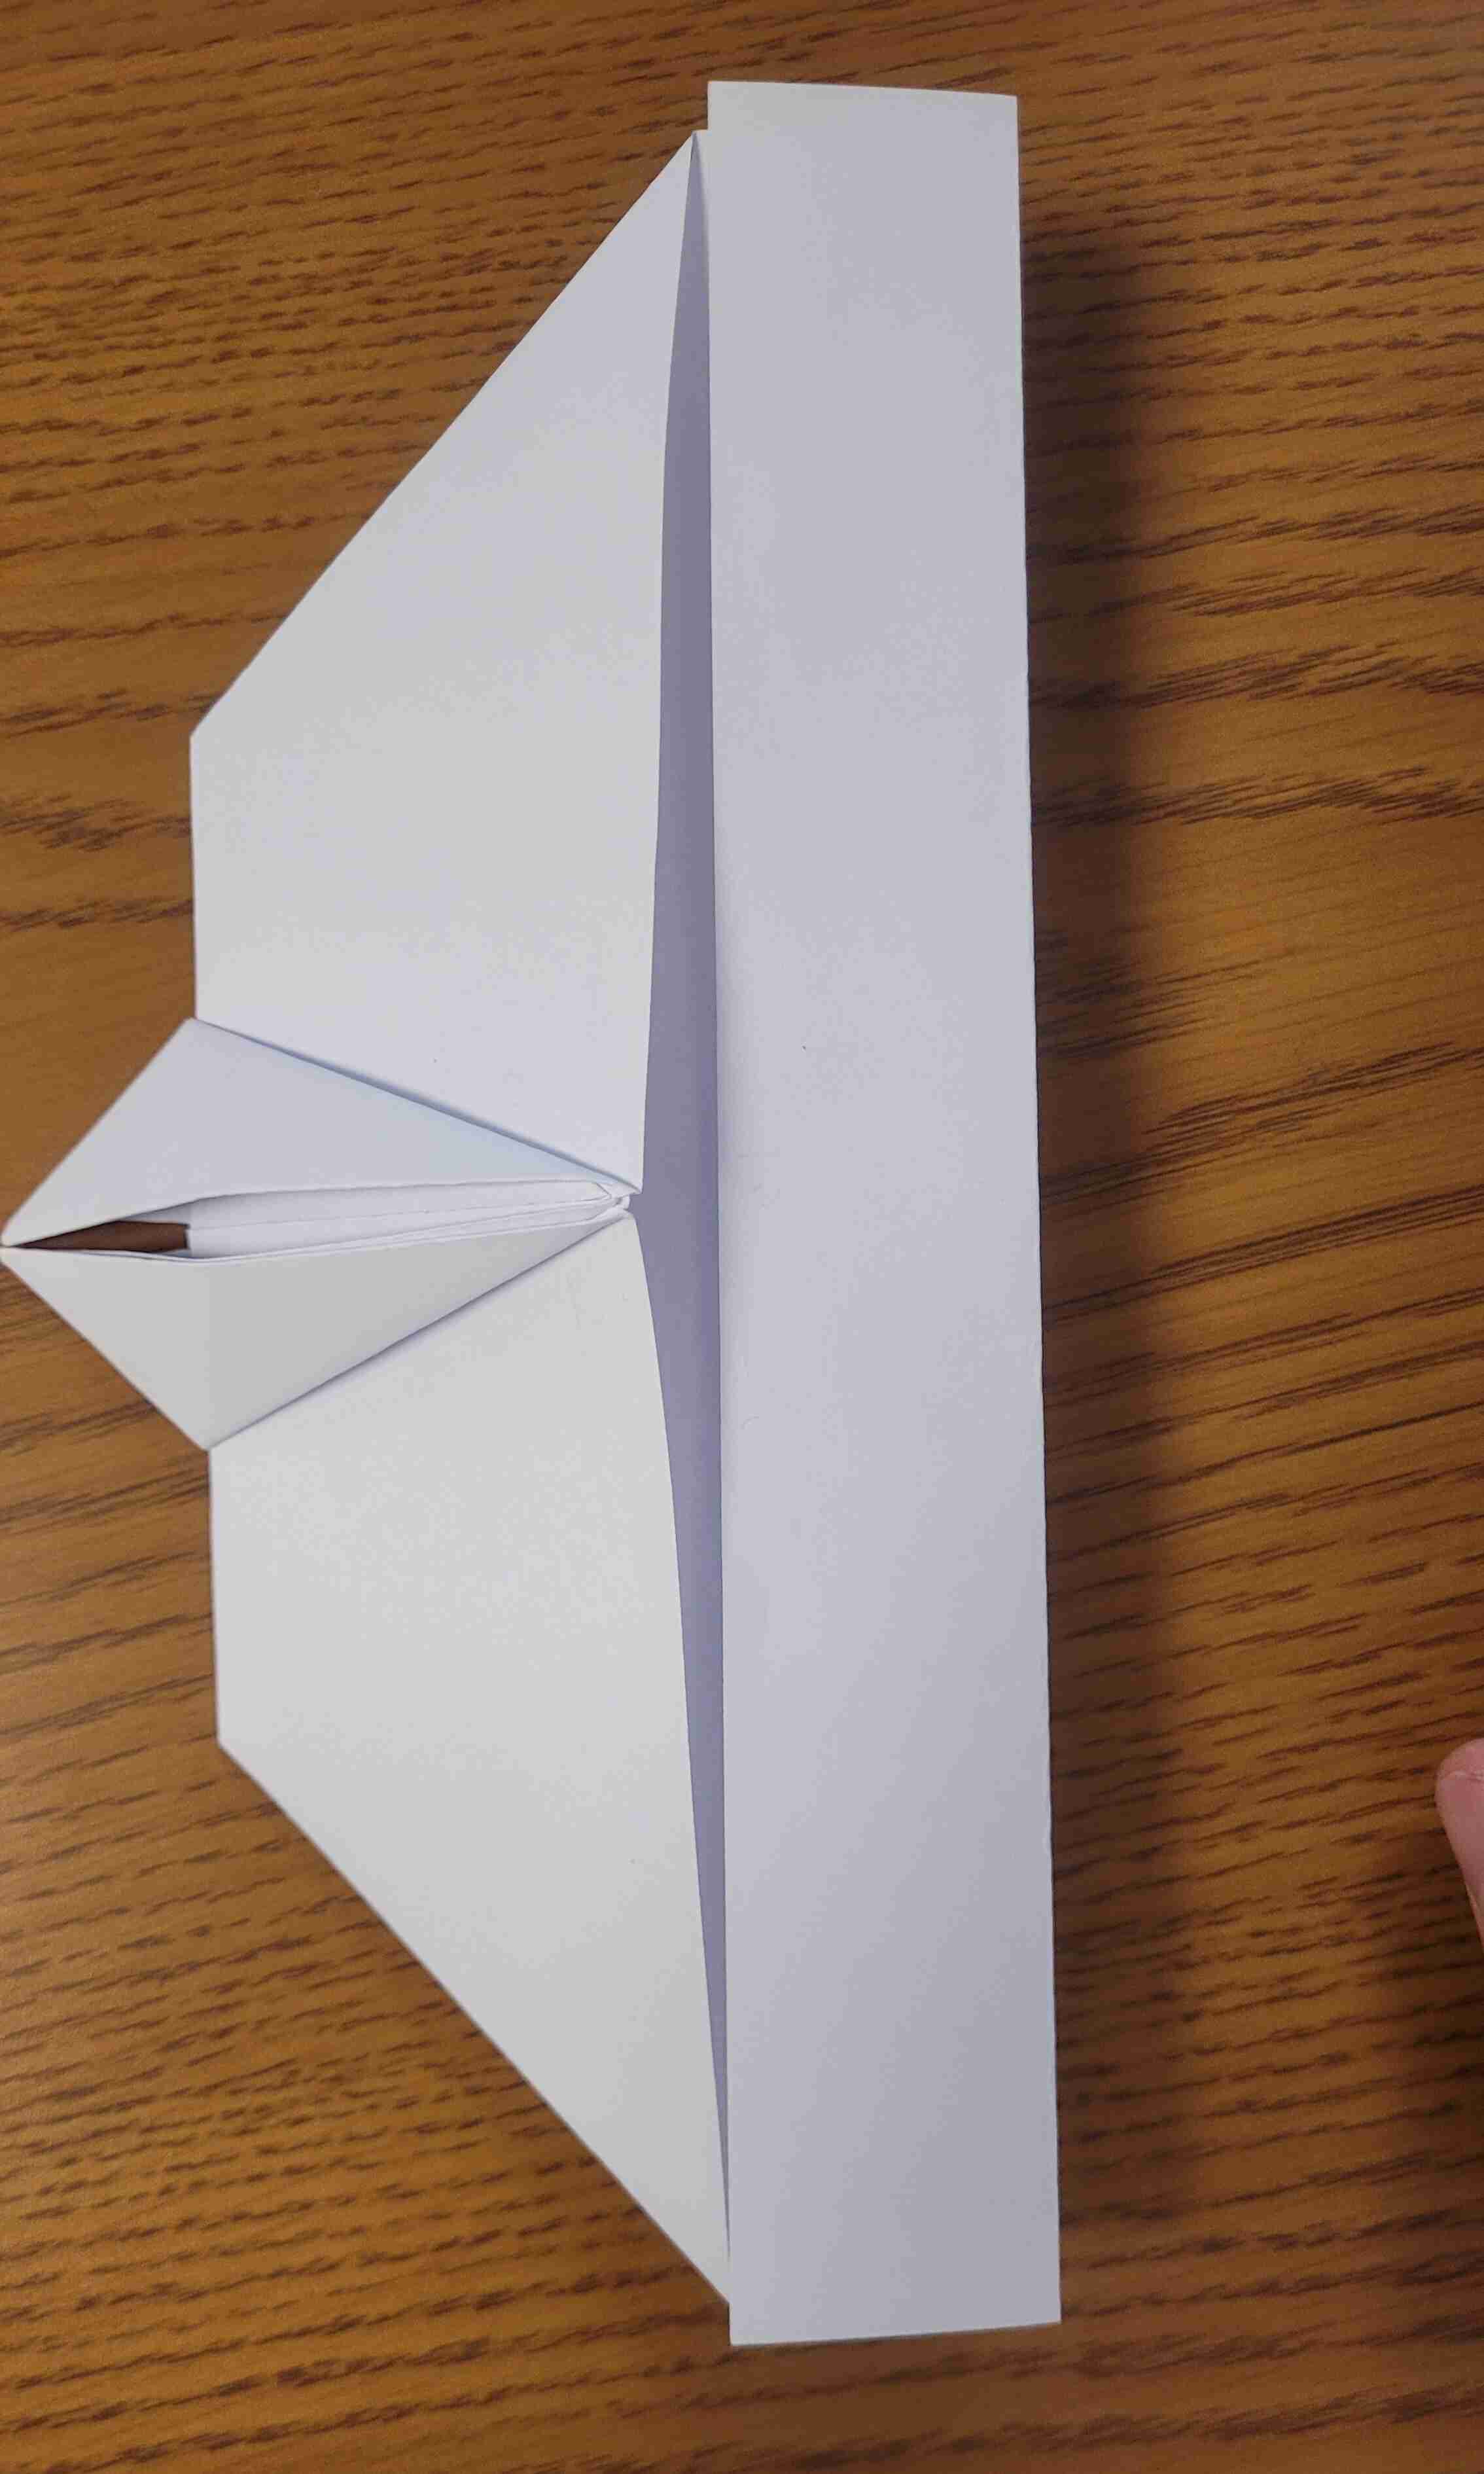
Step 14 - Flip over the paper and fold edge 13 along the crease that was just made.
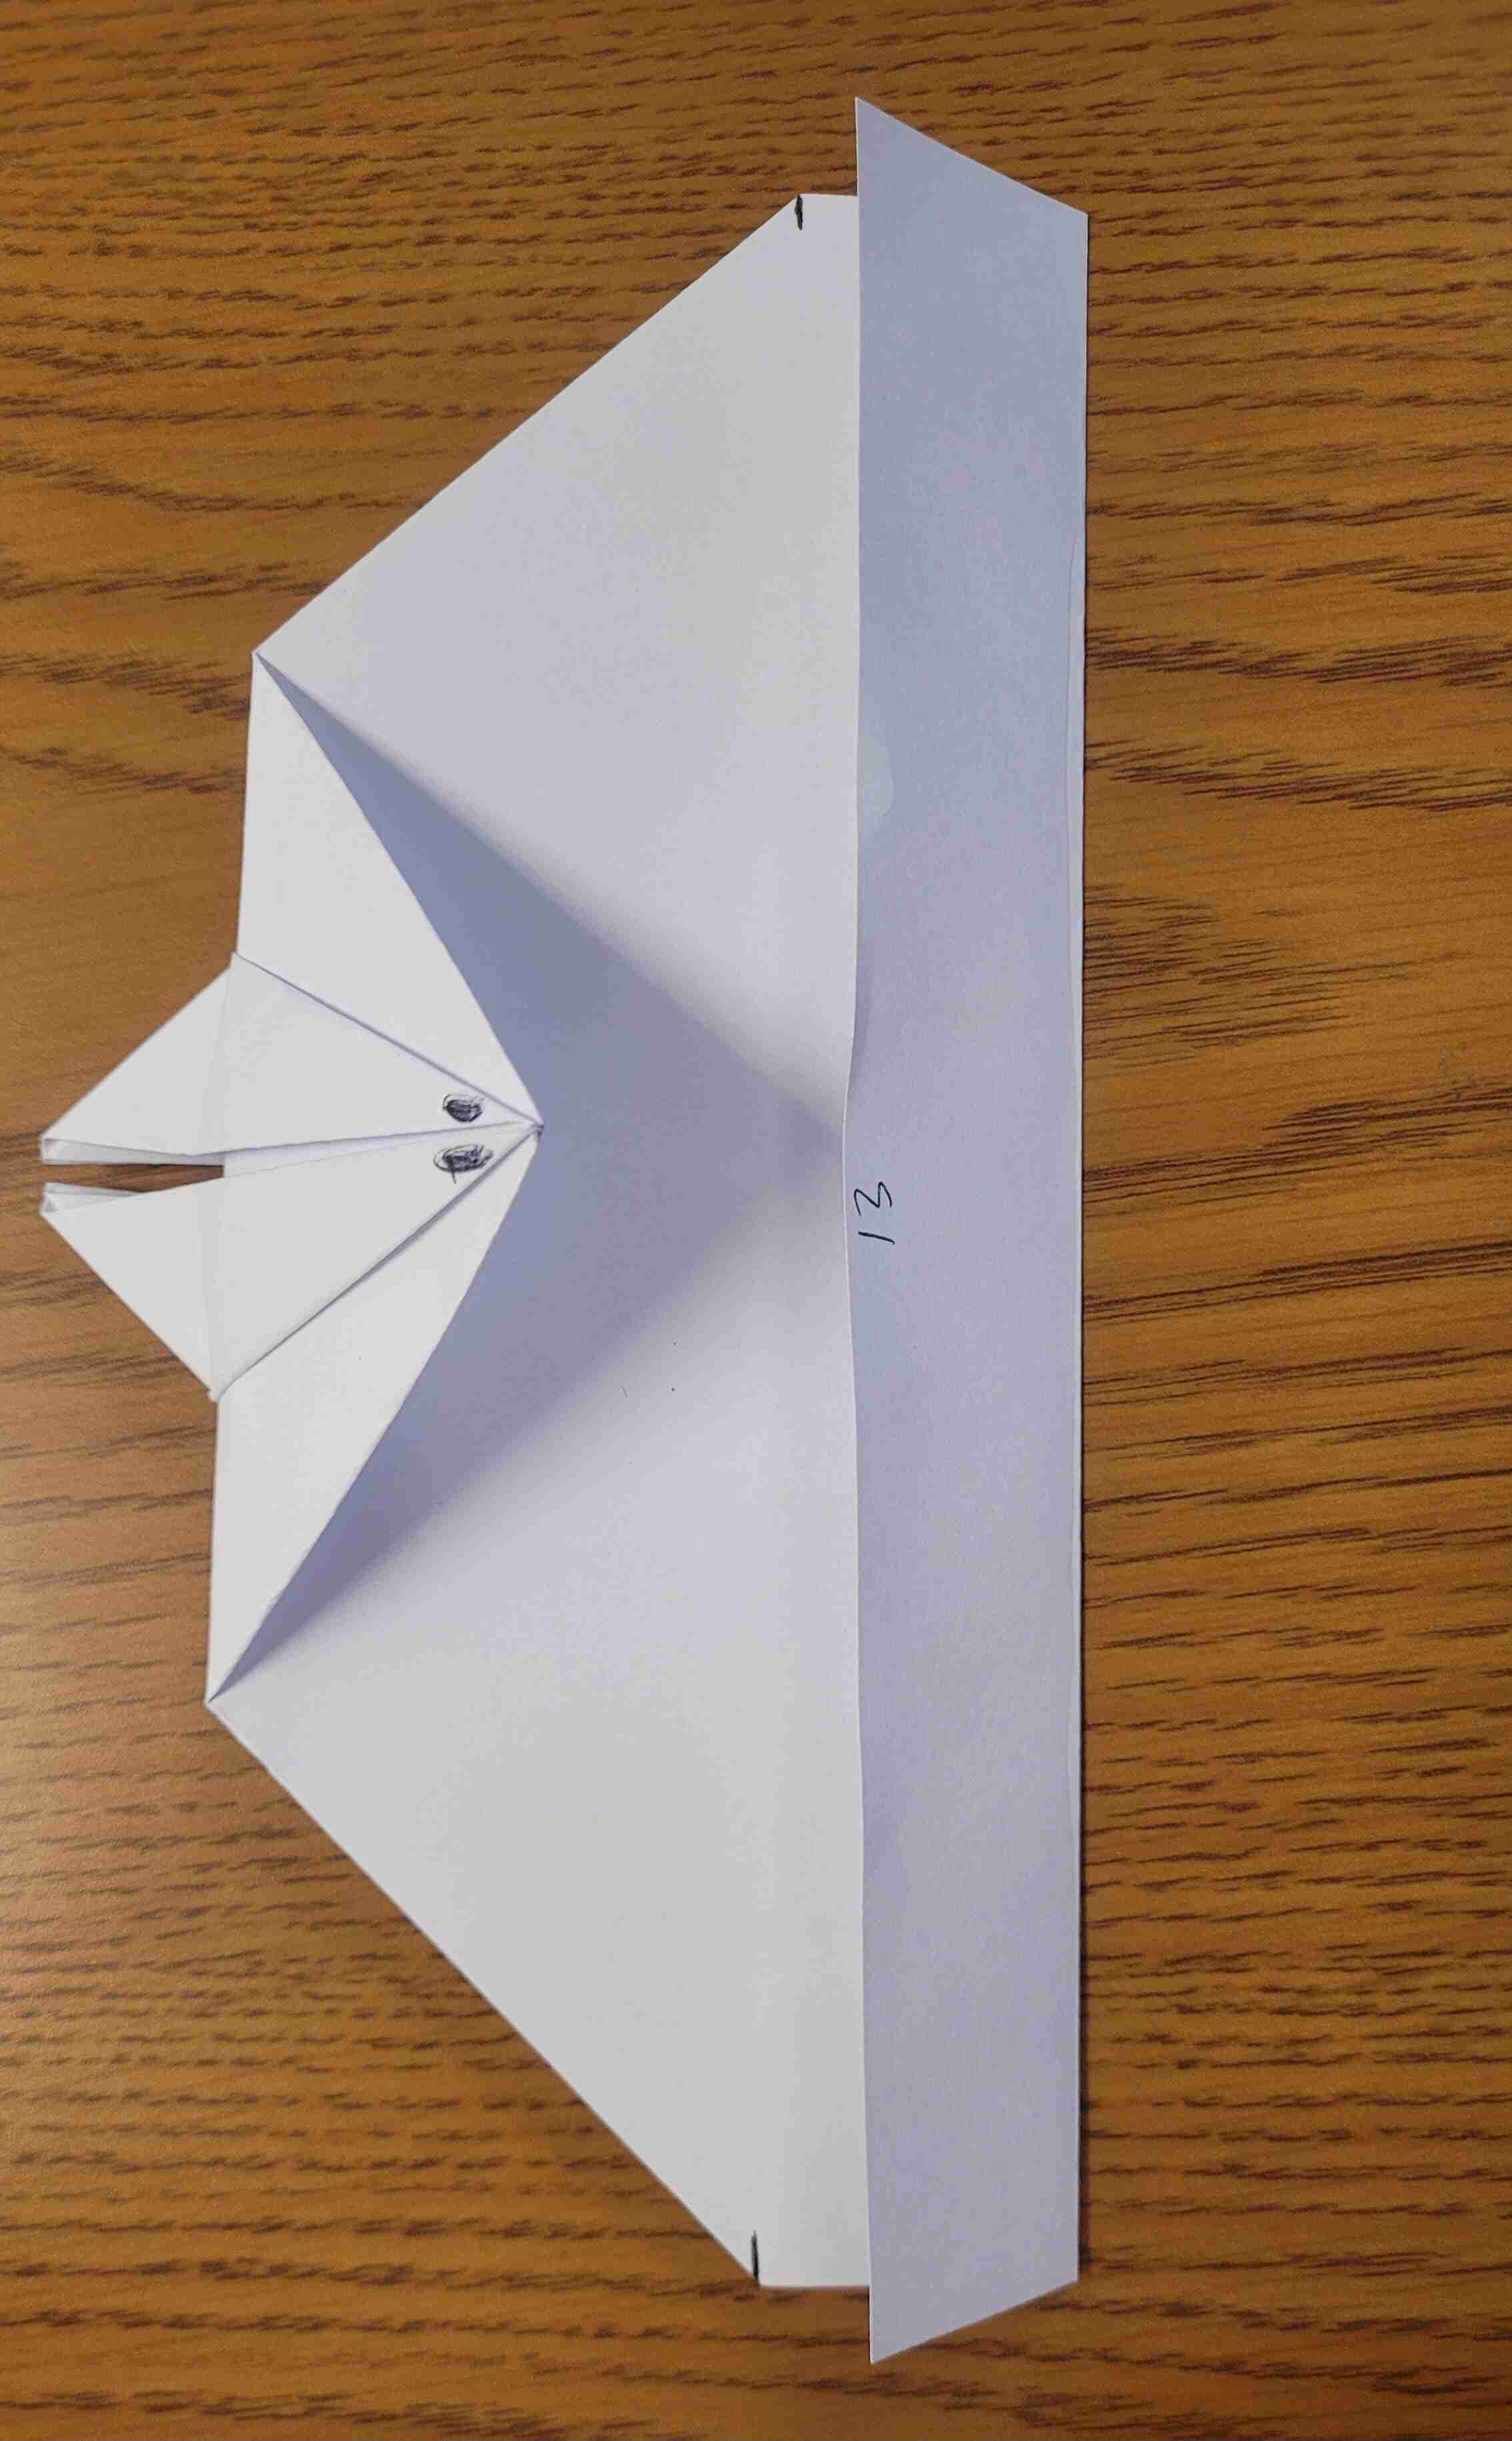
Repeat steps 13 and 14 a few times. This will weaken the paper along this crease which will allows us to tear it off easily. You can also fold once on step 13 and cut this section off with scissors, but tearing the paper is more fun.
Step 15 - Place the paper flat on a steady surface. Start the tear along the crease, then press down flat on the table and slowly pull apart the paper along the crease. Save this piece of paper, it will become the tail.
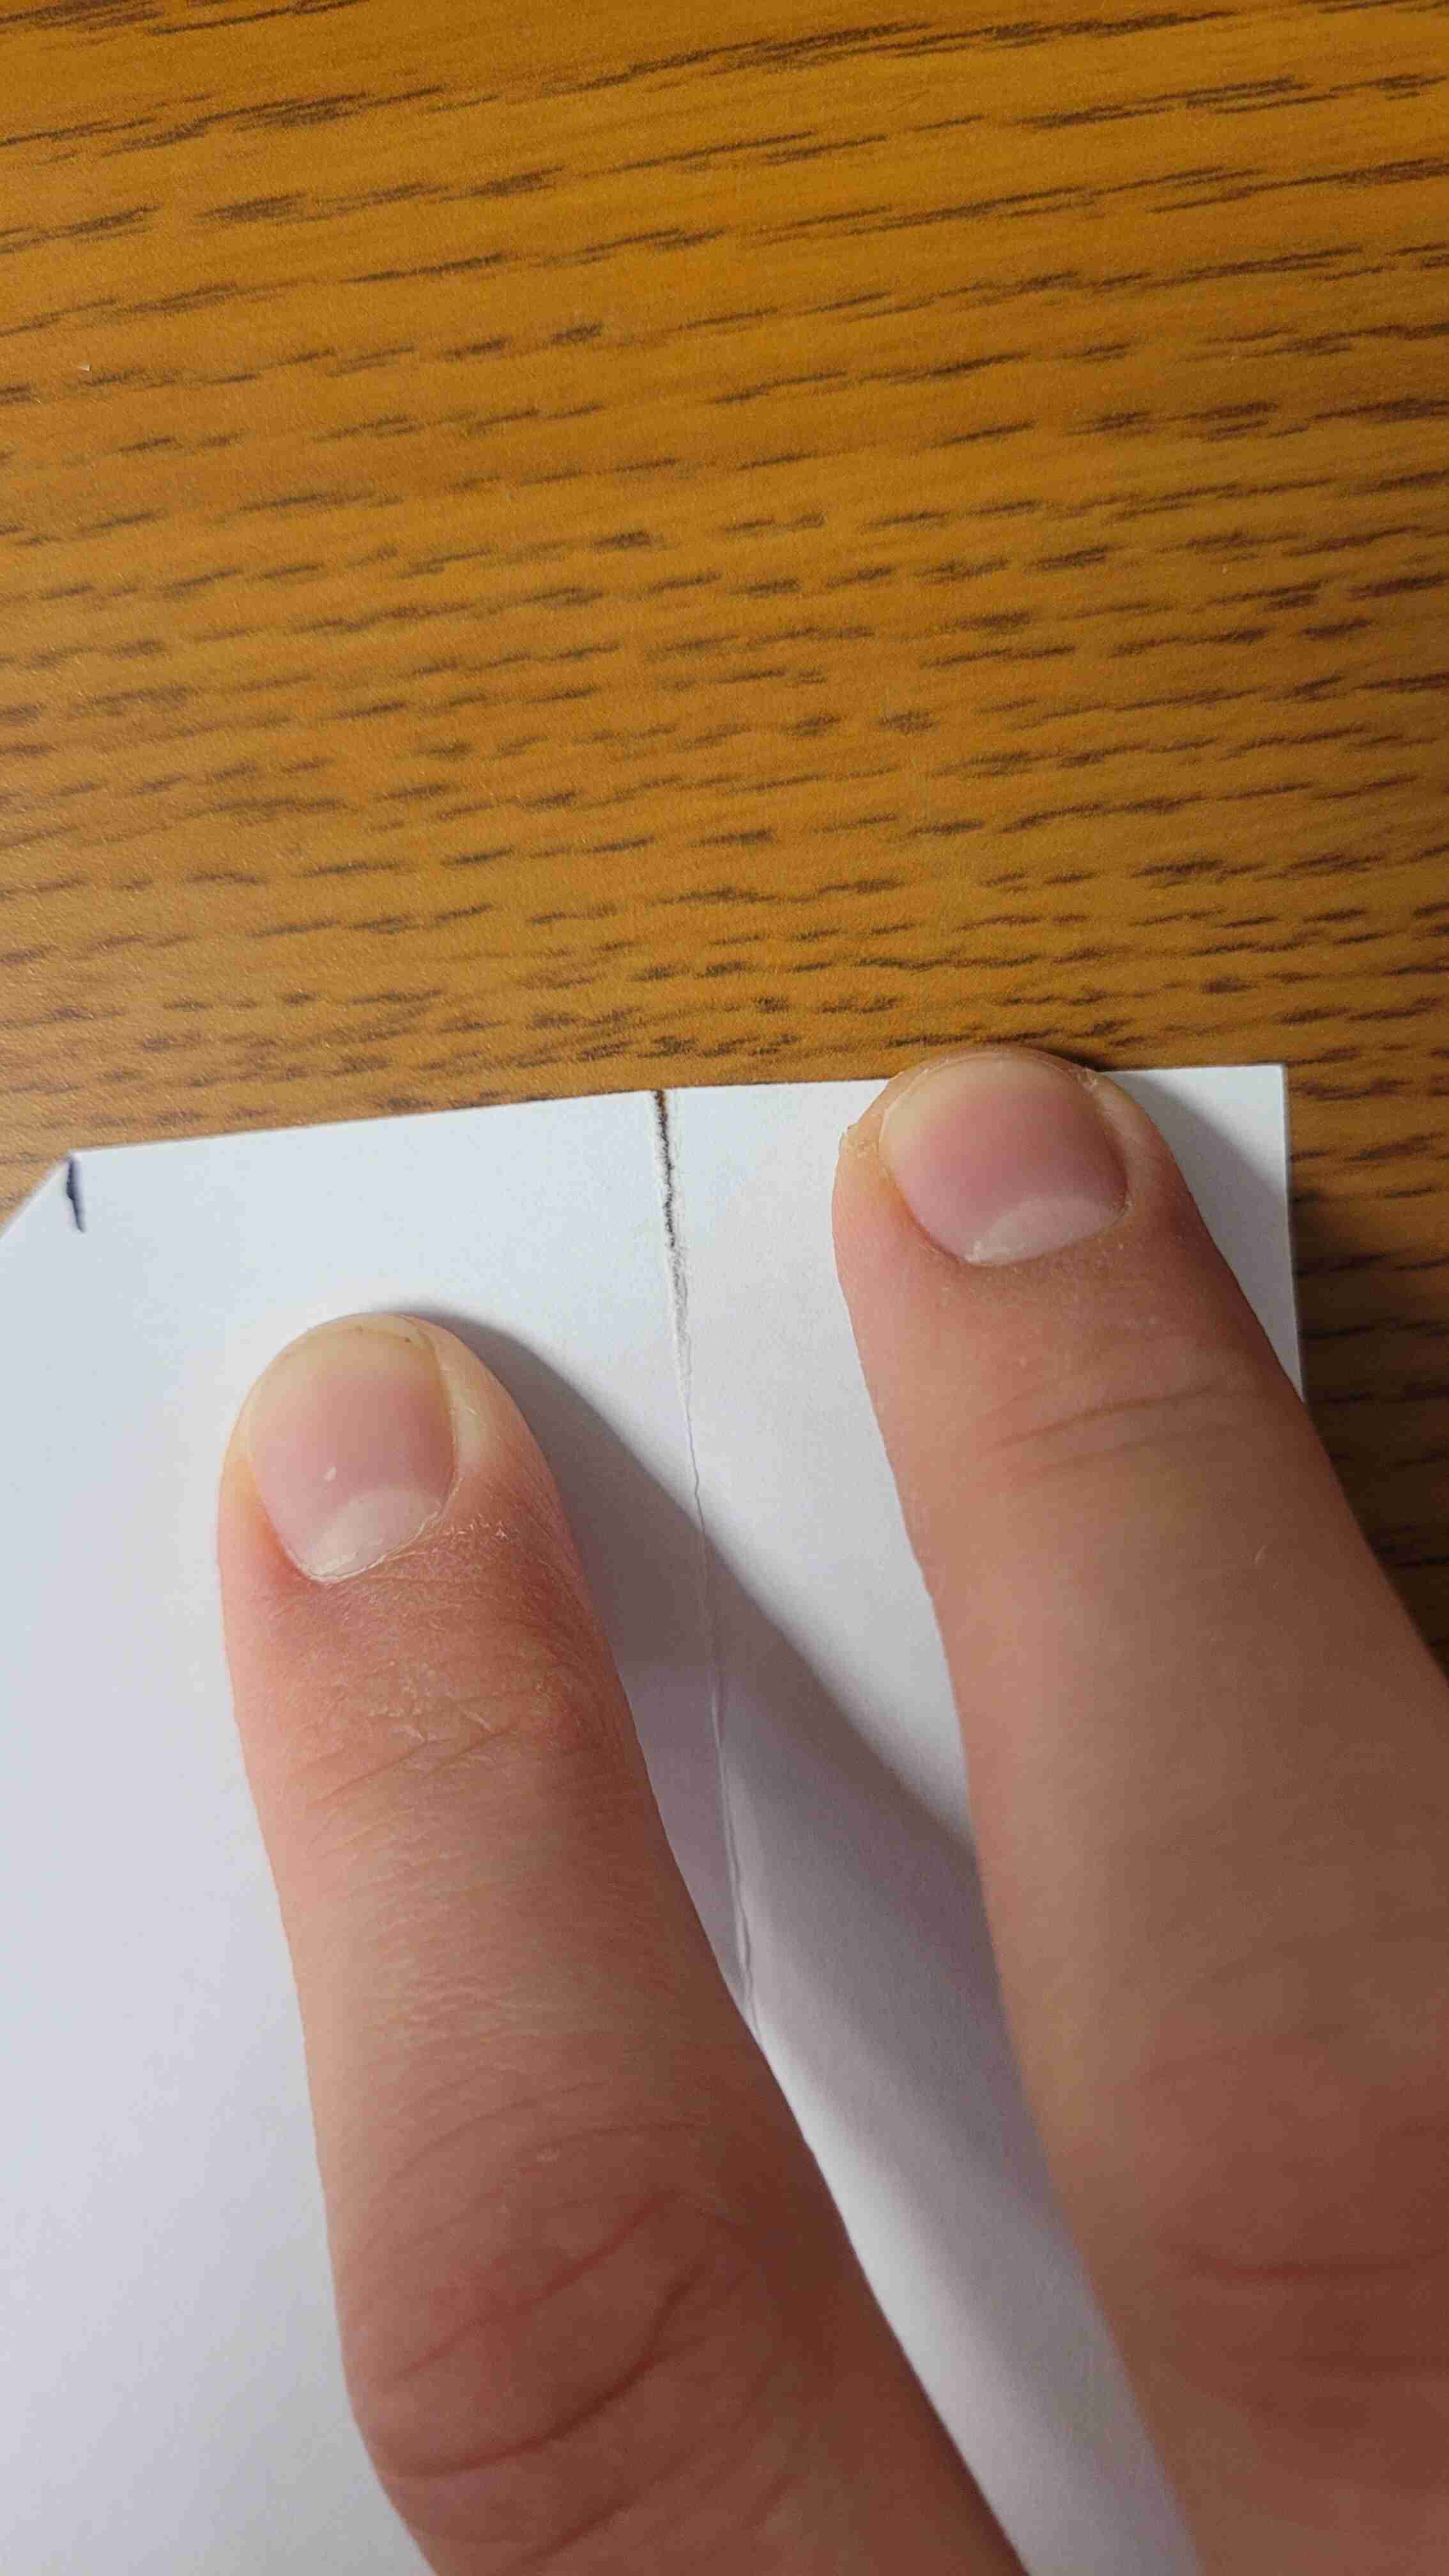
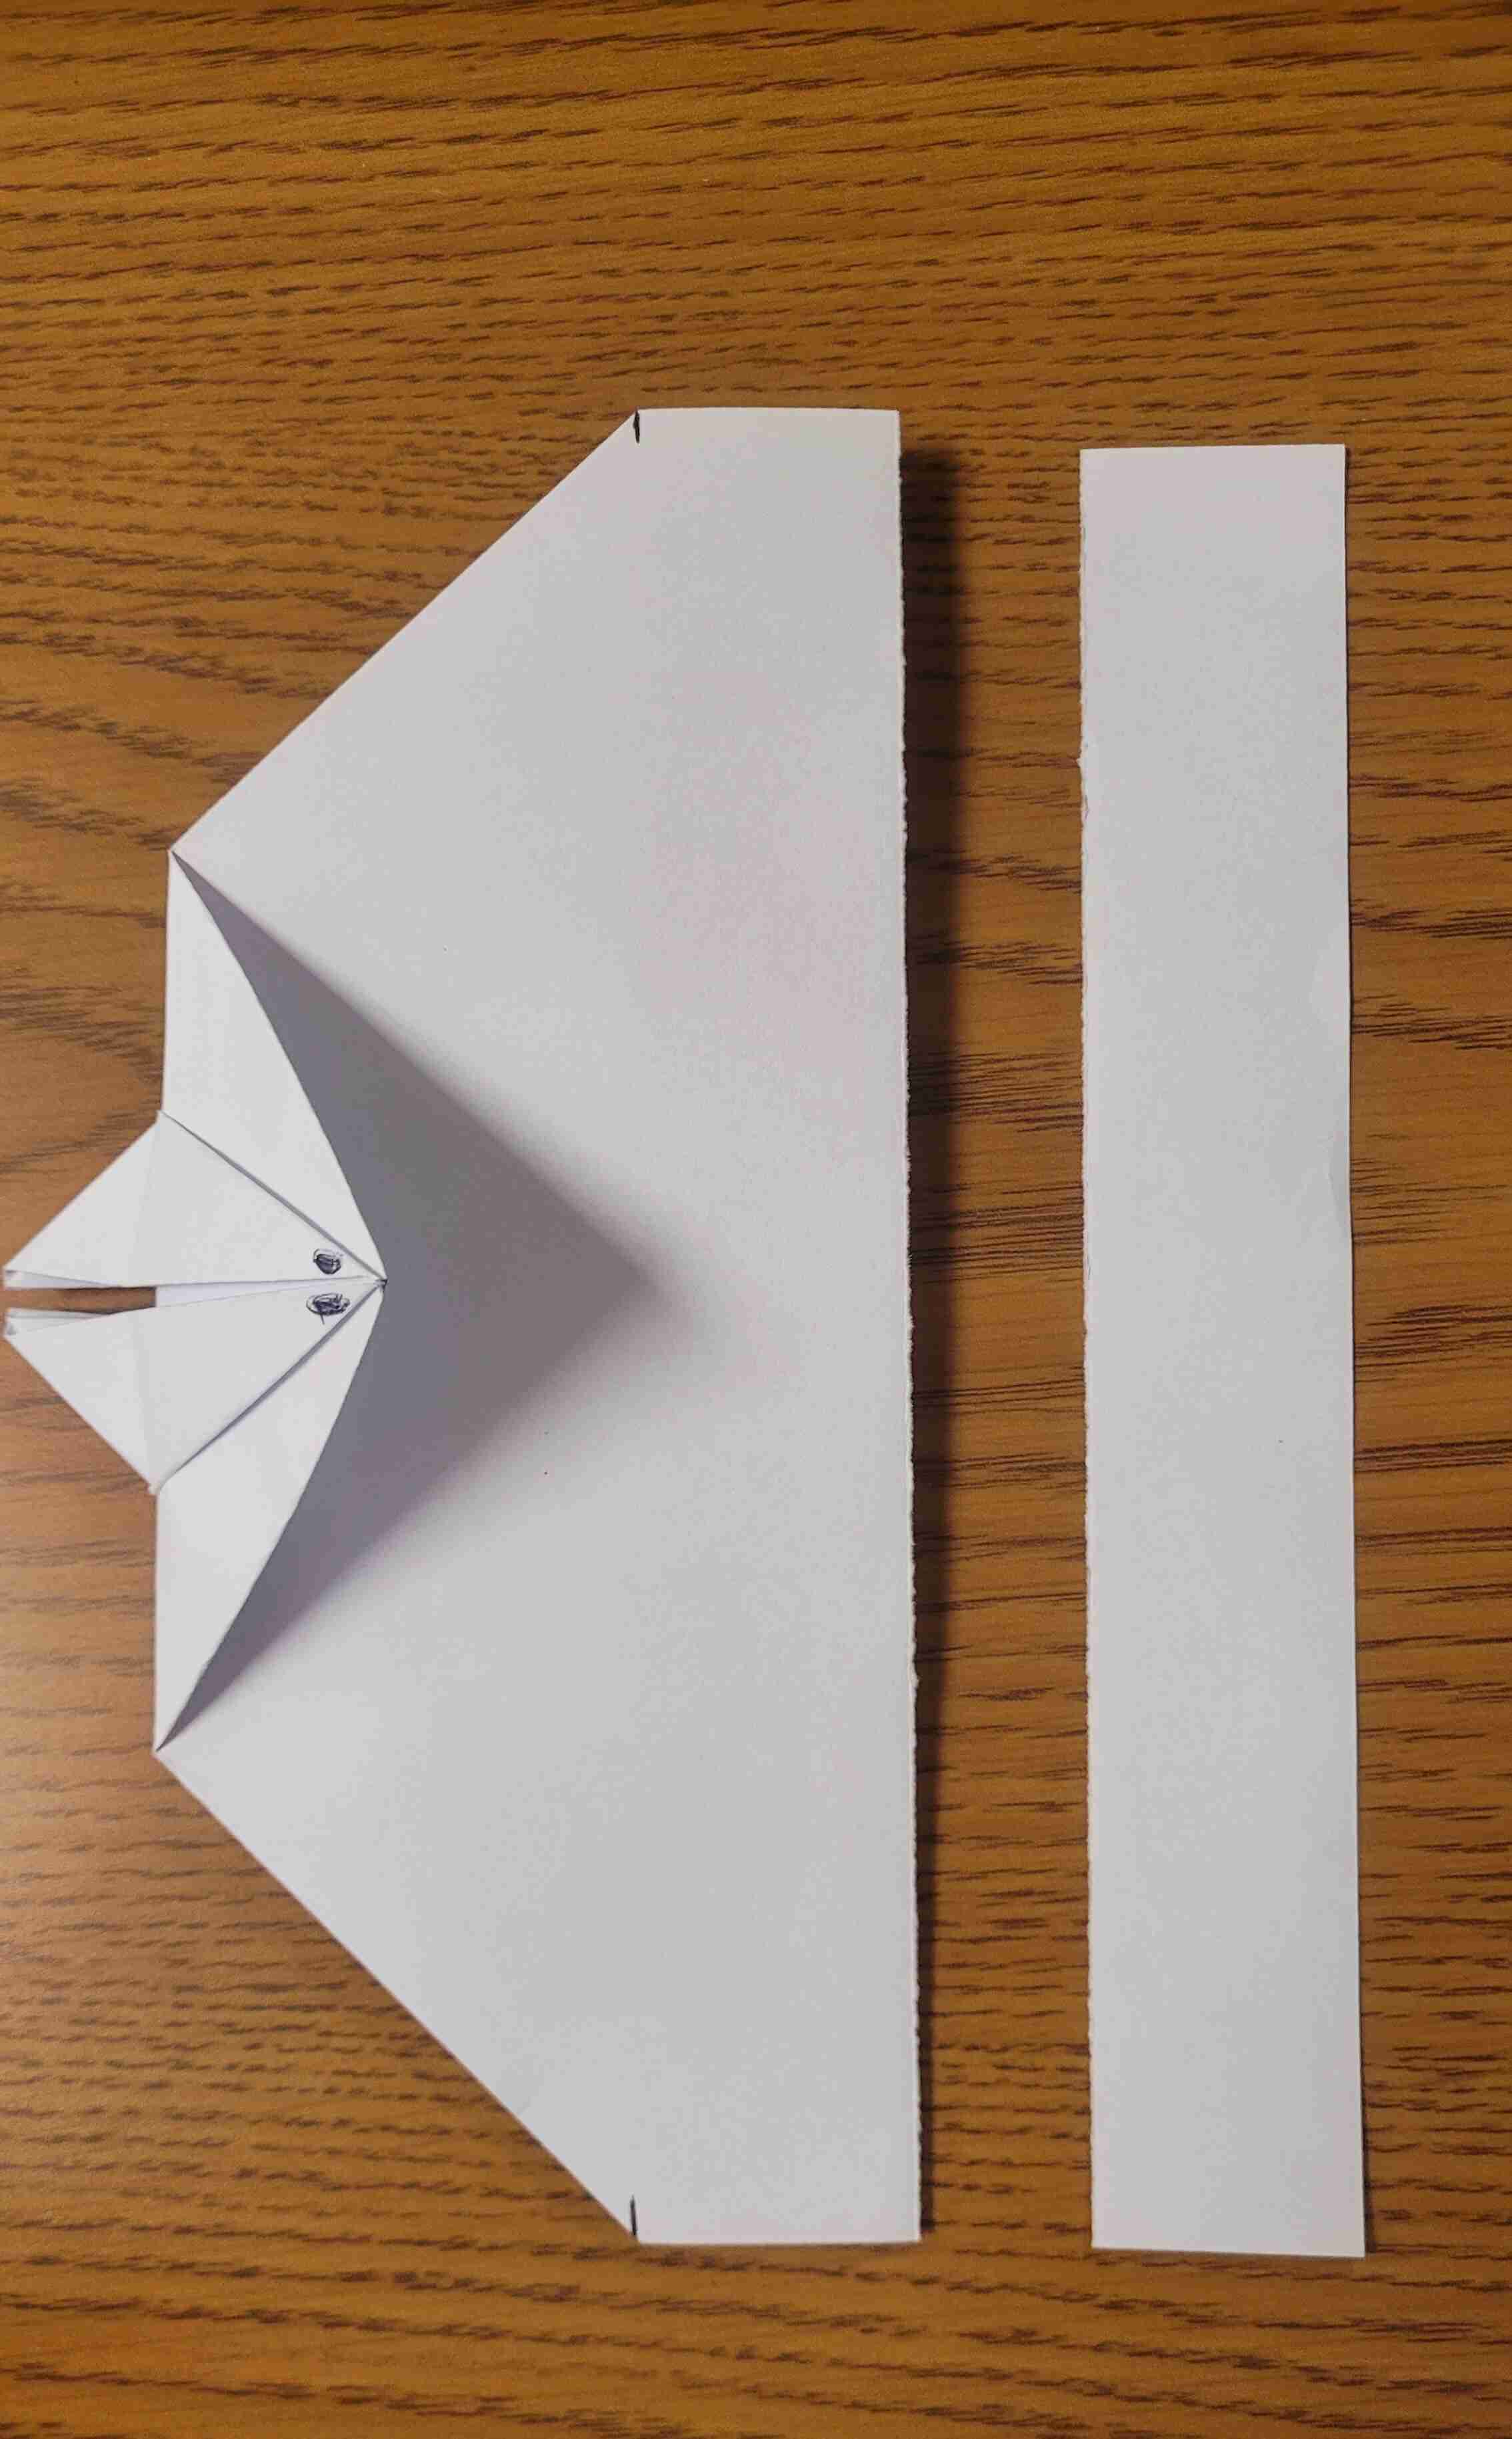
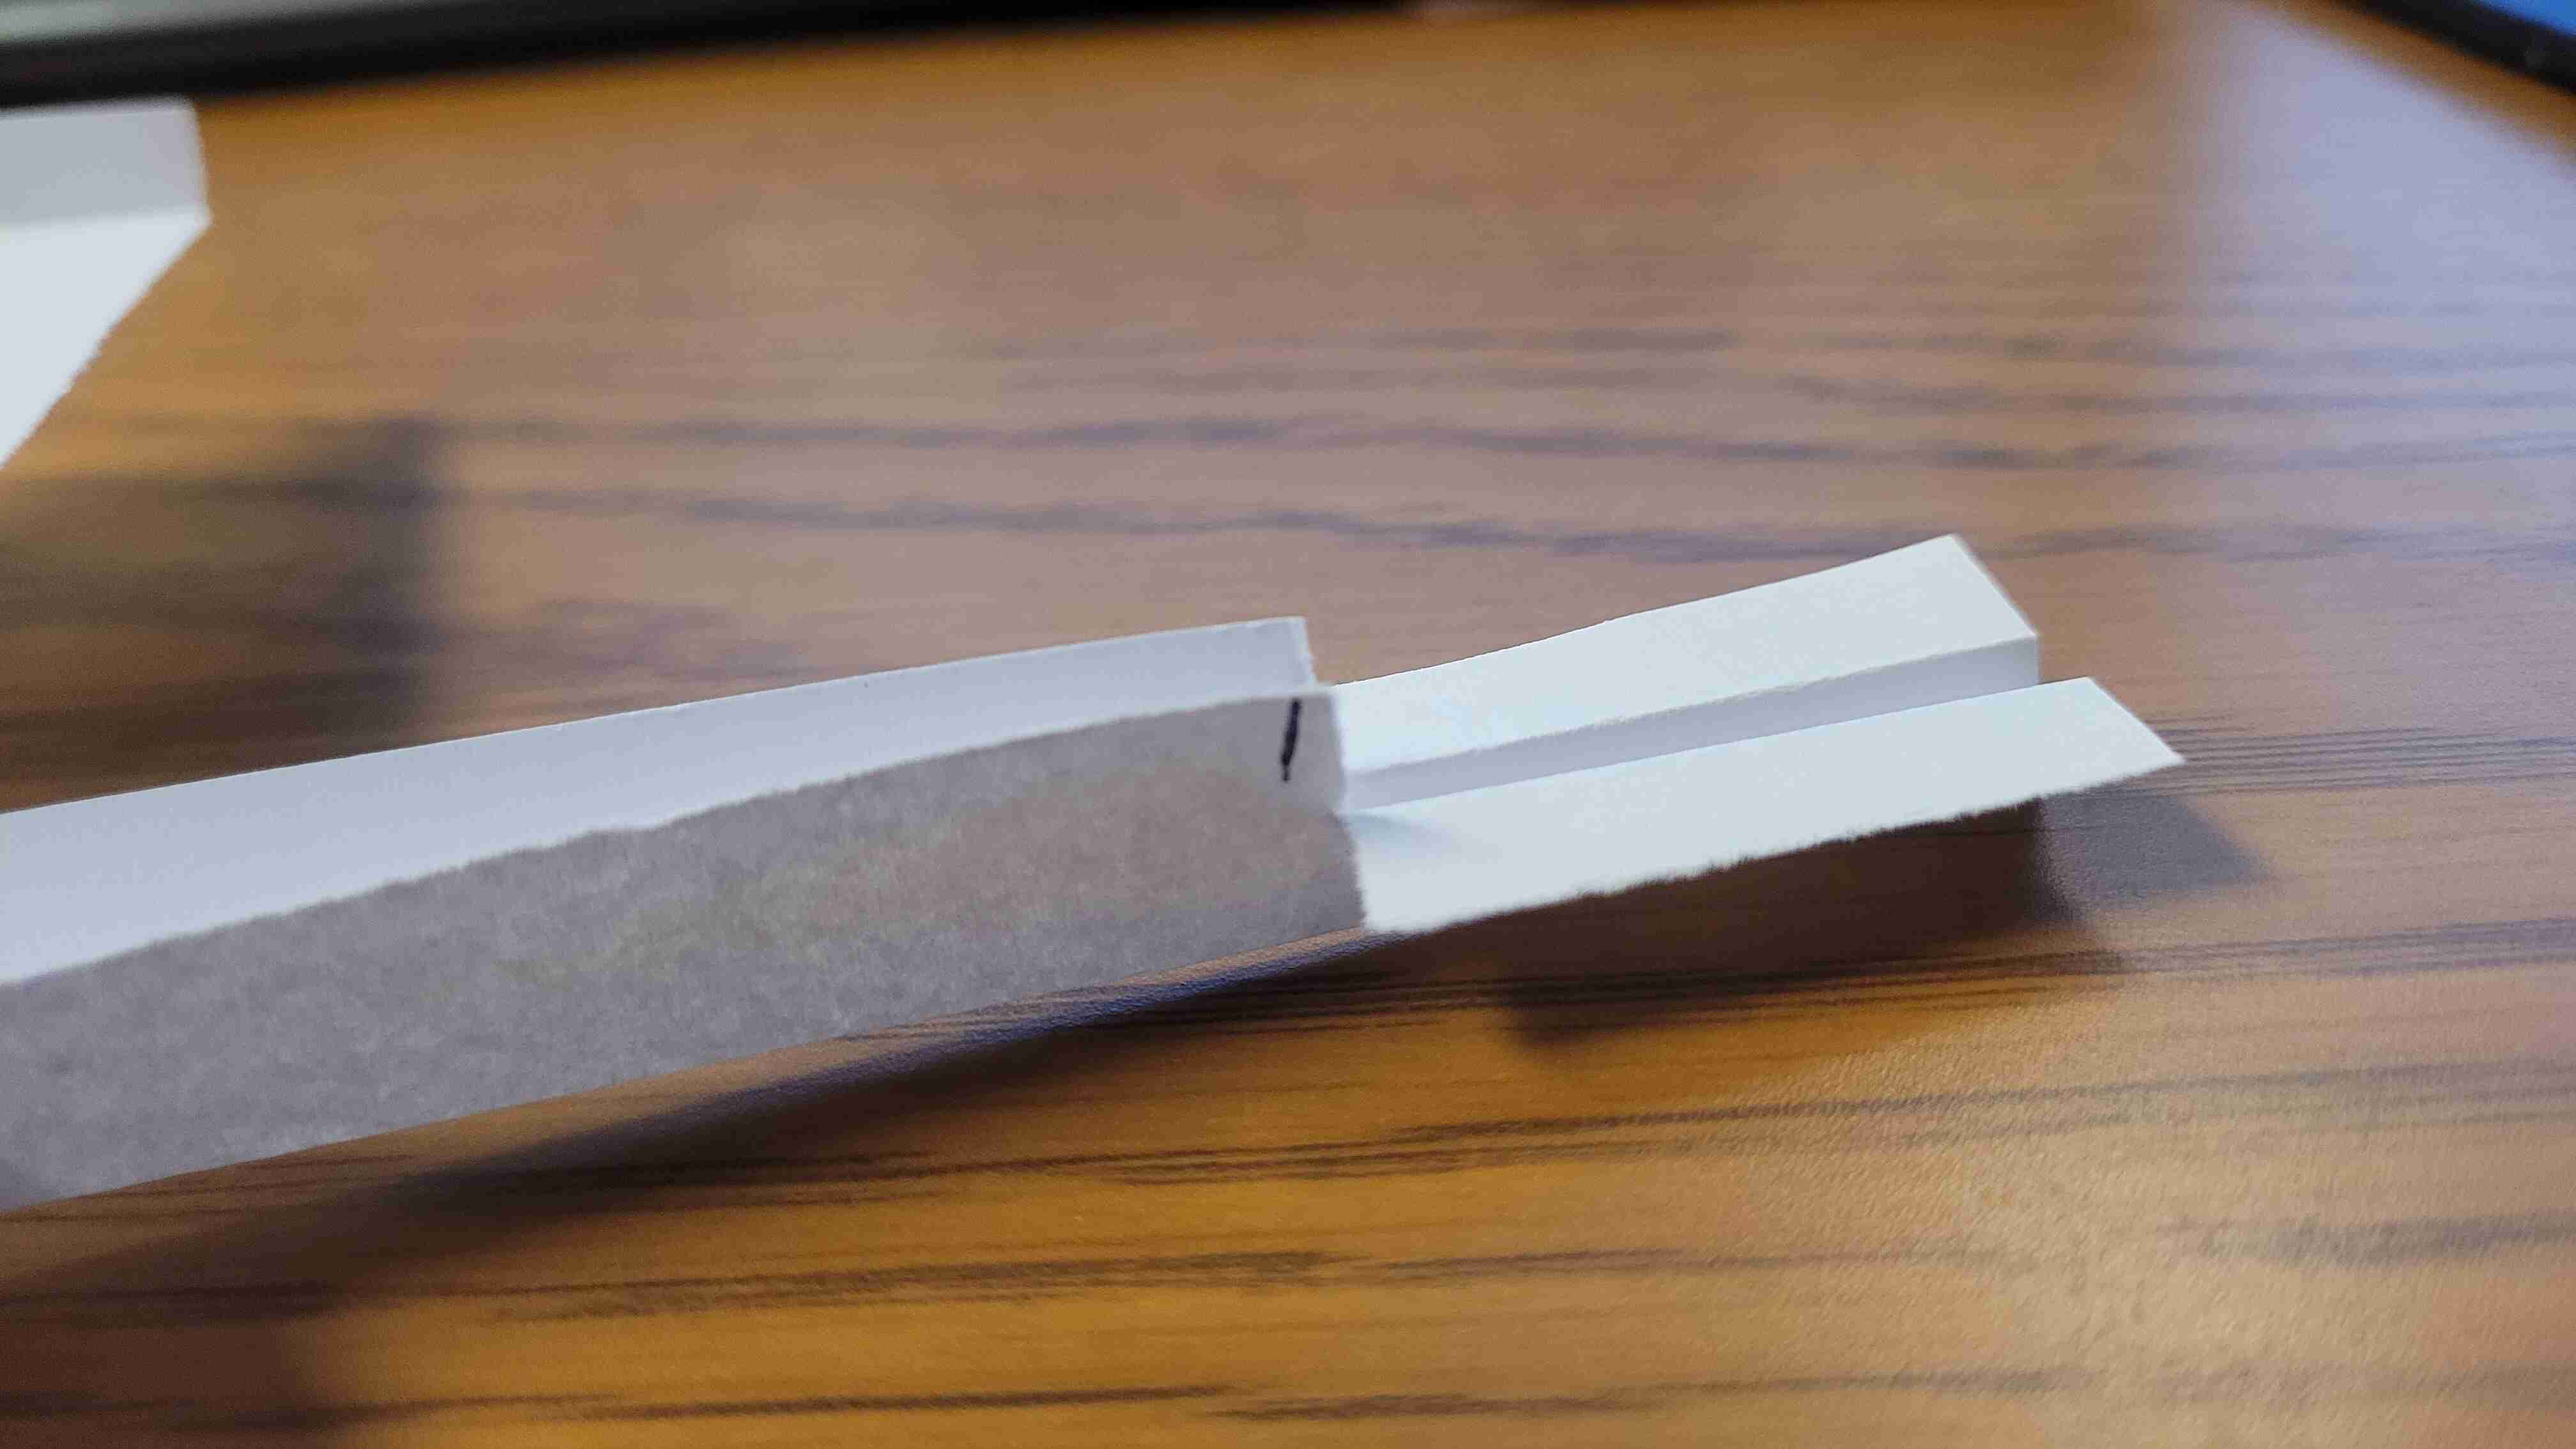
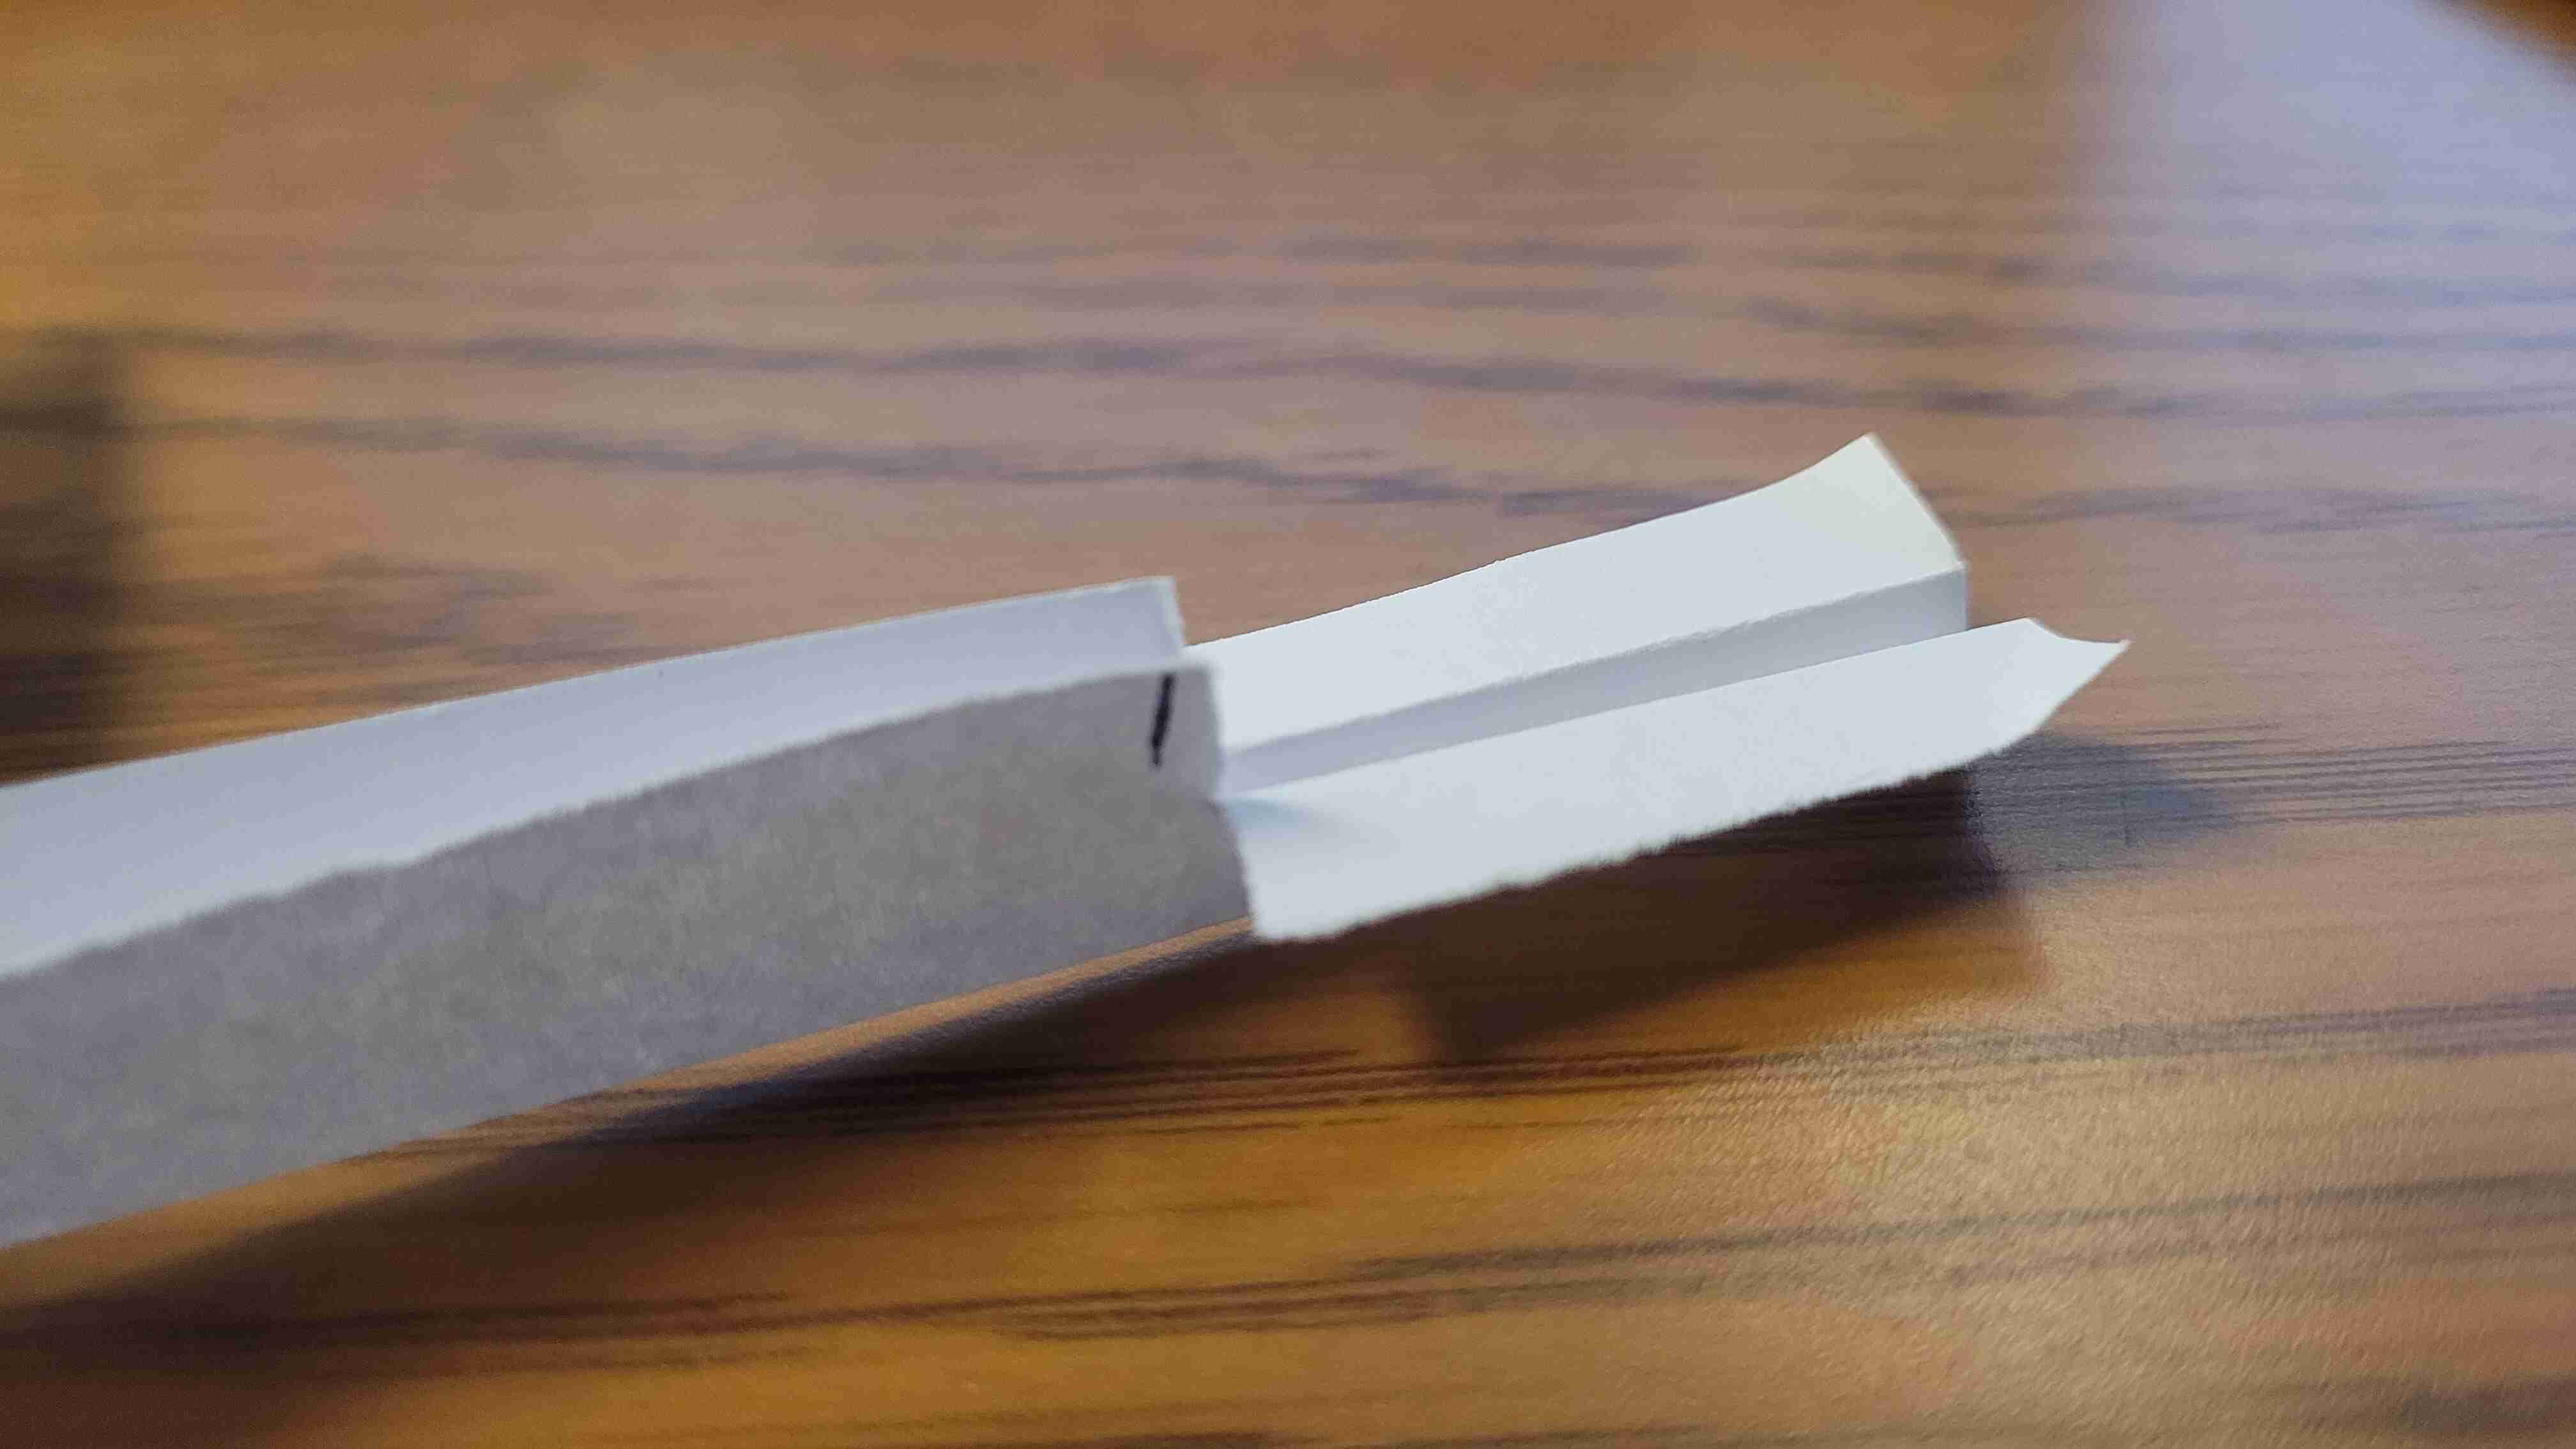
Step 16 - Take the torn off piece of paper and fold it in half along the longer edge.
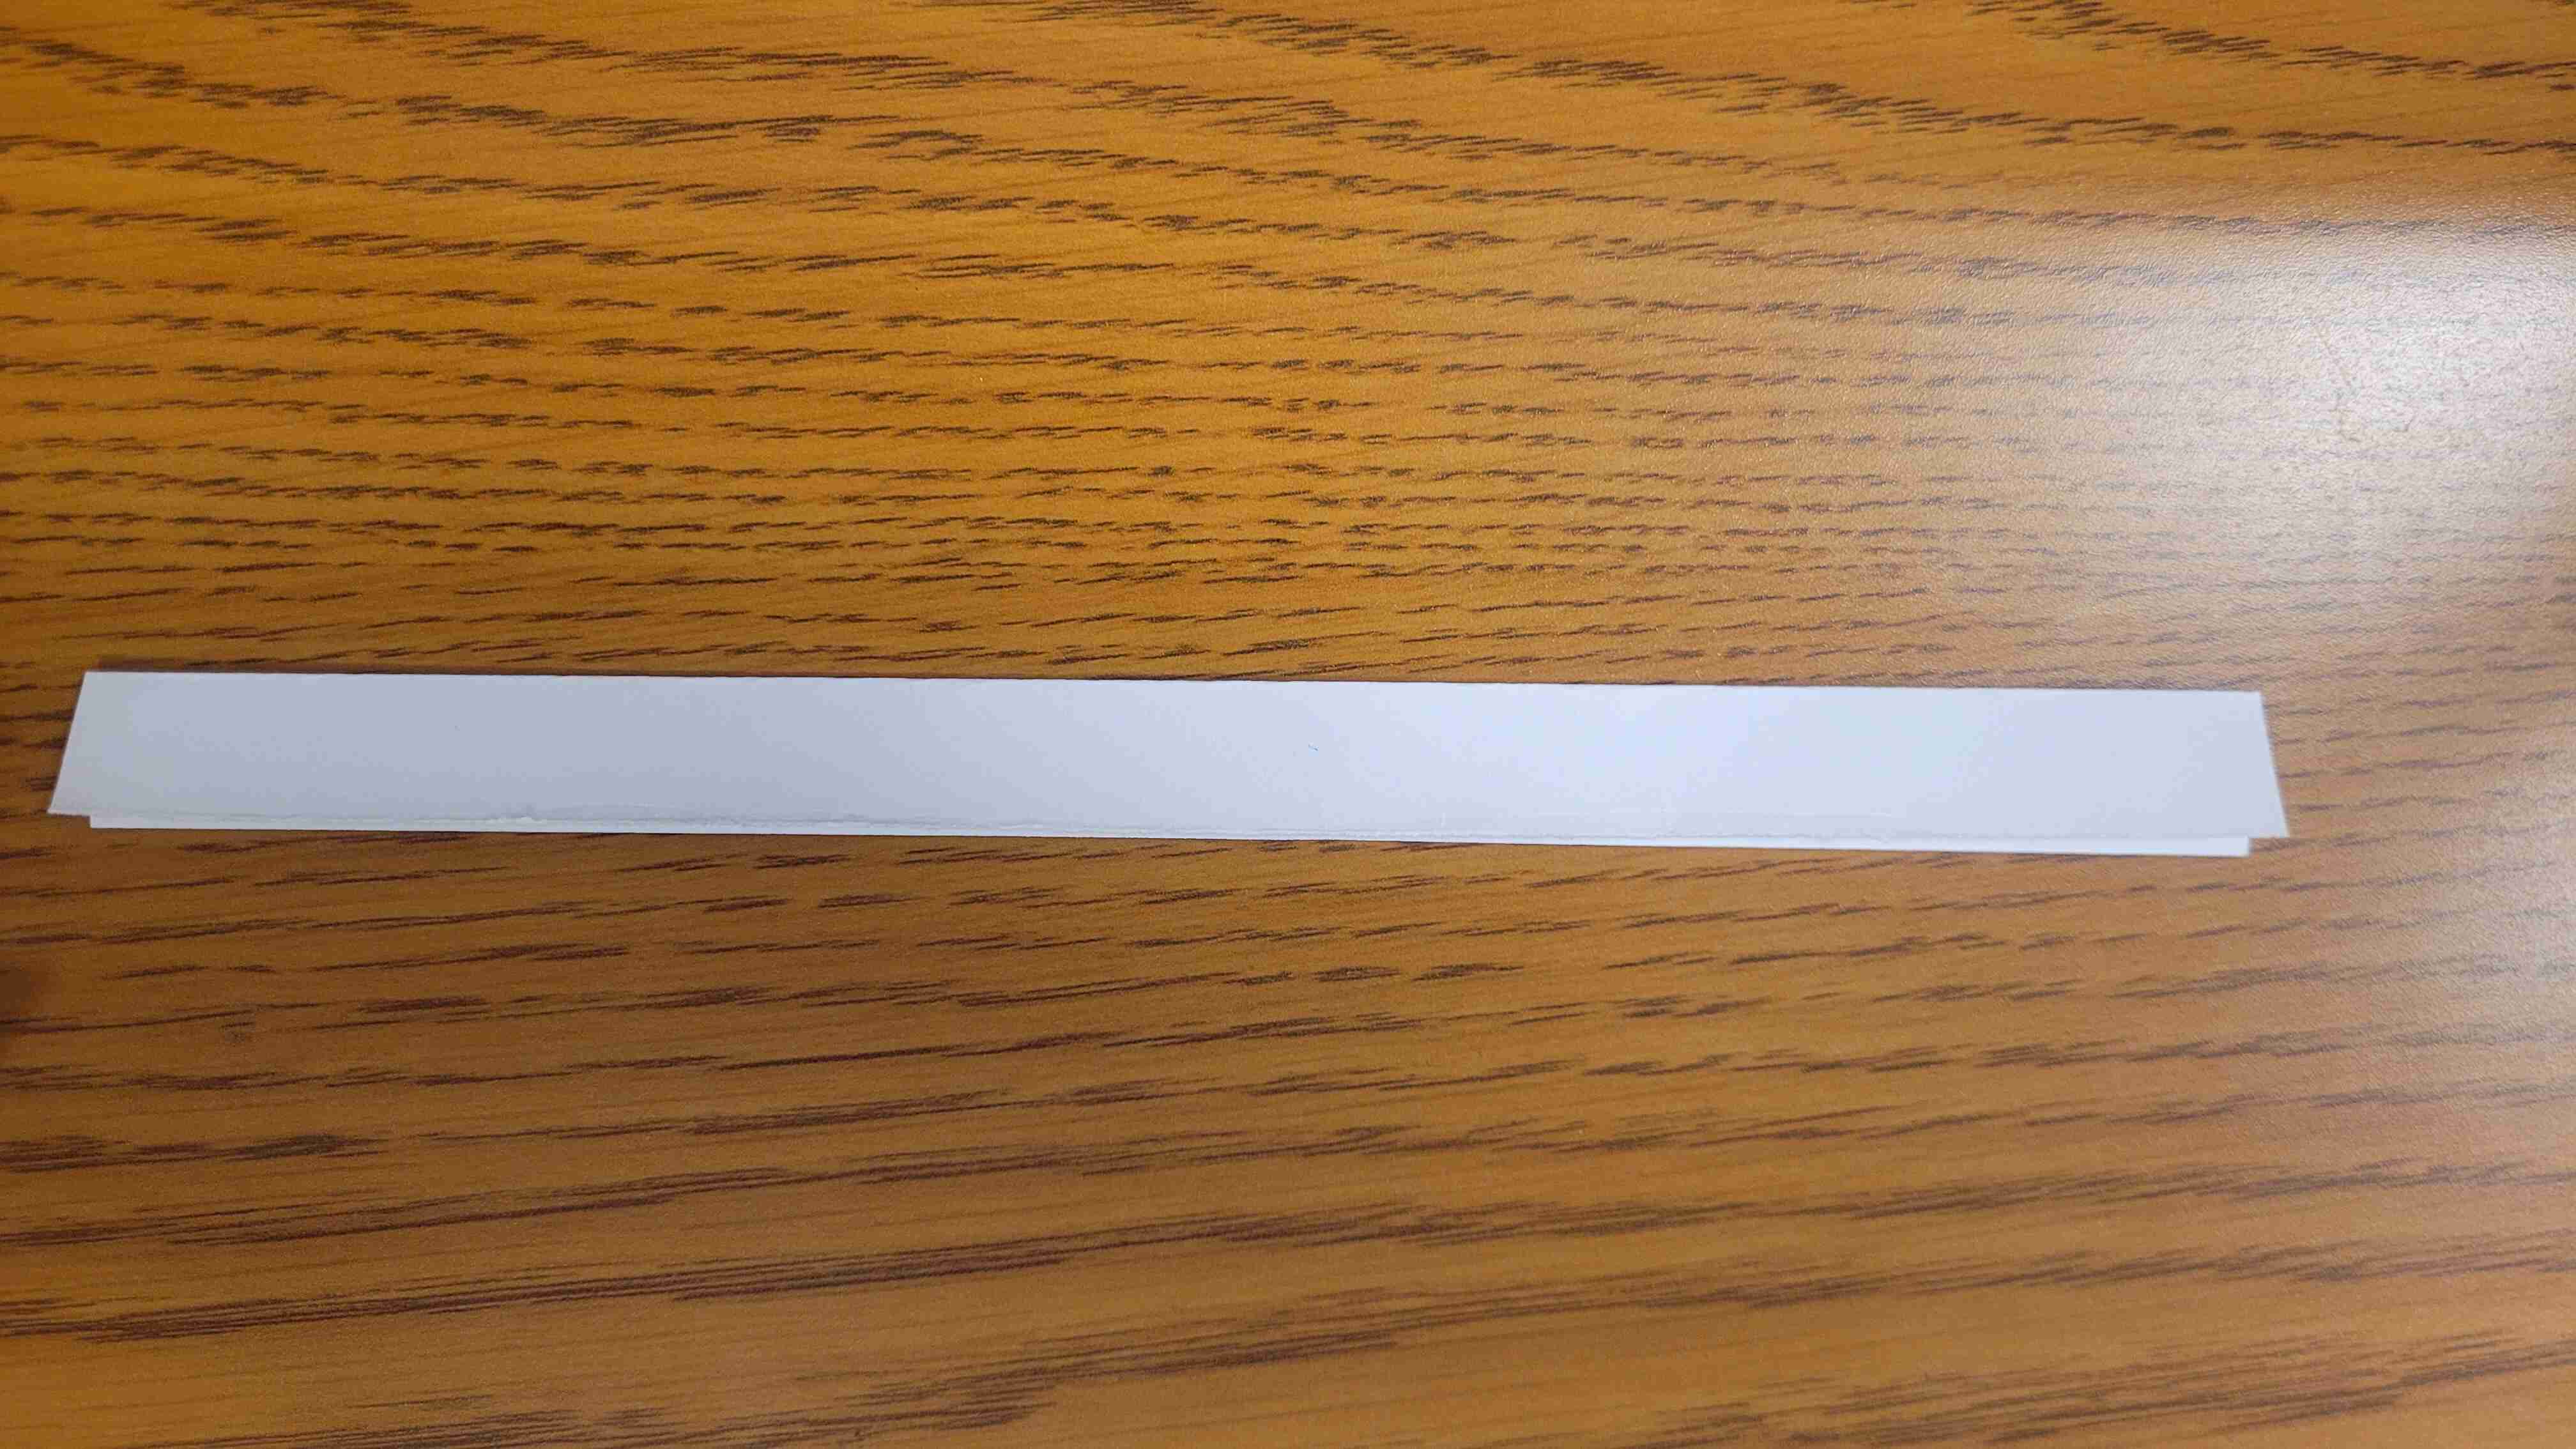
Step 17 - Fold back about 1 inch of any side and press it into the center of the fold from the previous step.
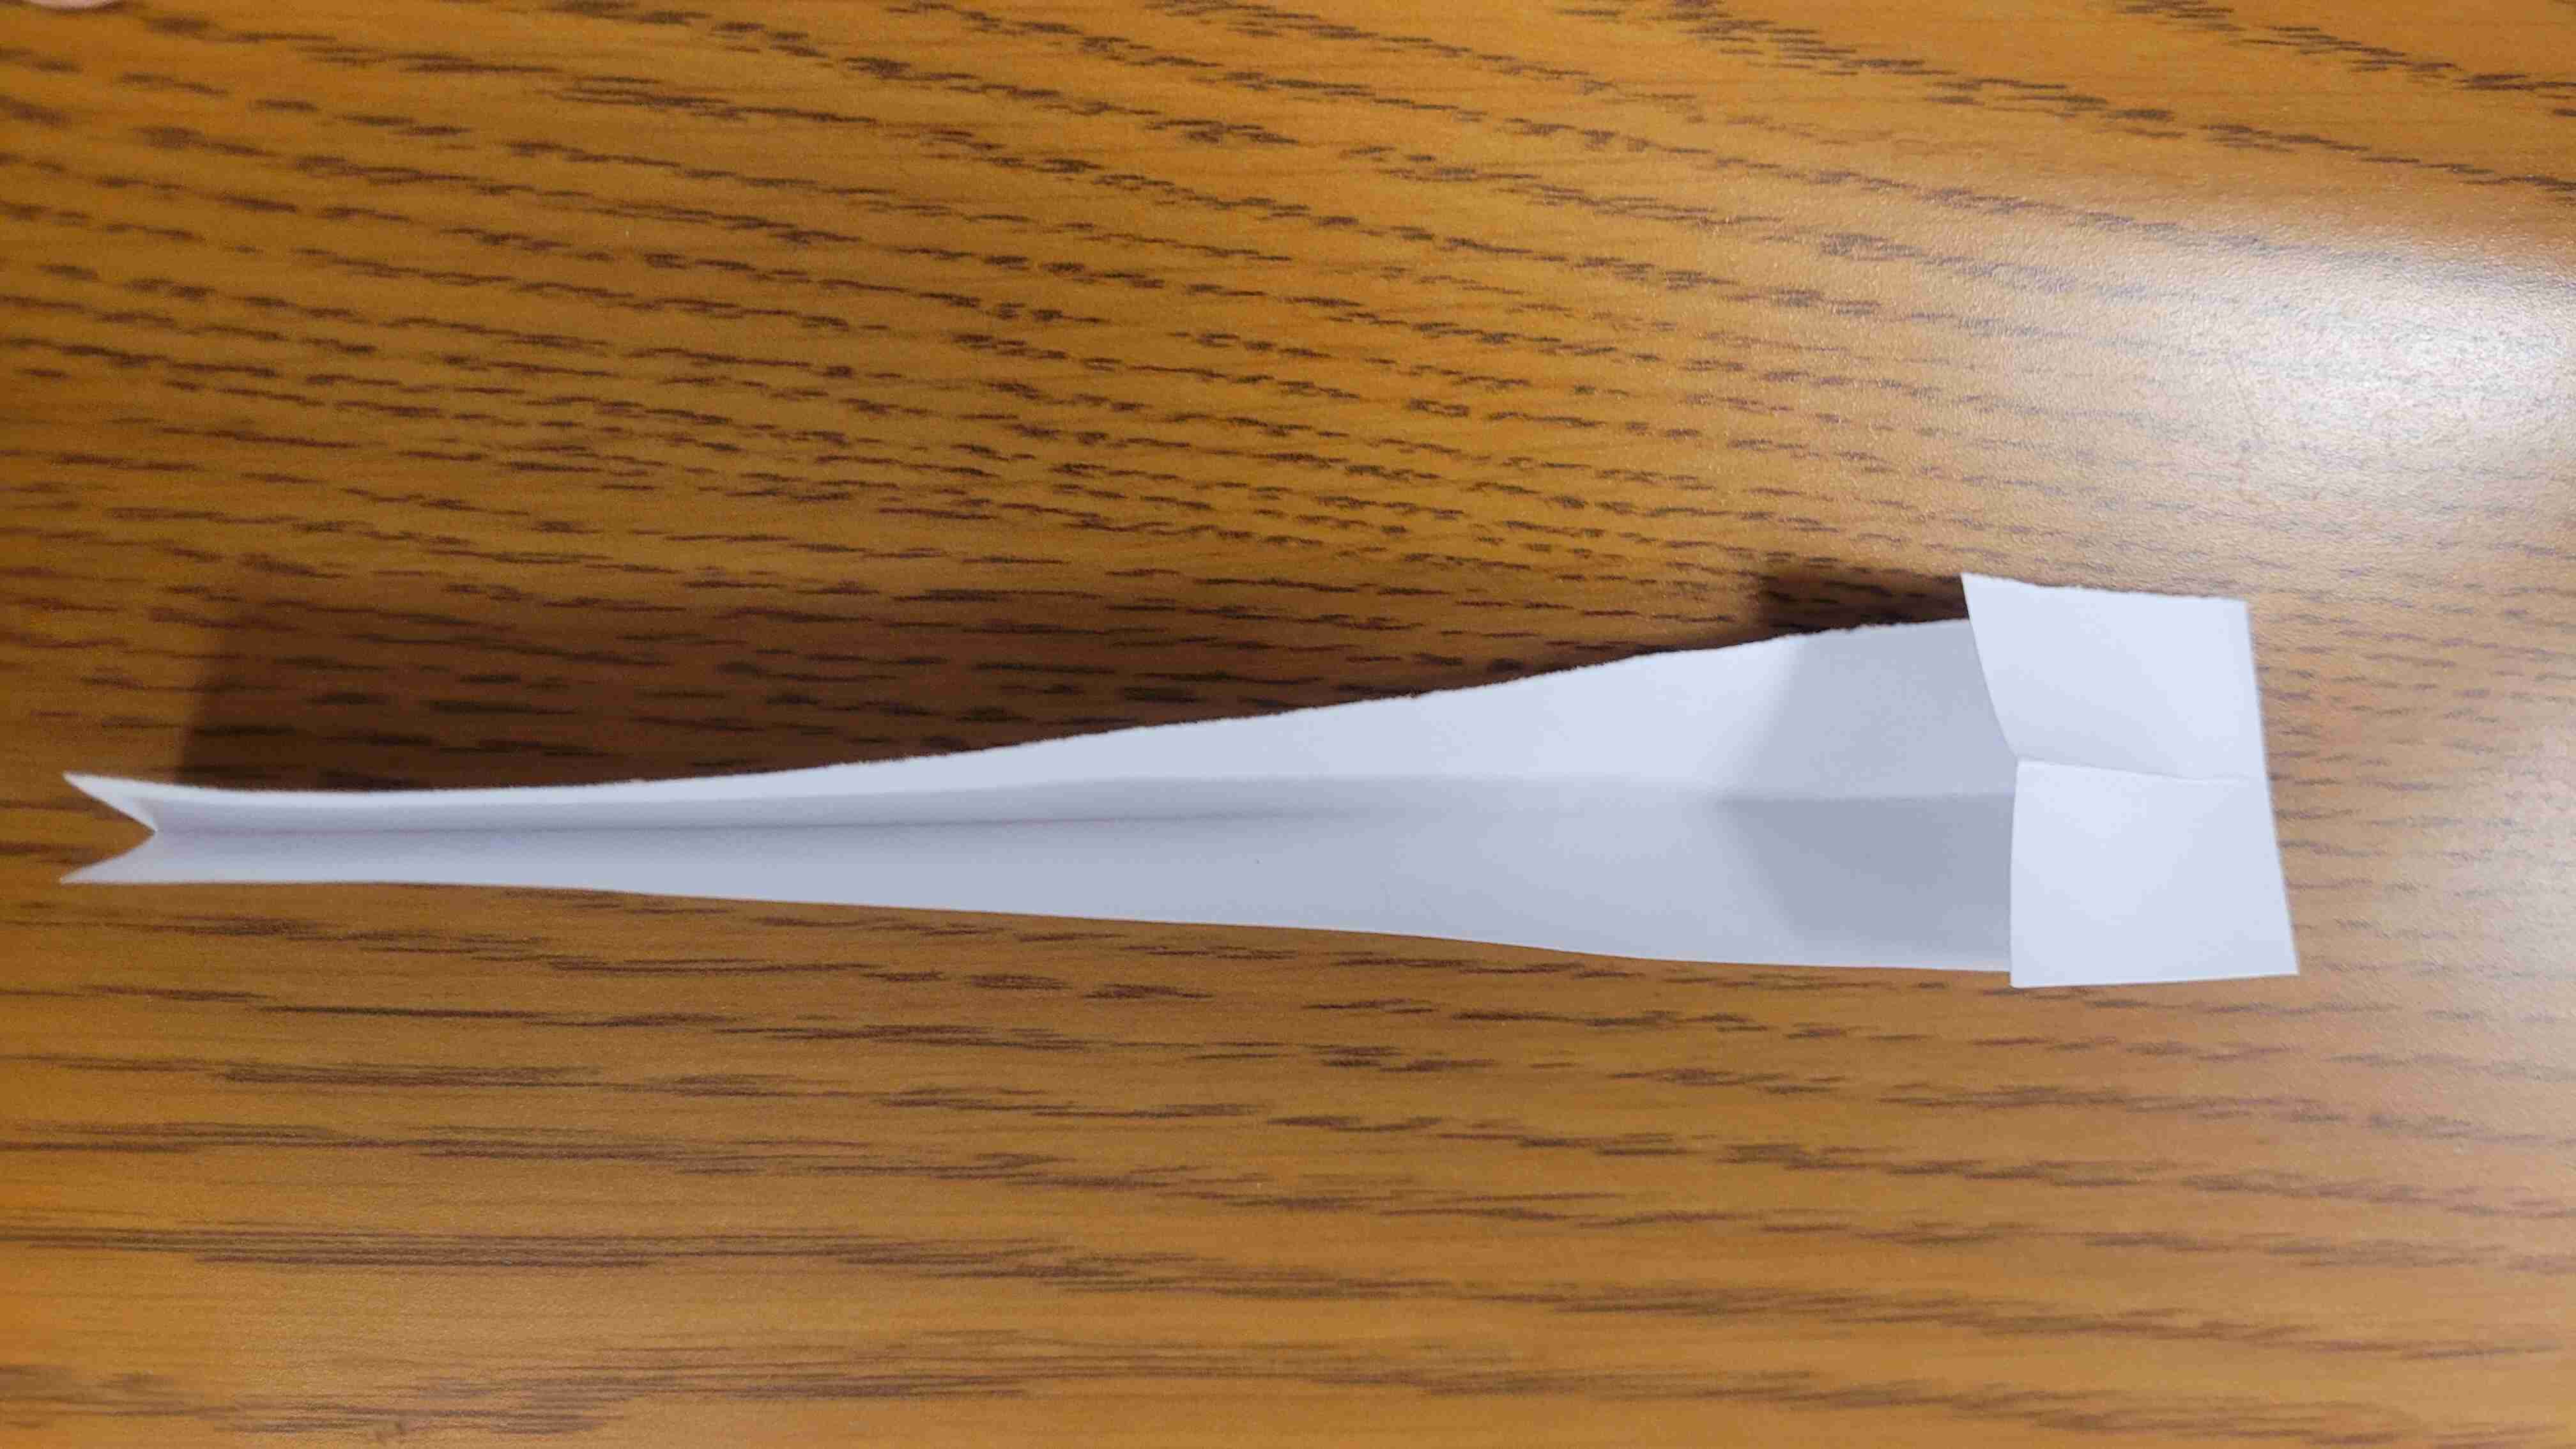
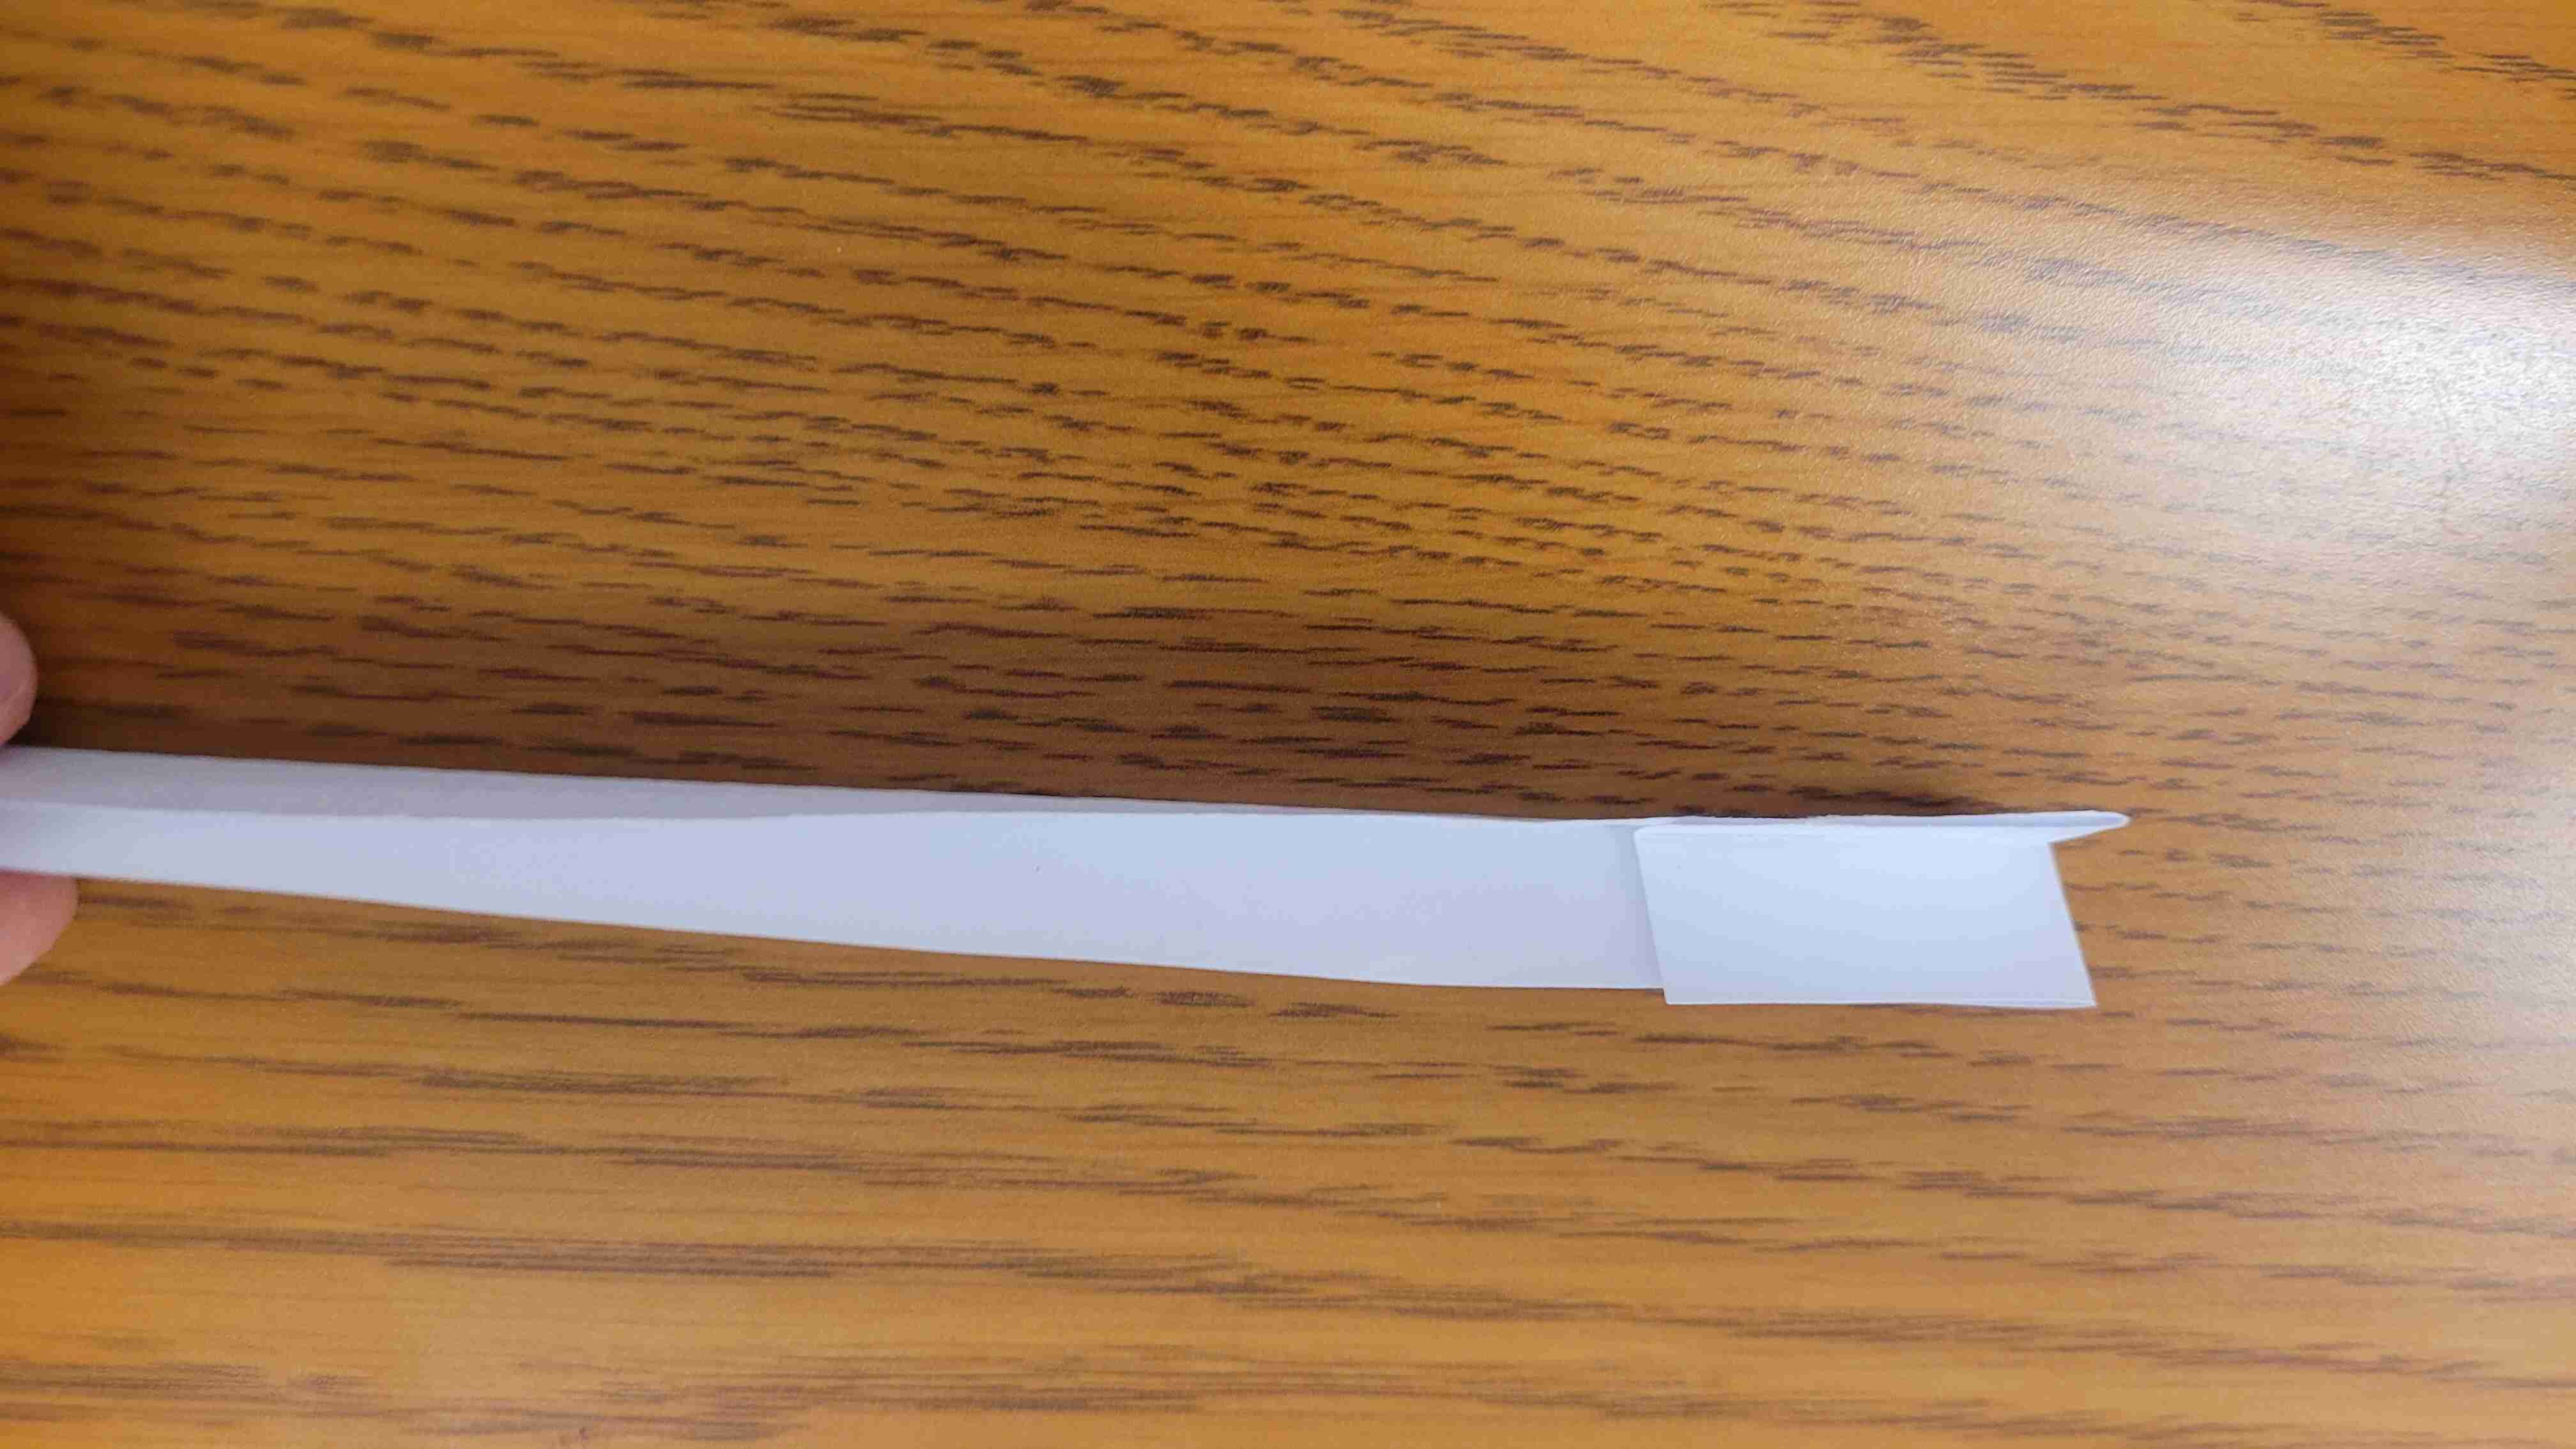
Step 18 - On the other end of the paper, about 1 inch from the end, tear vertically half way down the paper. Then fold each side of the free paper down to the bottom edge of the tail.
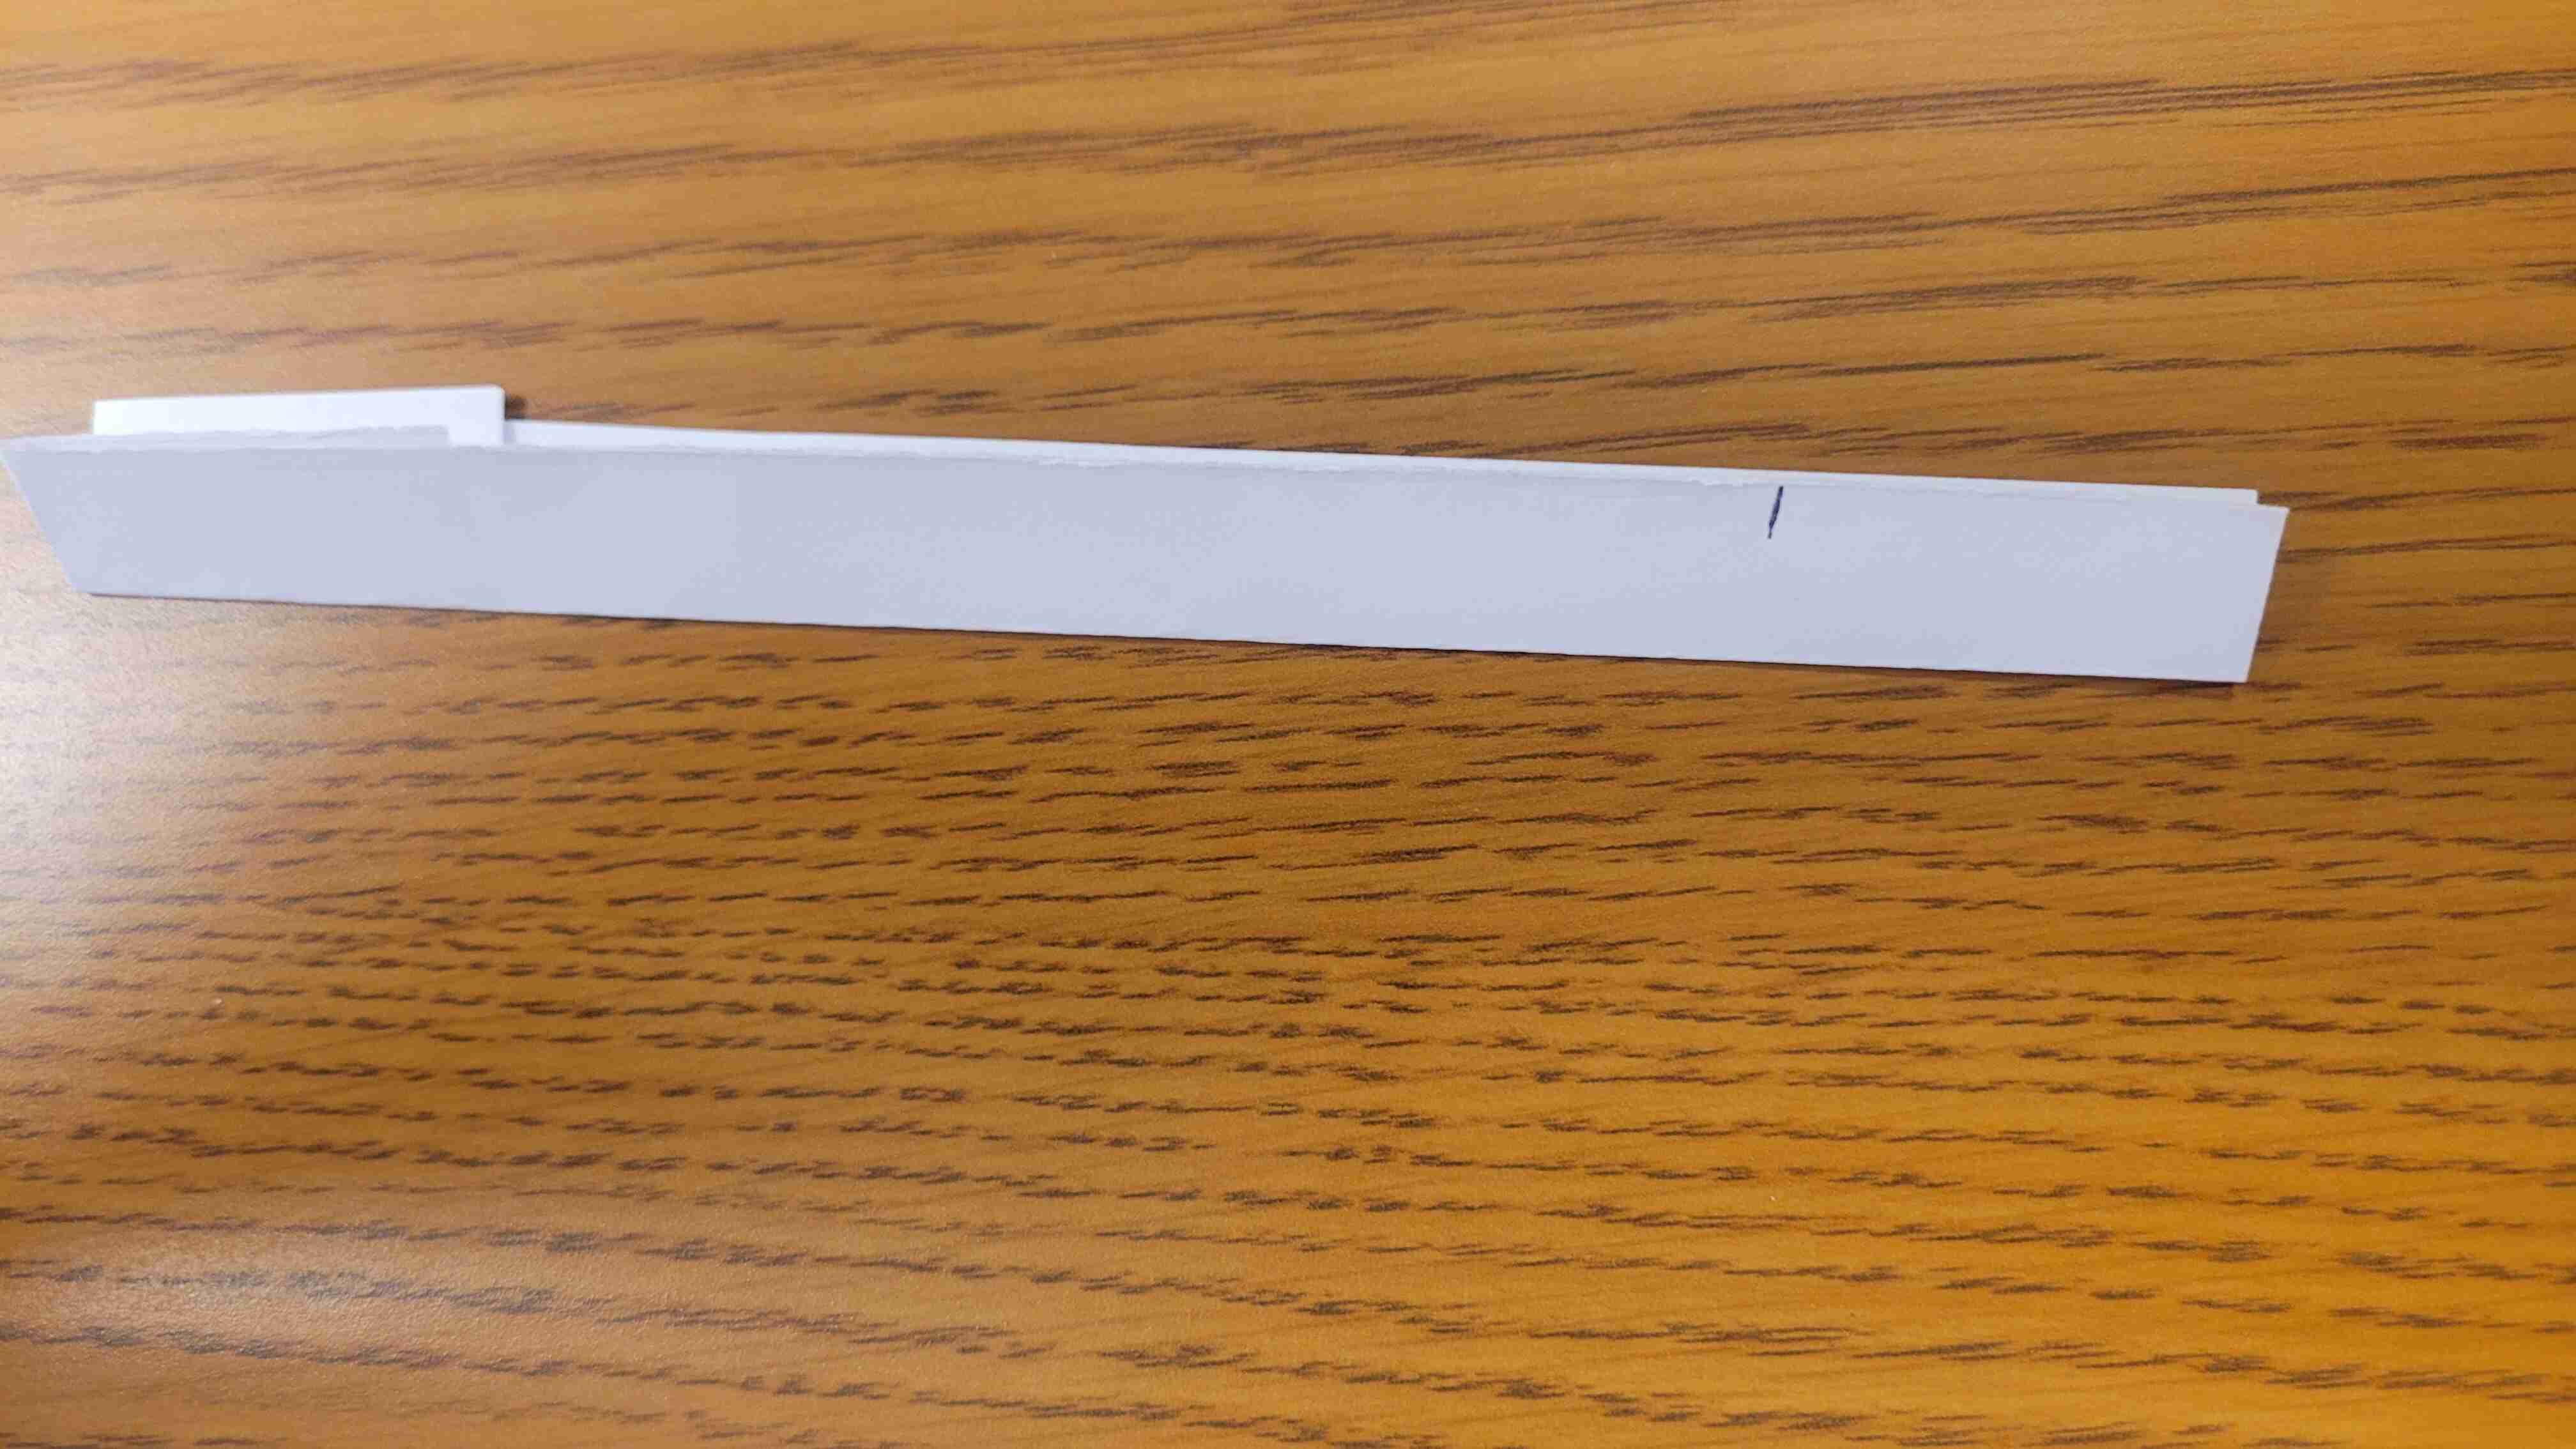
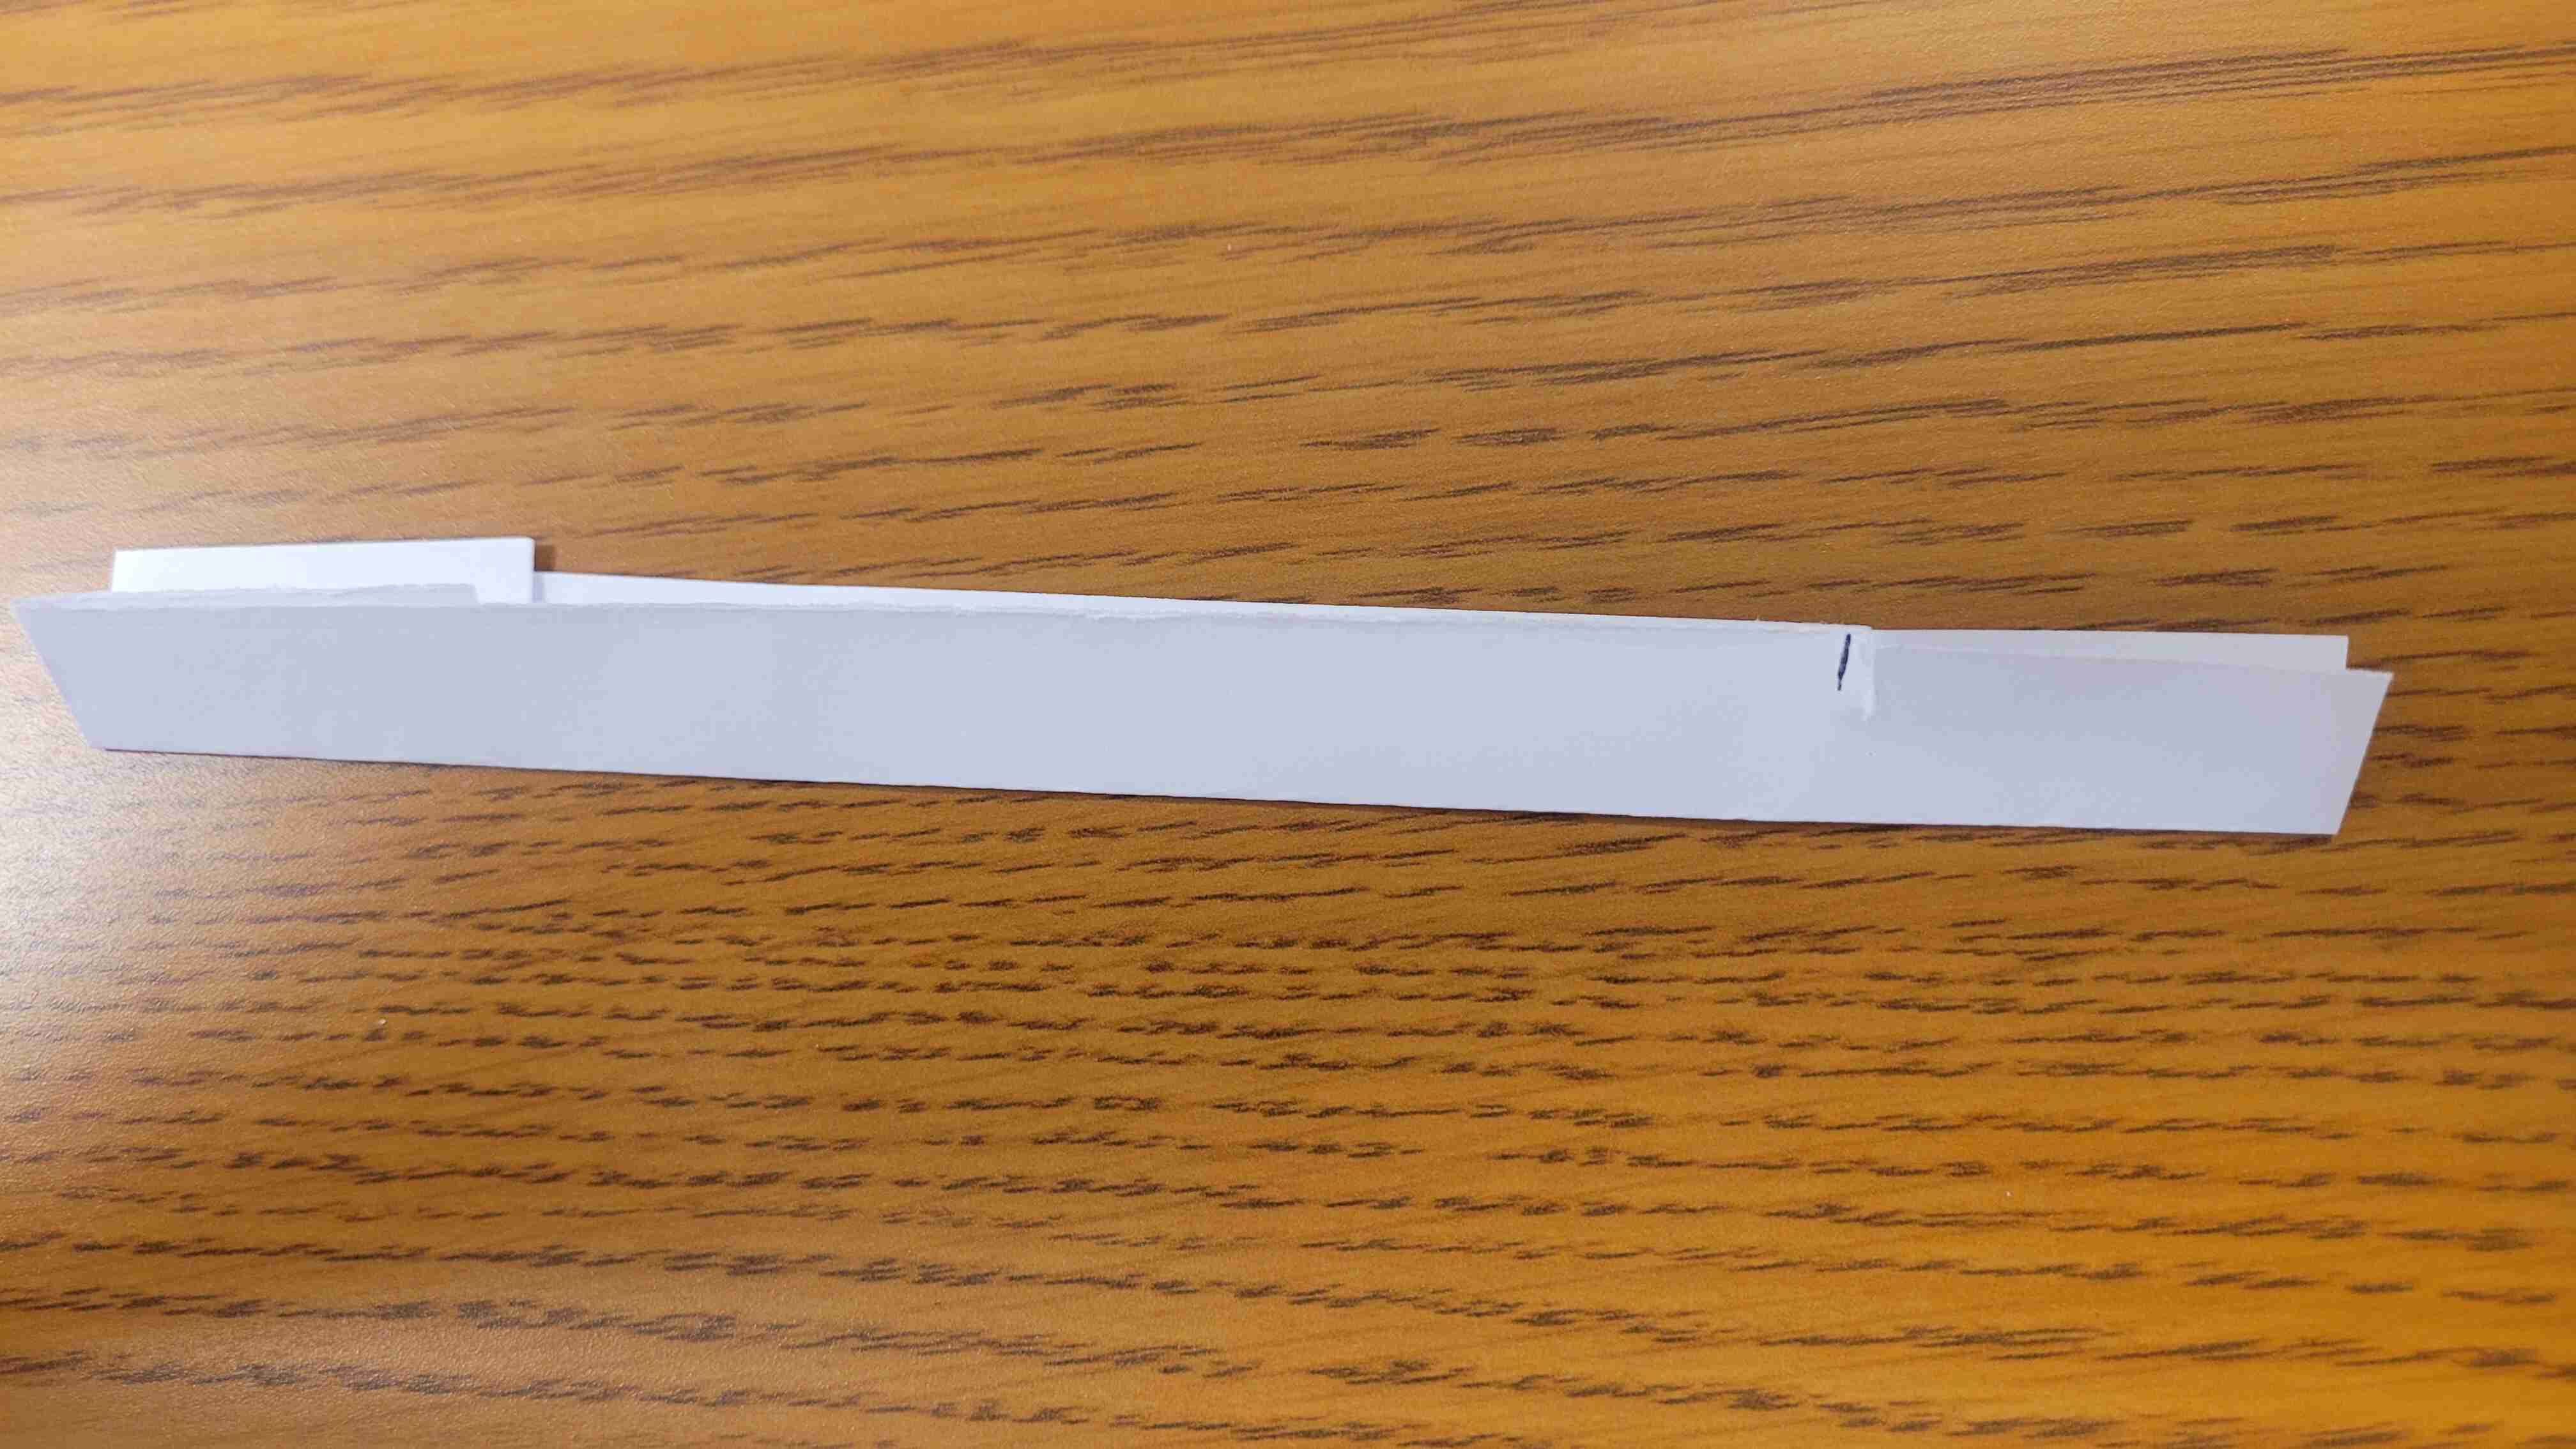
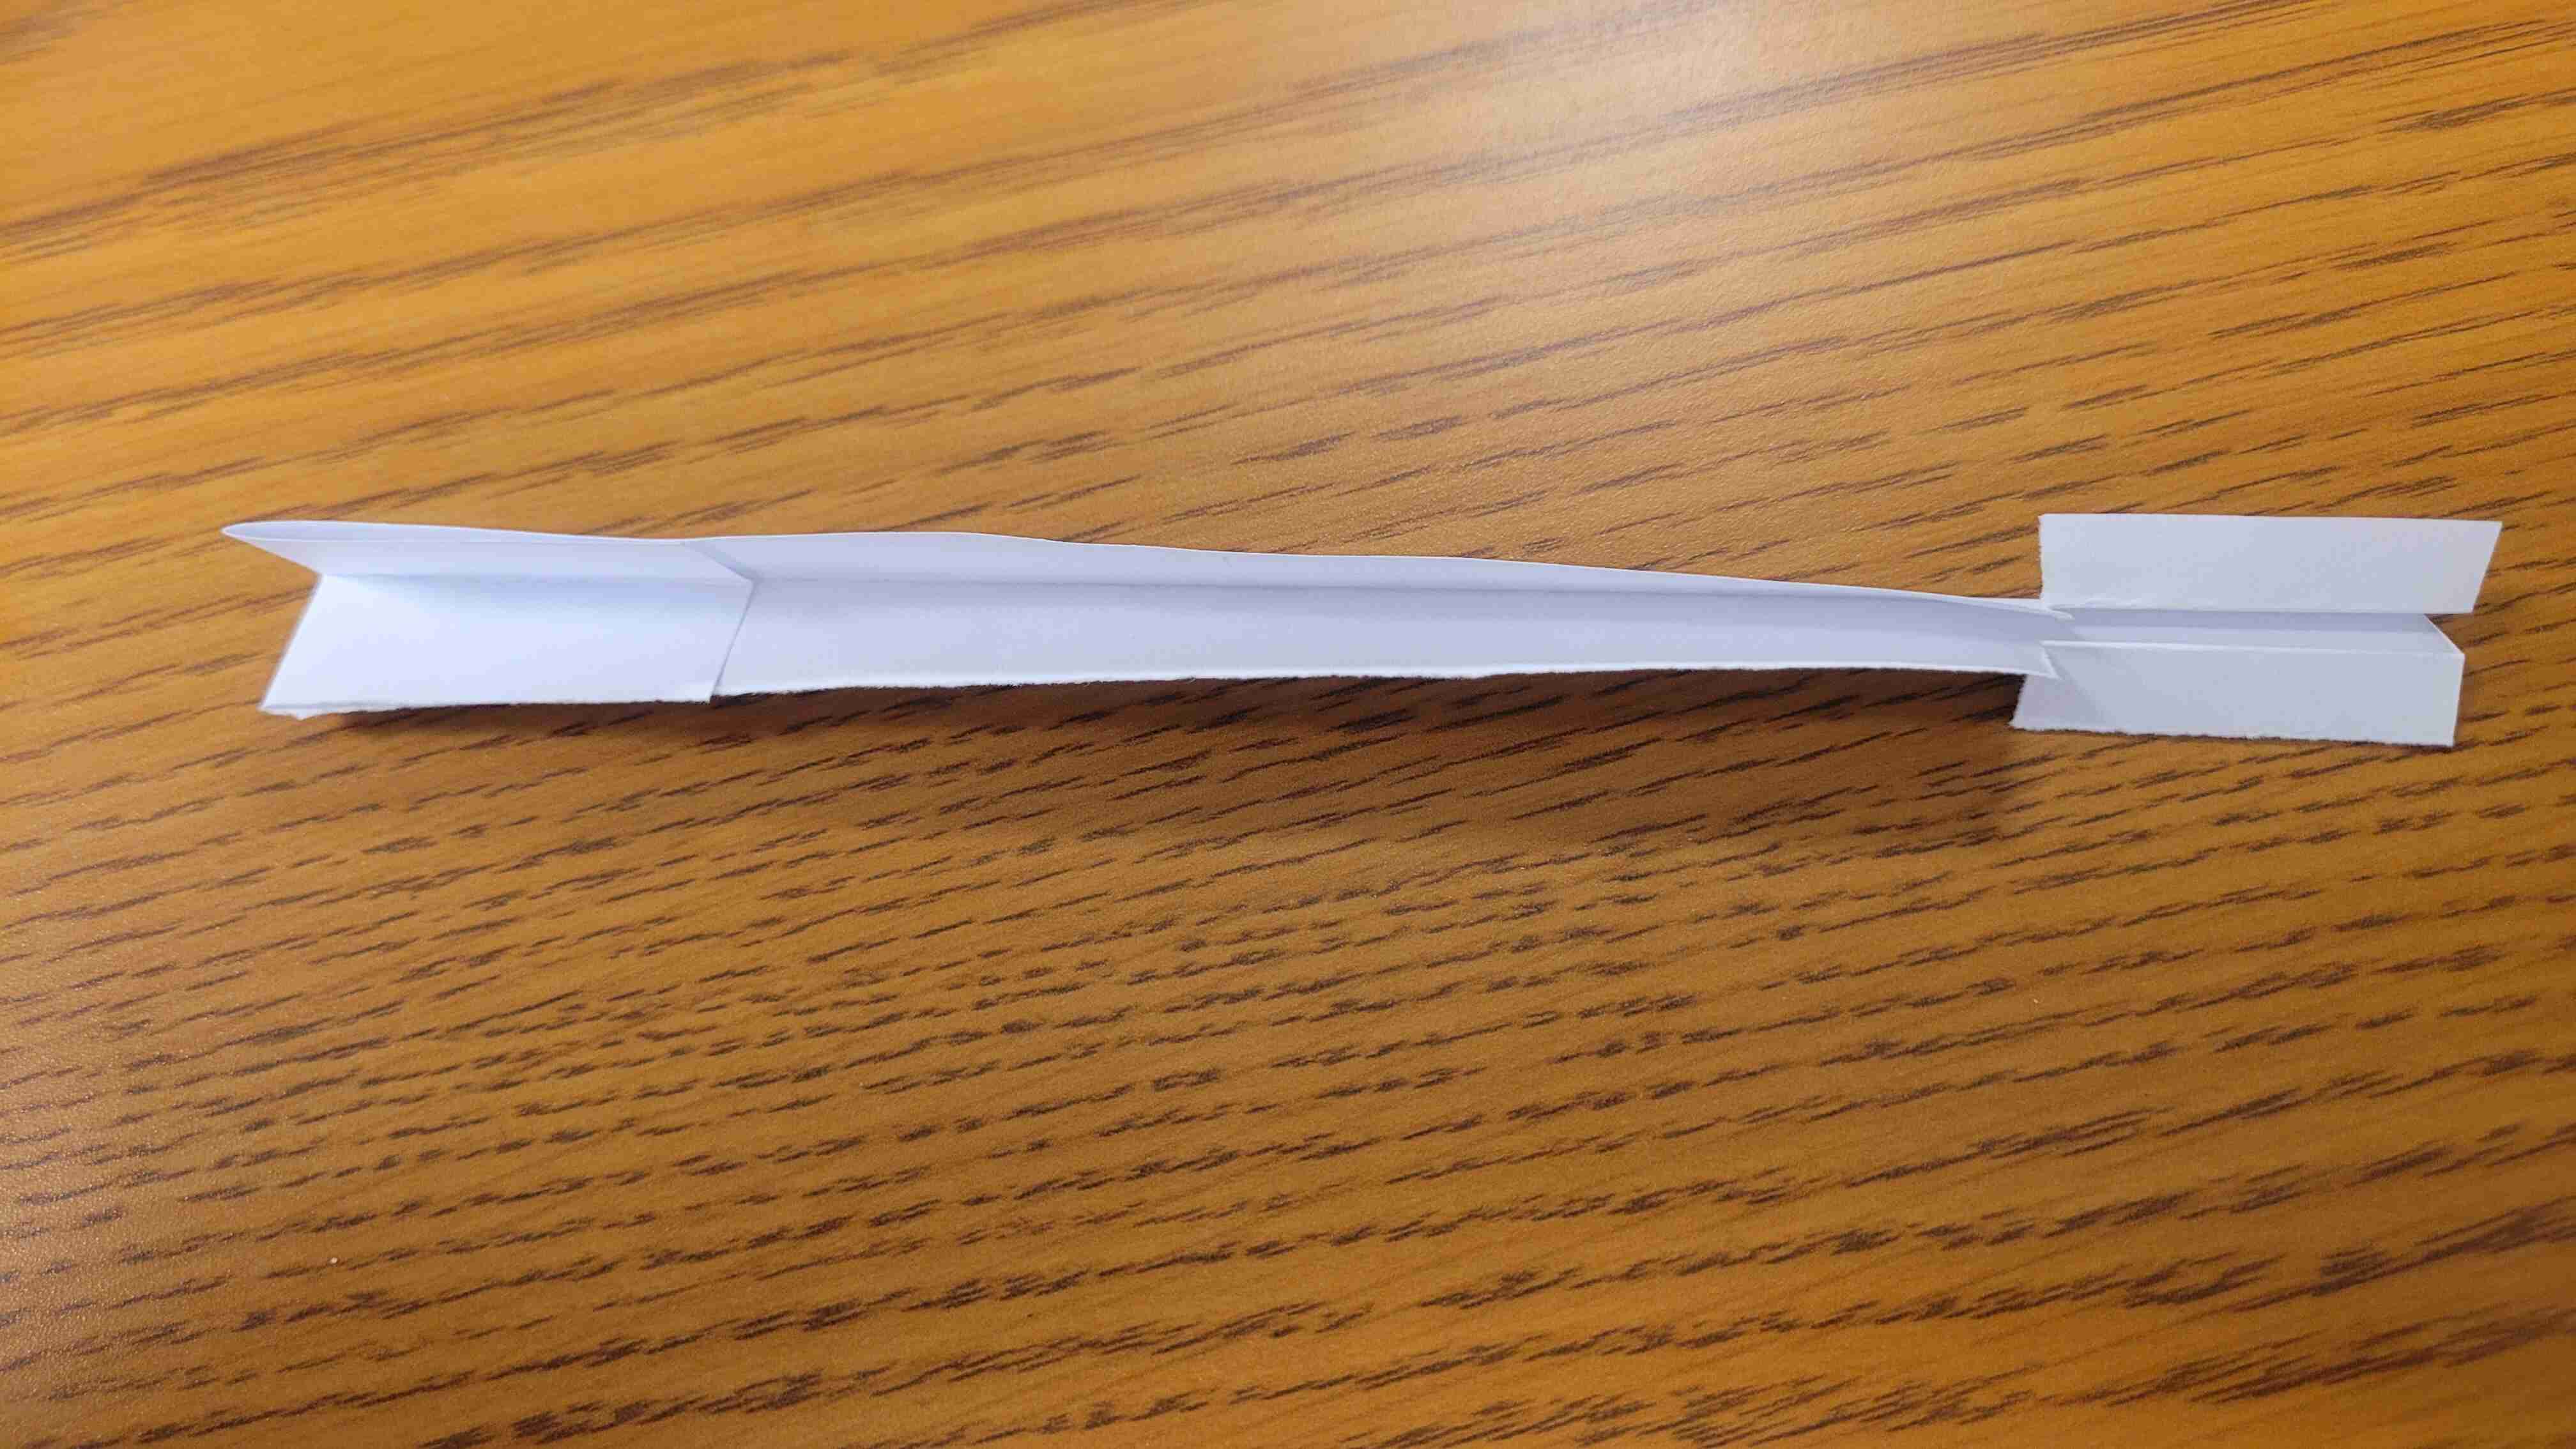
Step 19 - Grab the larger of the two papers, and fold the plane in half right down the middle of the nose of the plane.
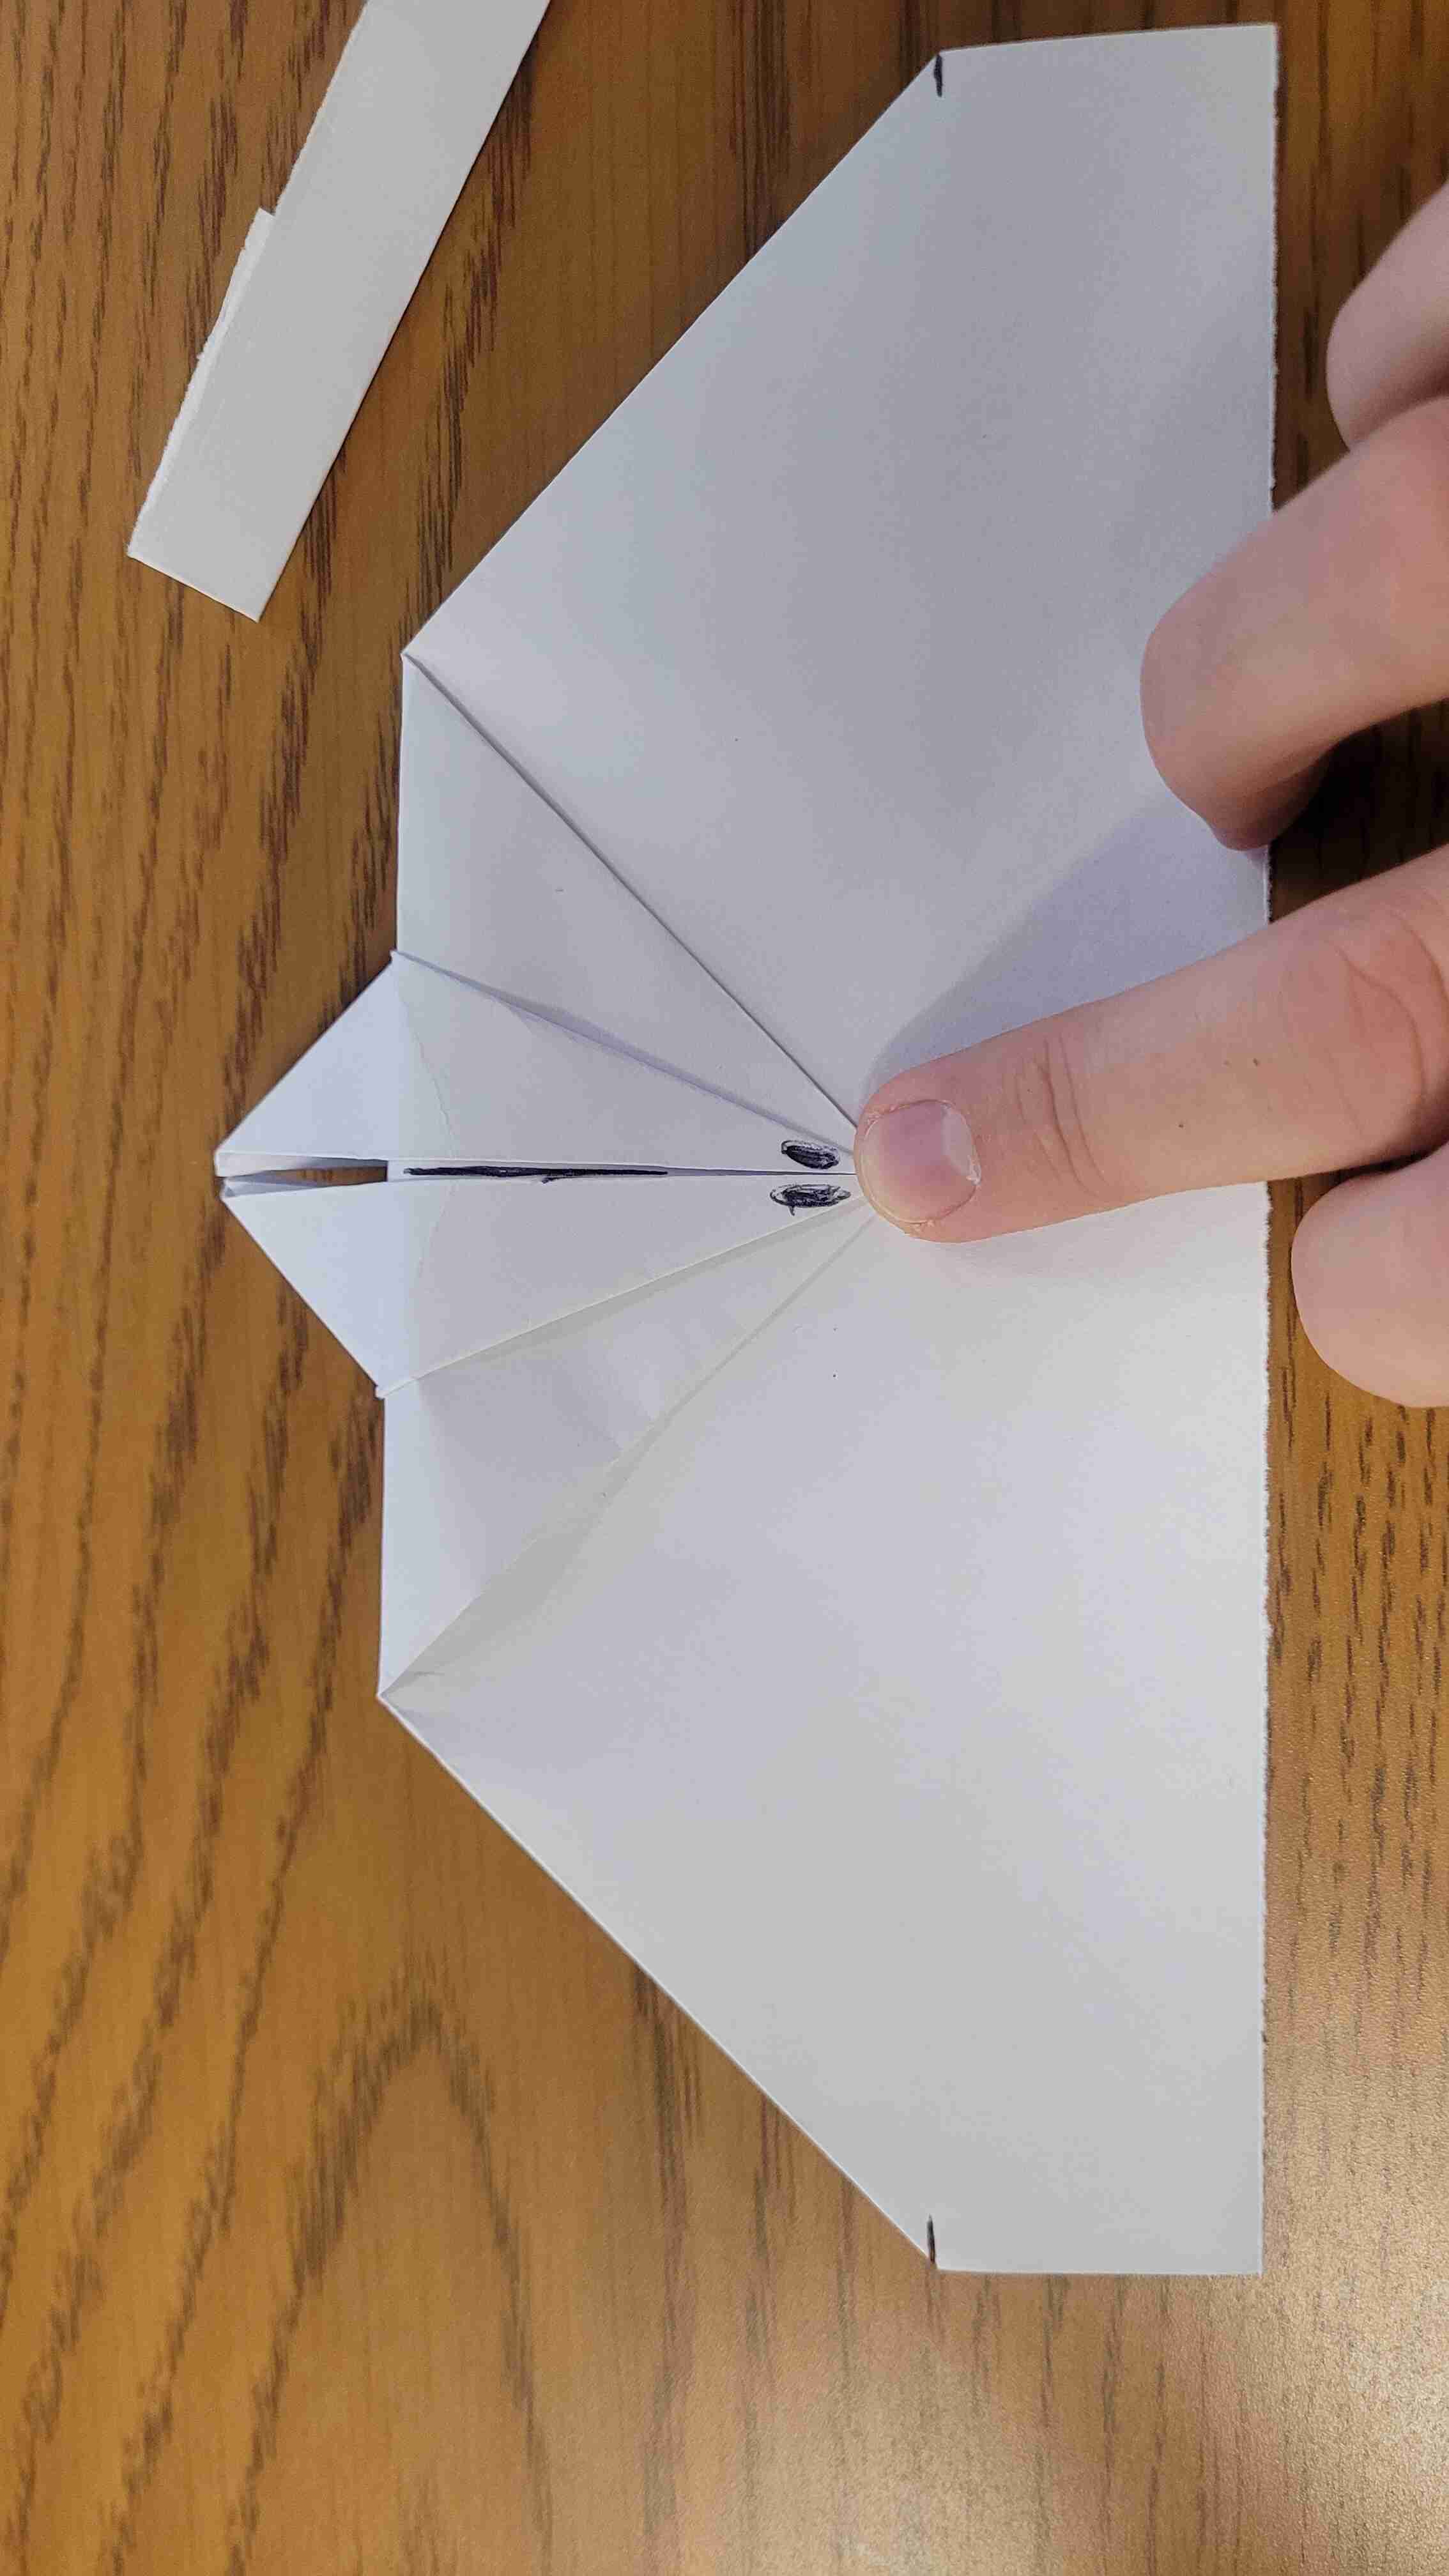
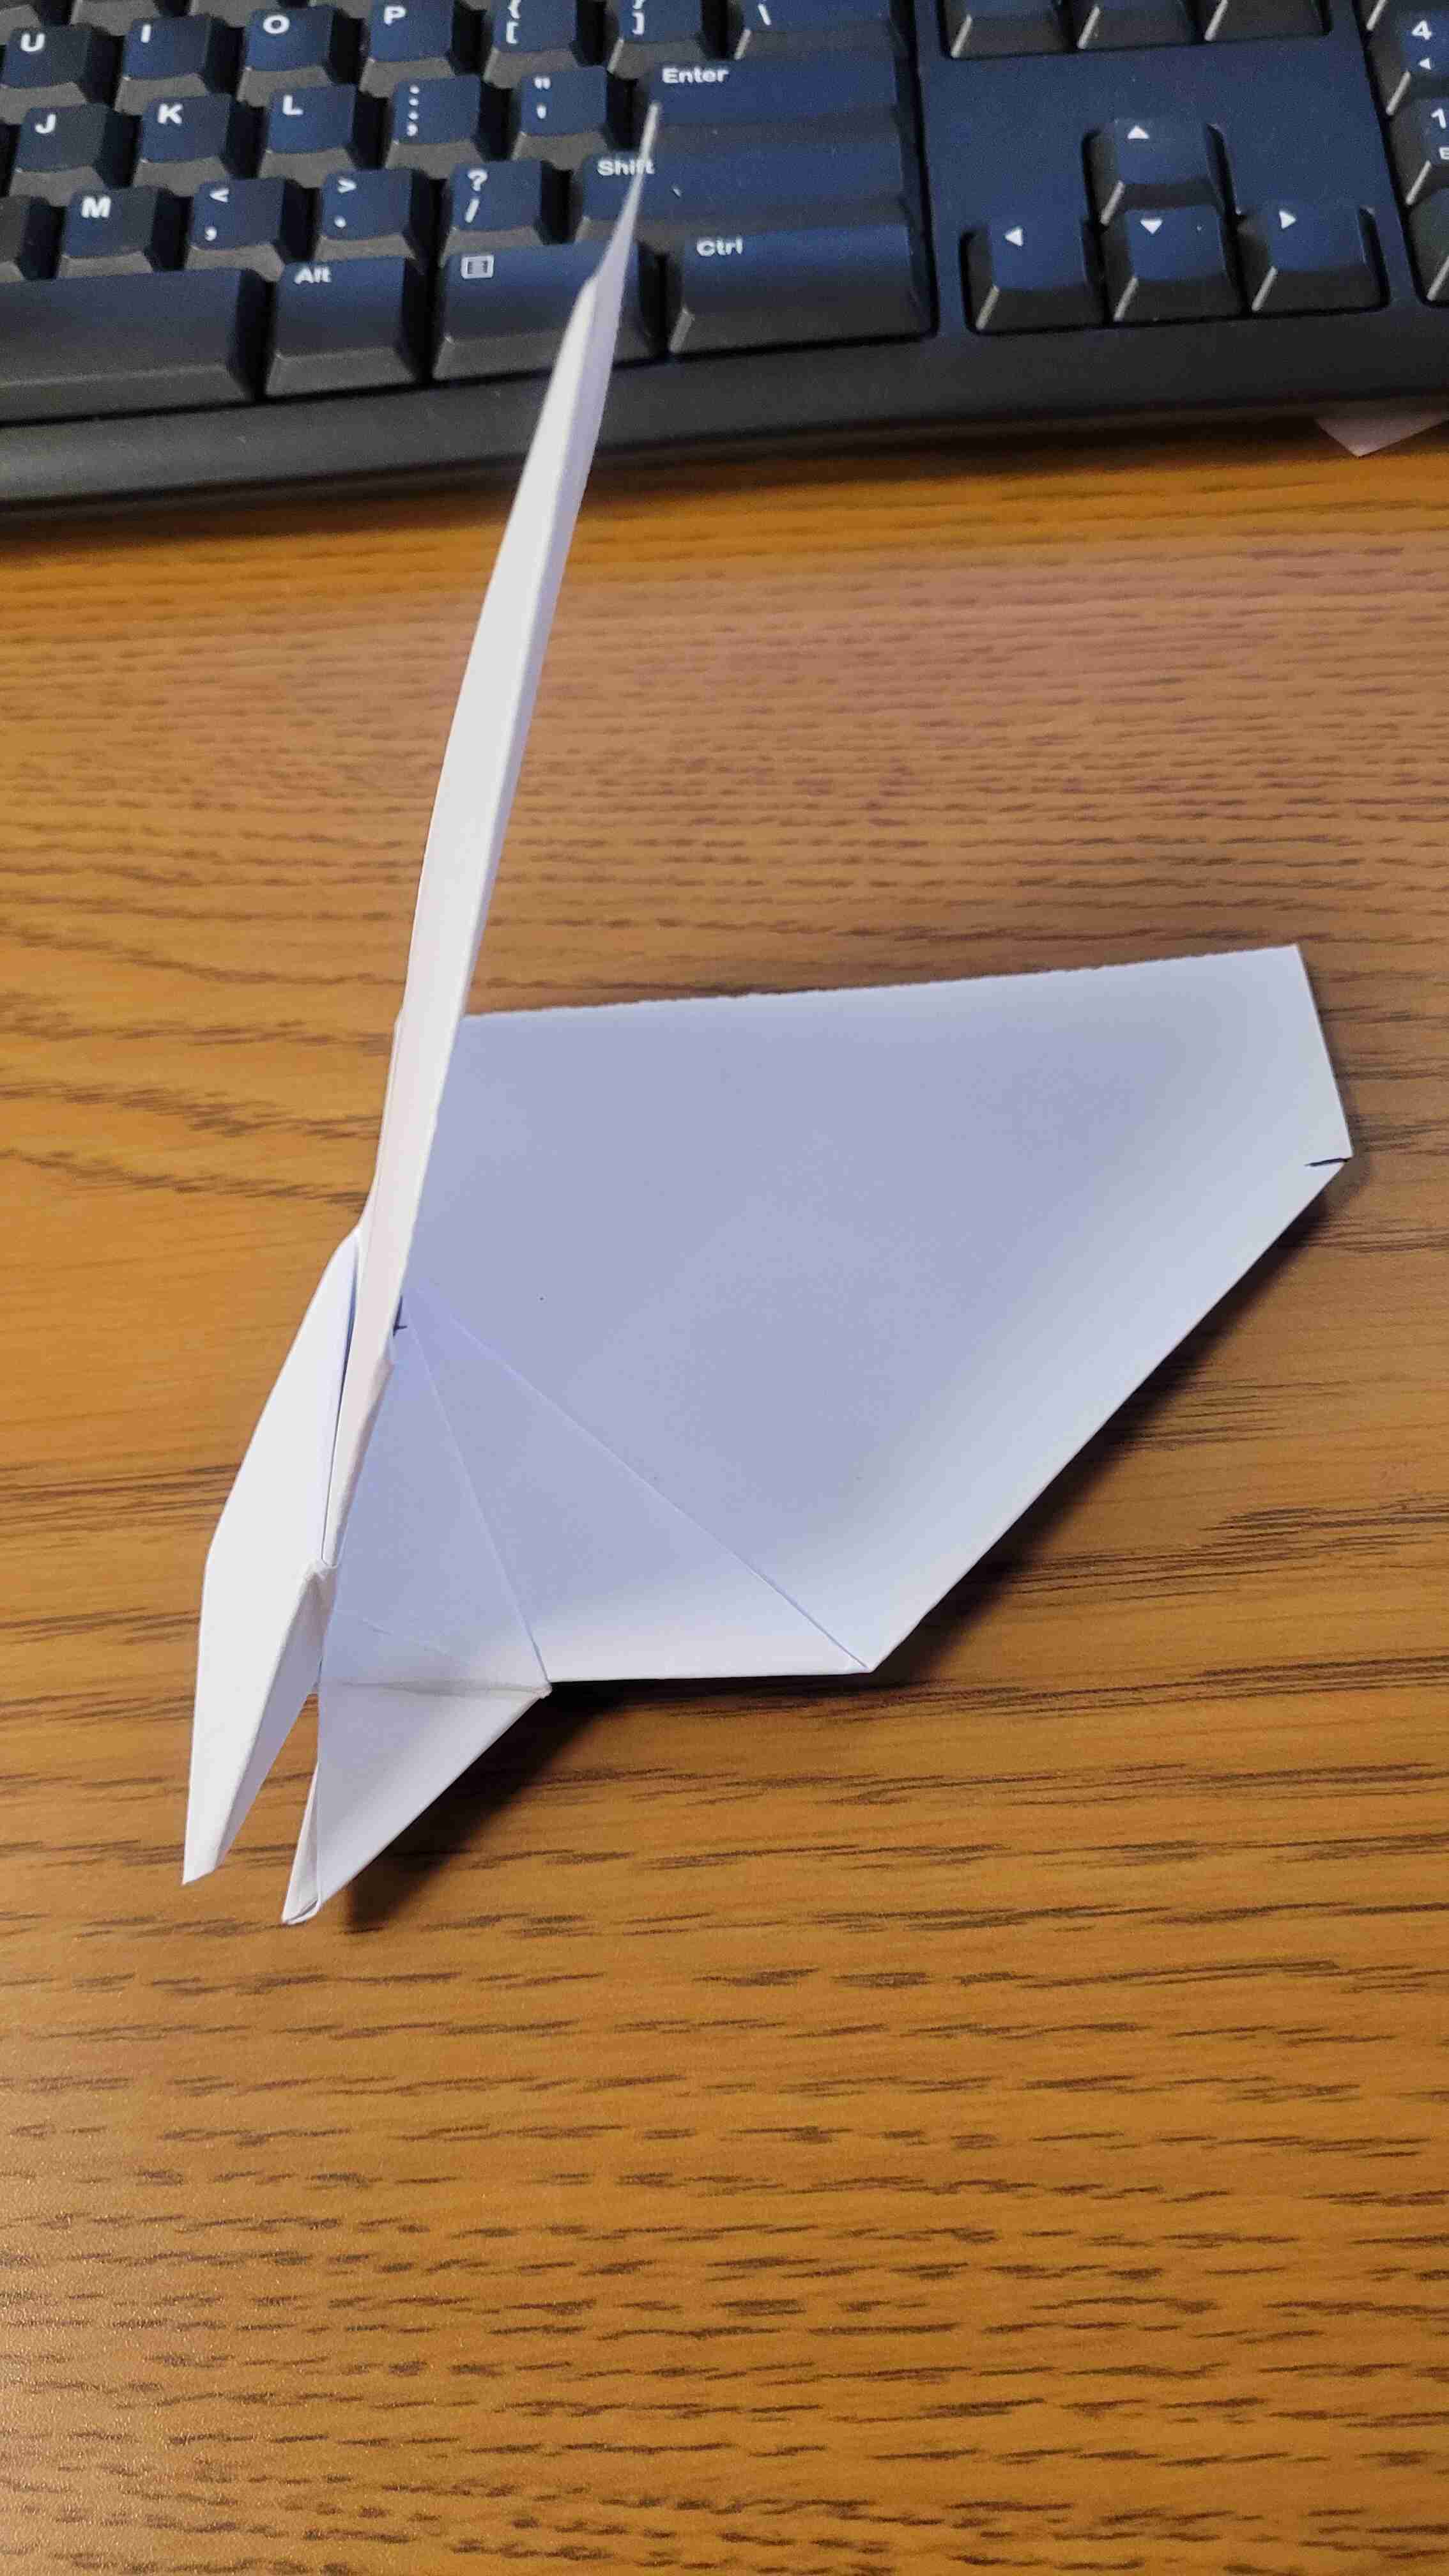
Step 20 - Then where the wings meet the top point of the nose, fold flat horizontally along that point, then slightly unfold so they stick out perpendicular to the nose. Do this on both sides.
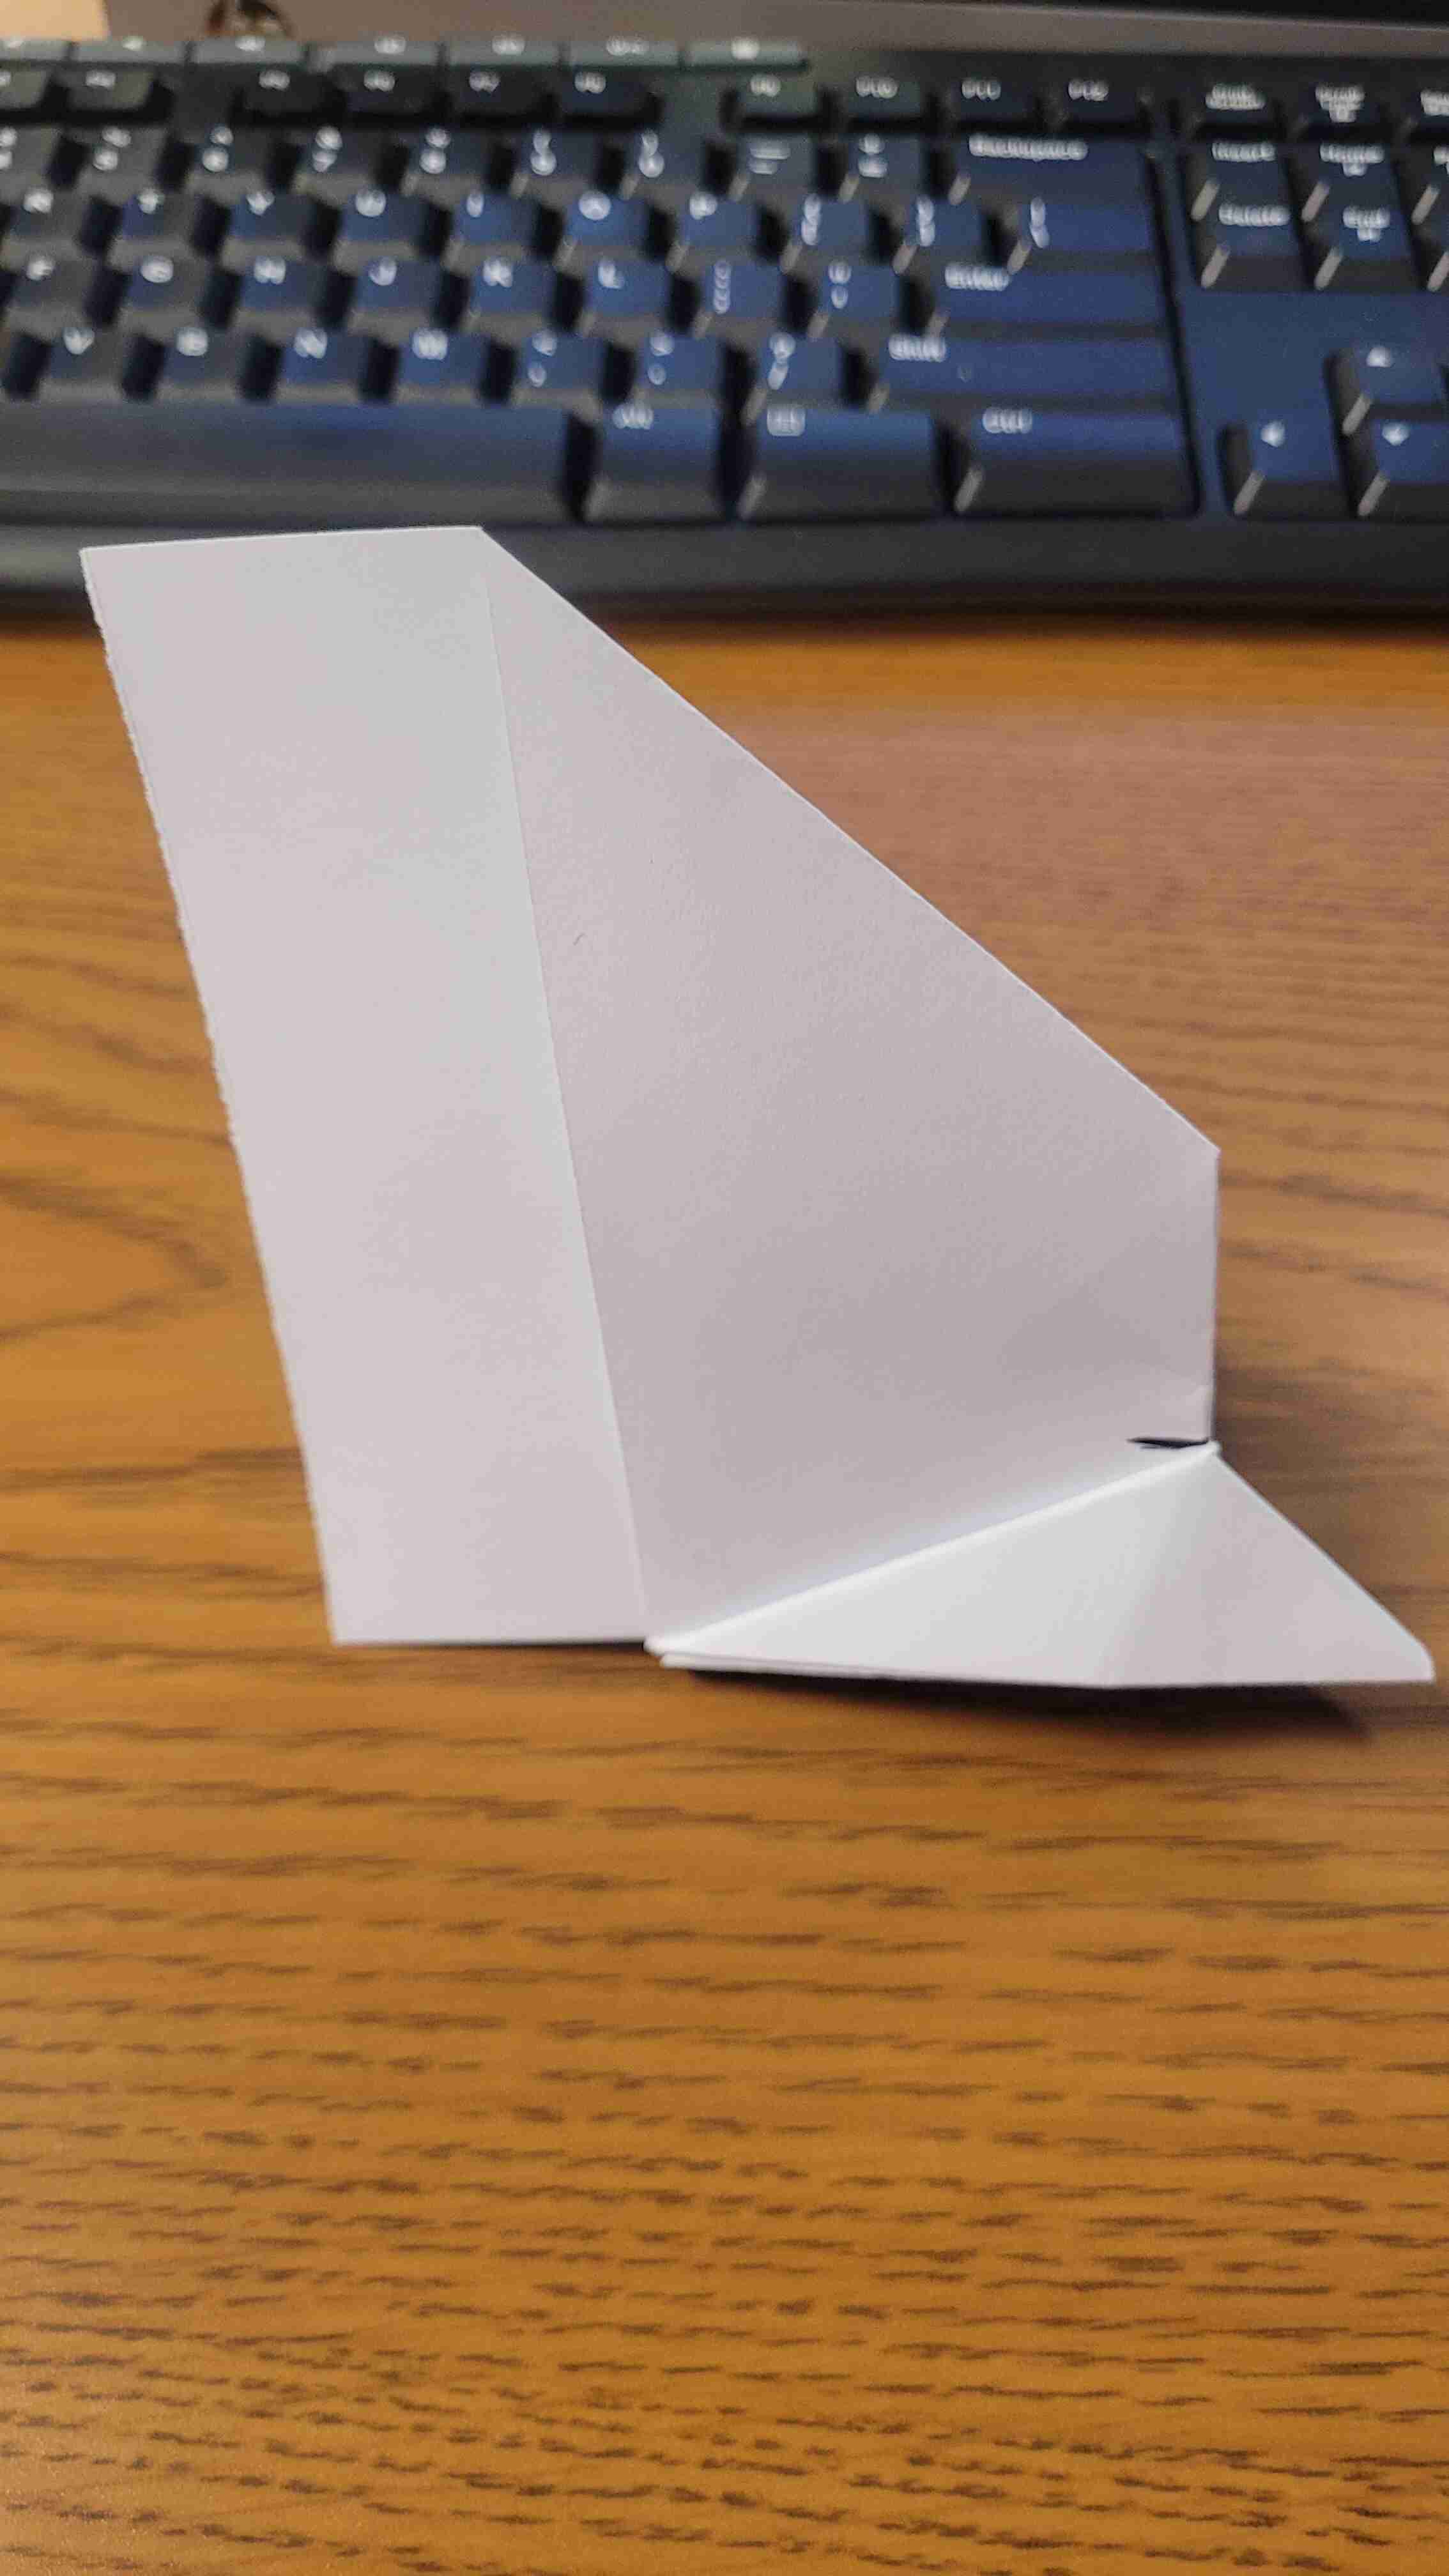
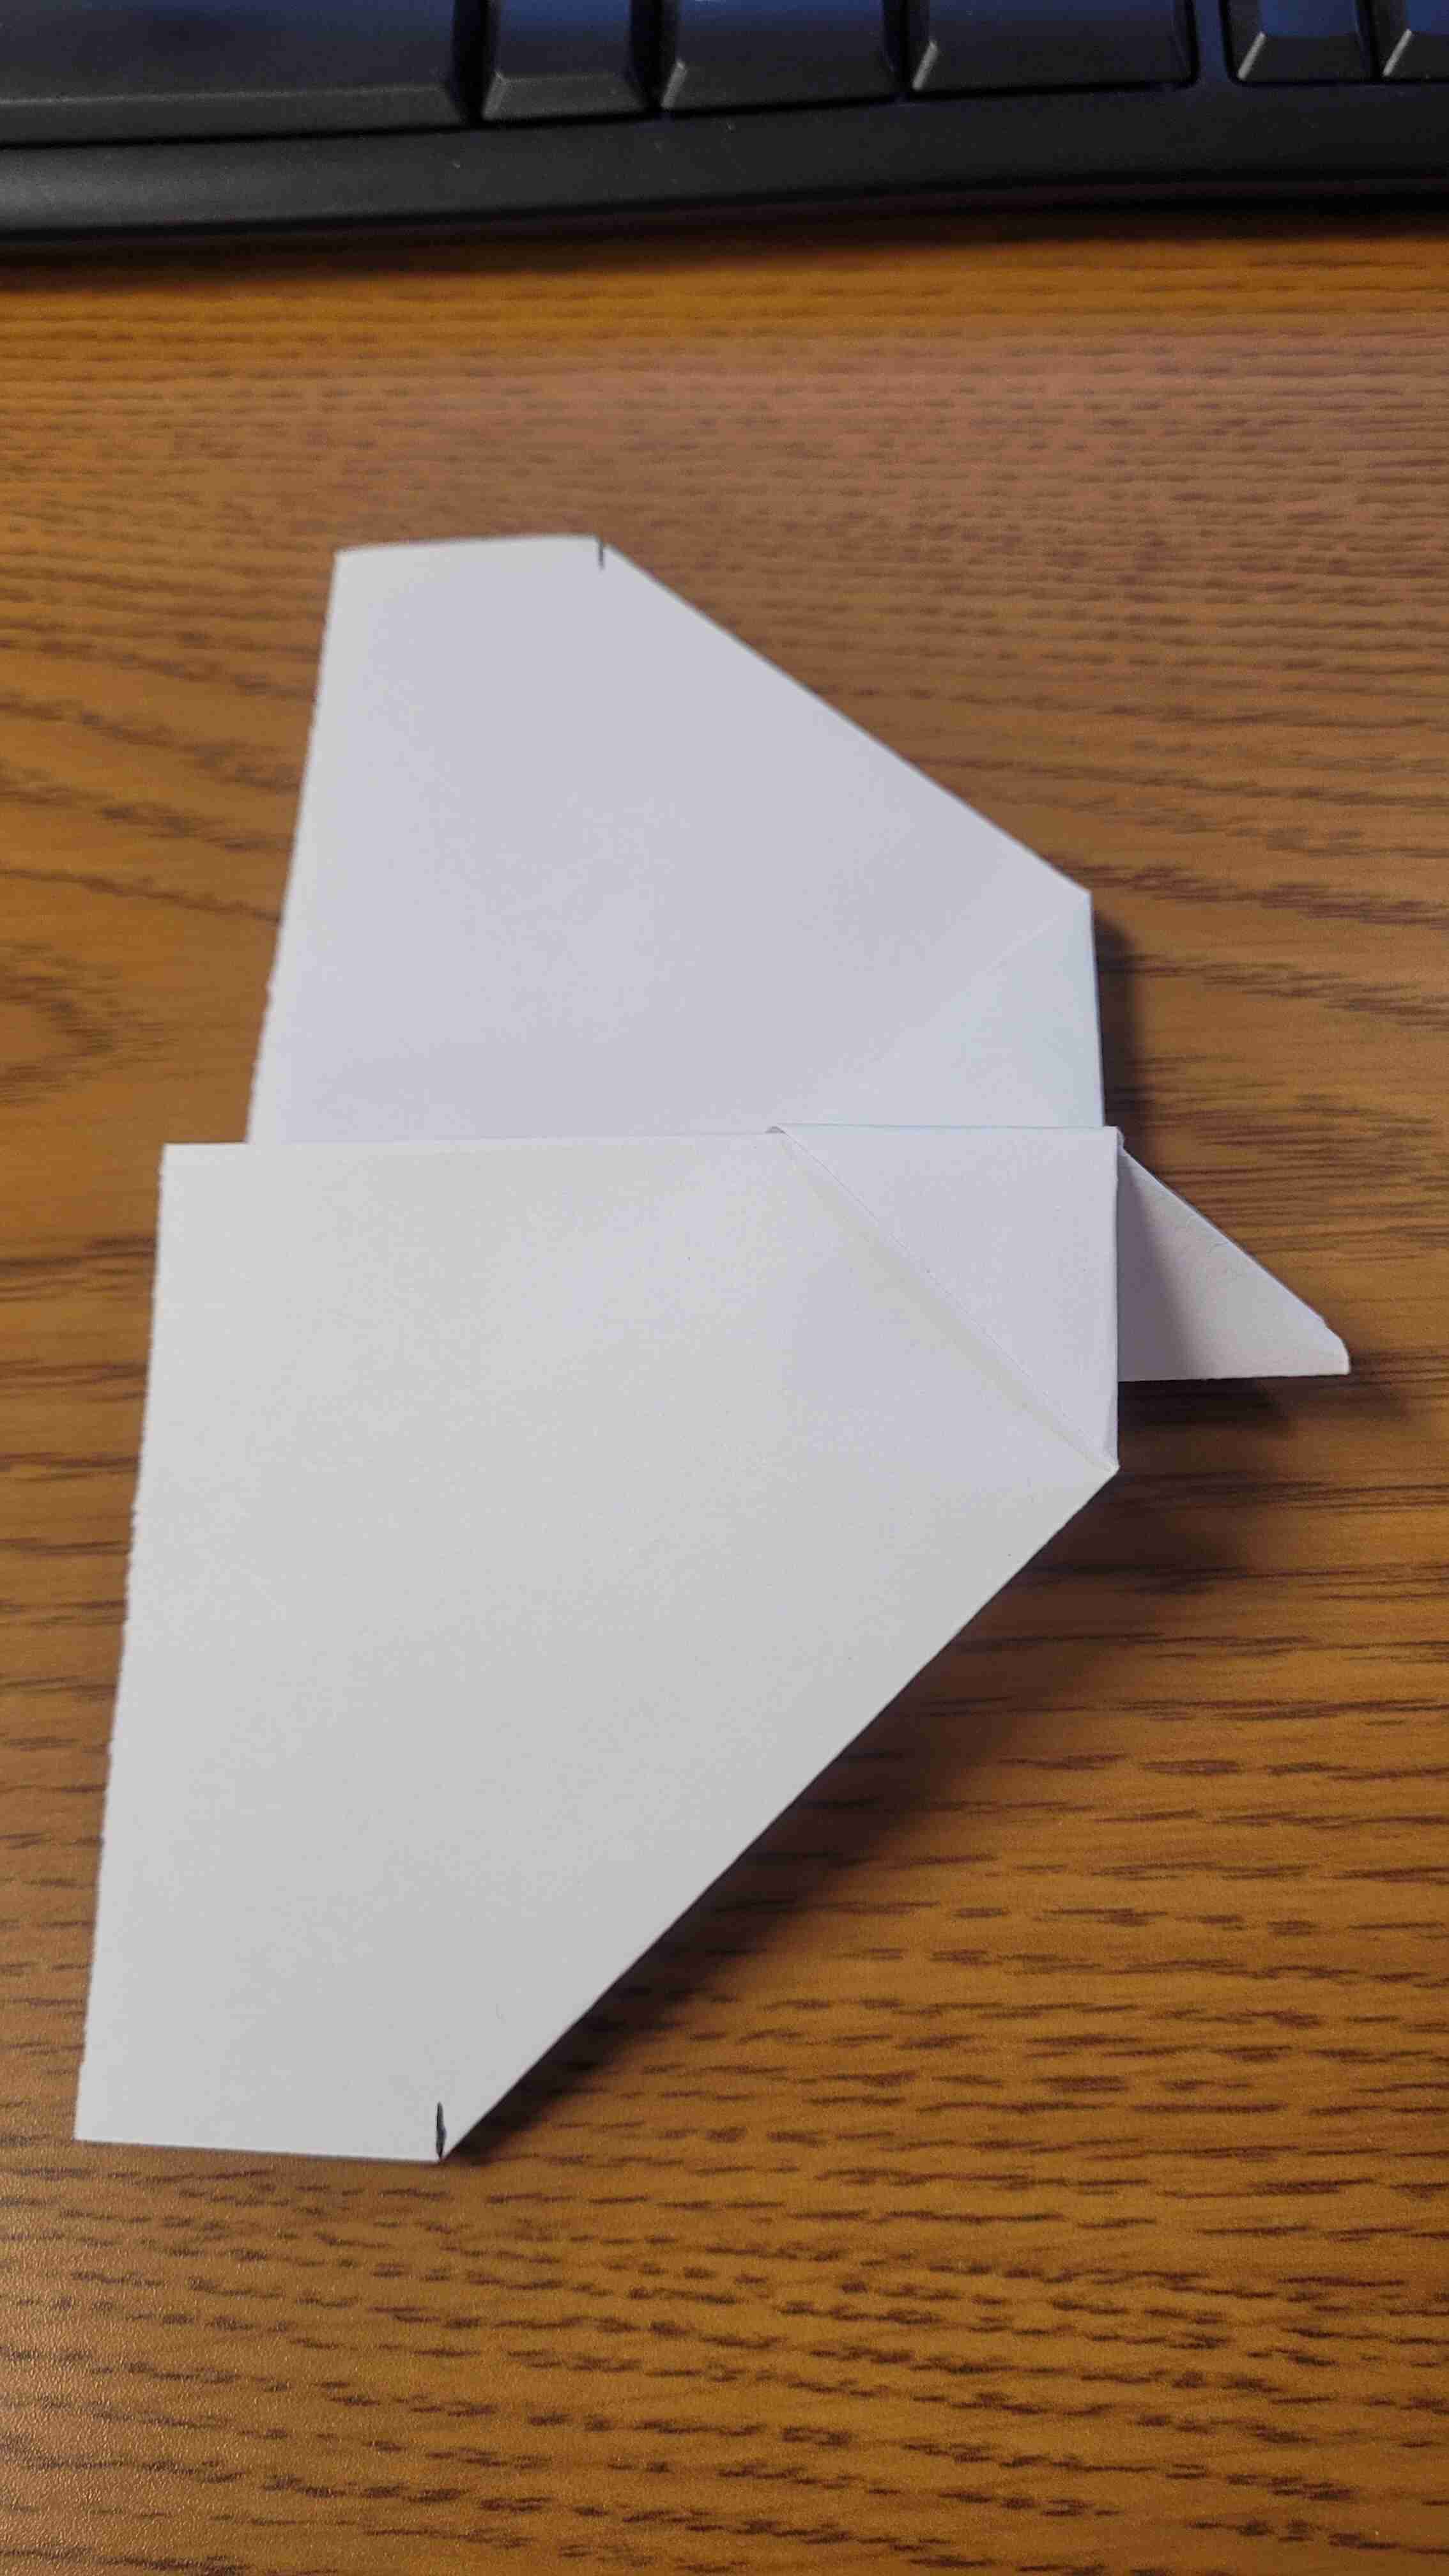
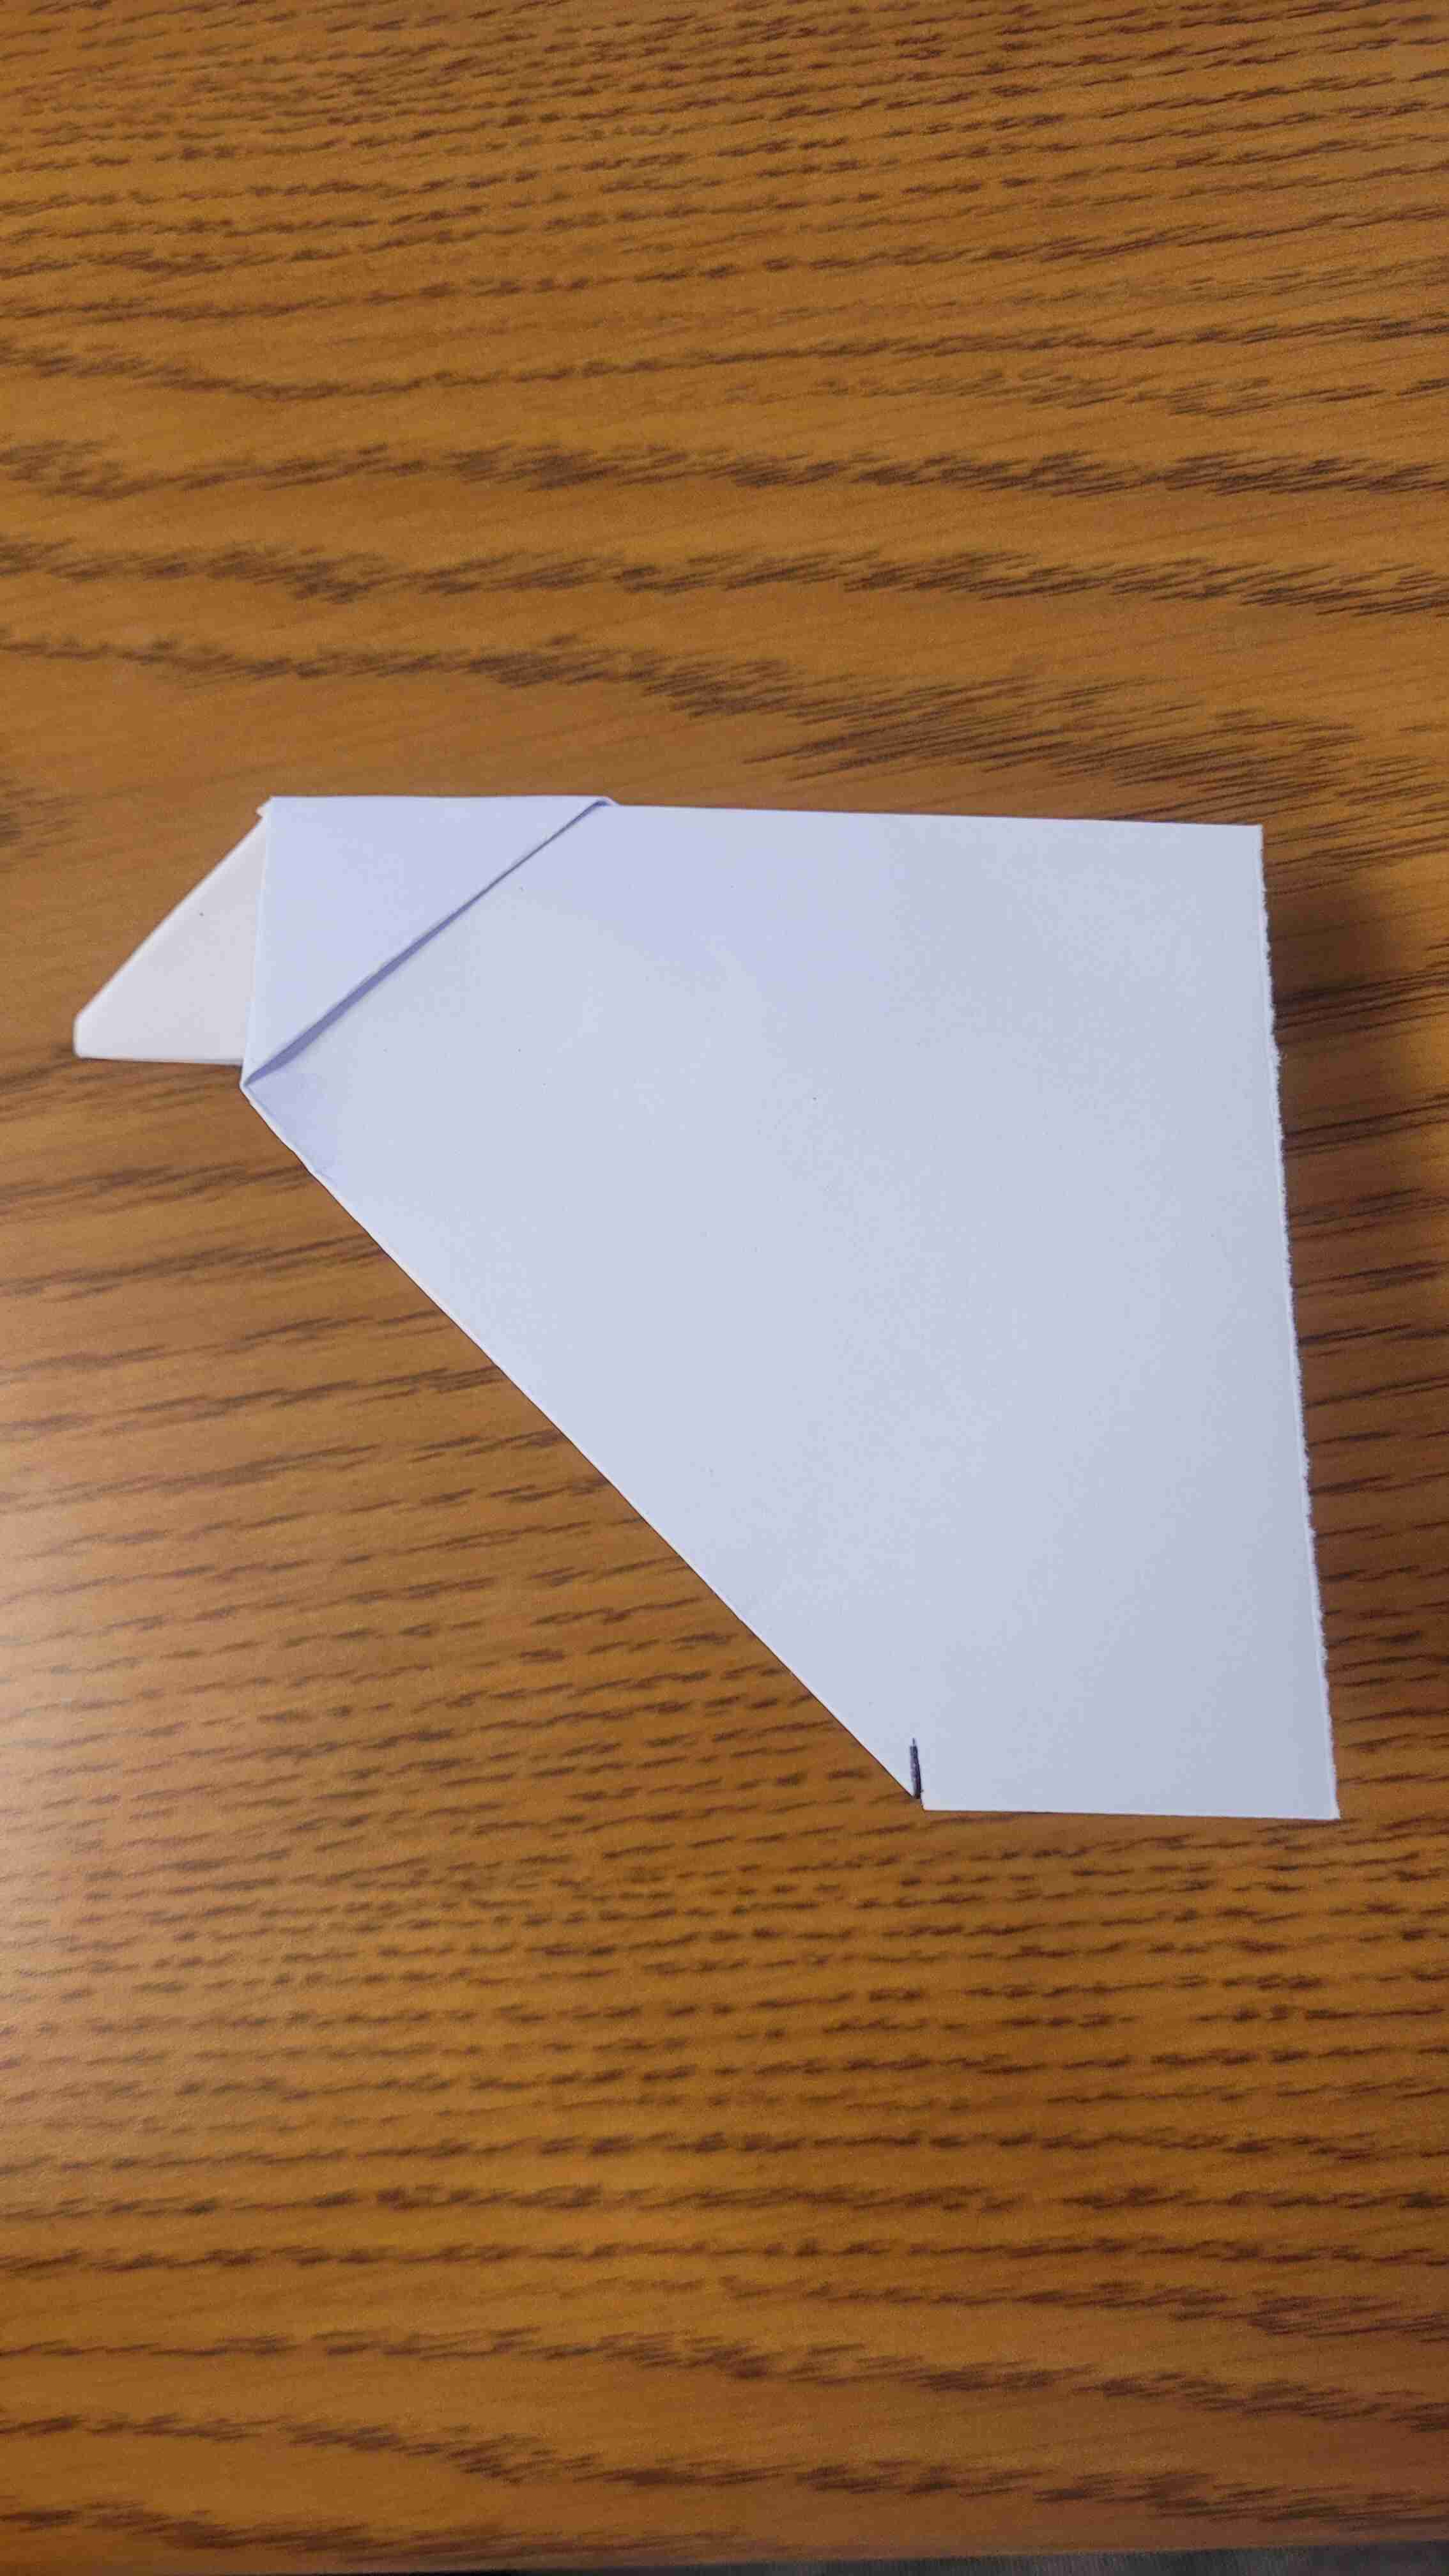
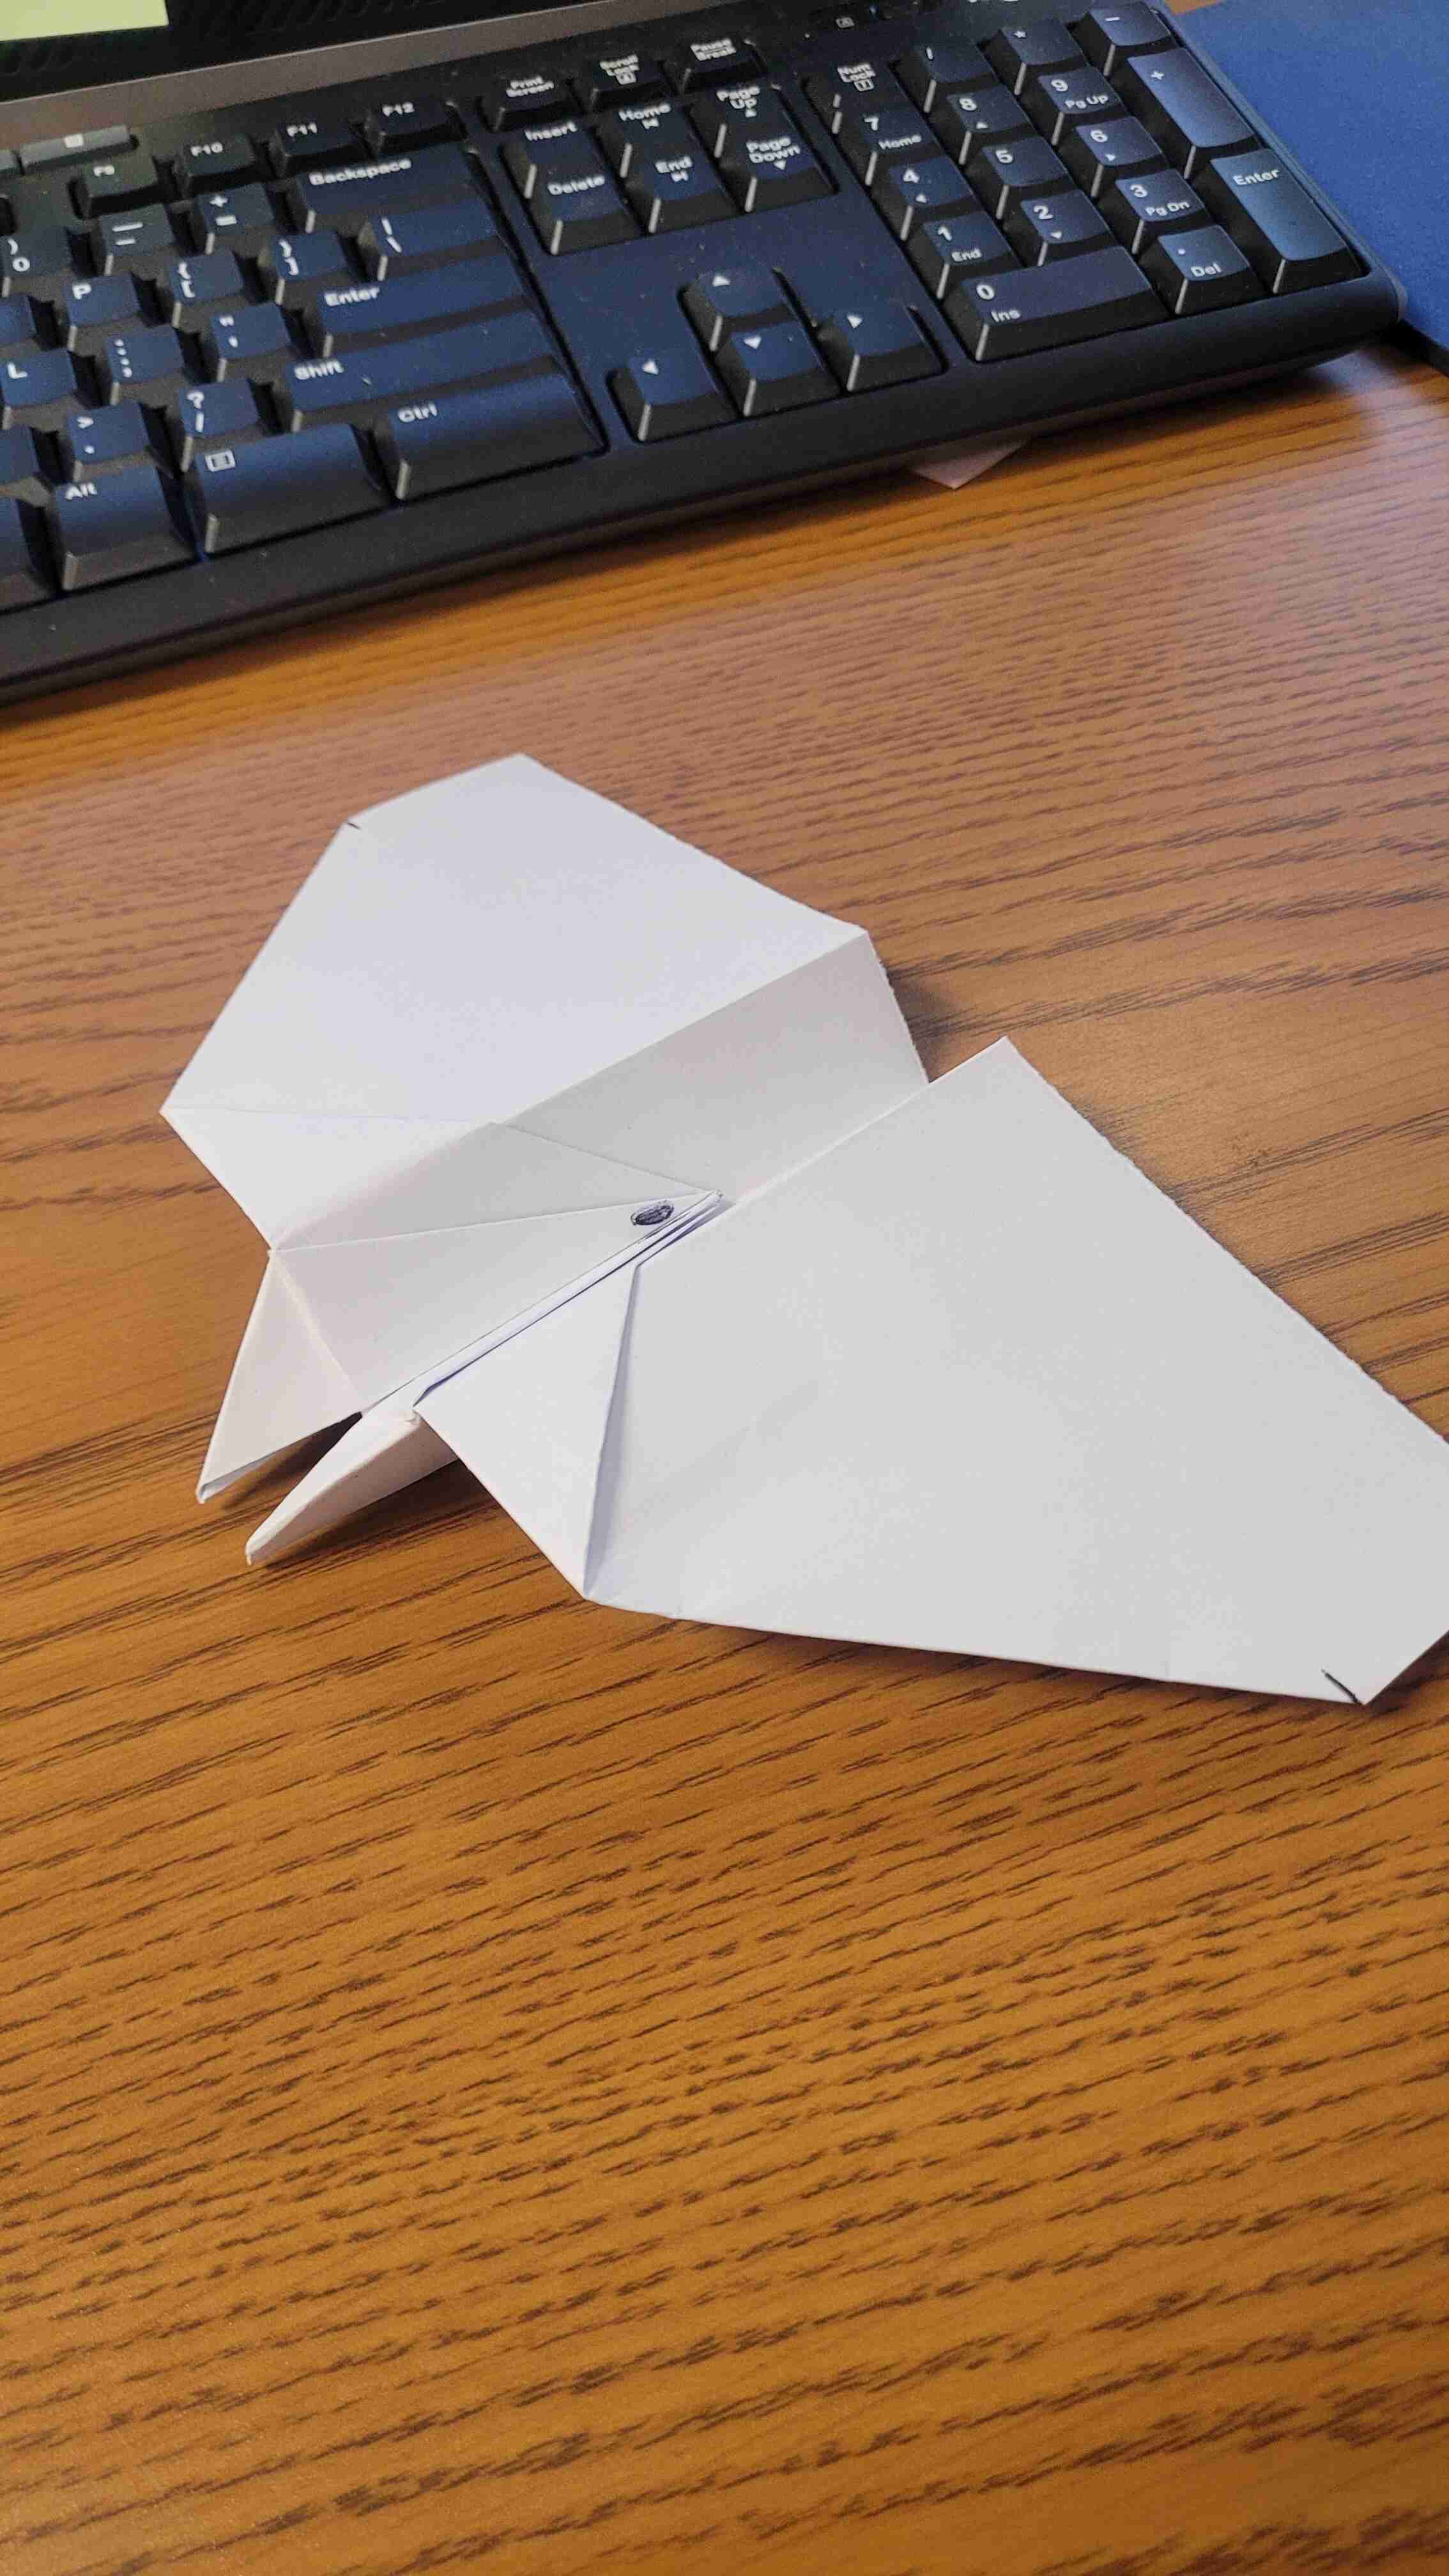
Step 21 - Take the end of the tail that has been folded in, and slide it under the back end of the nose.
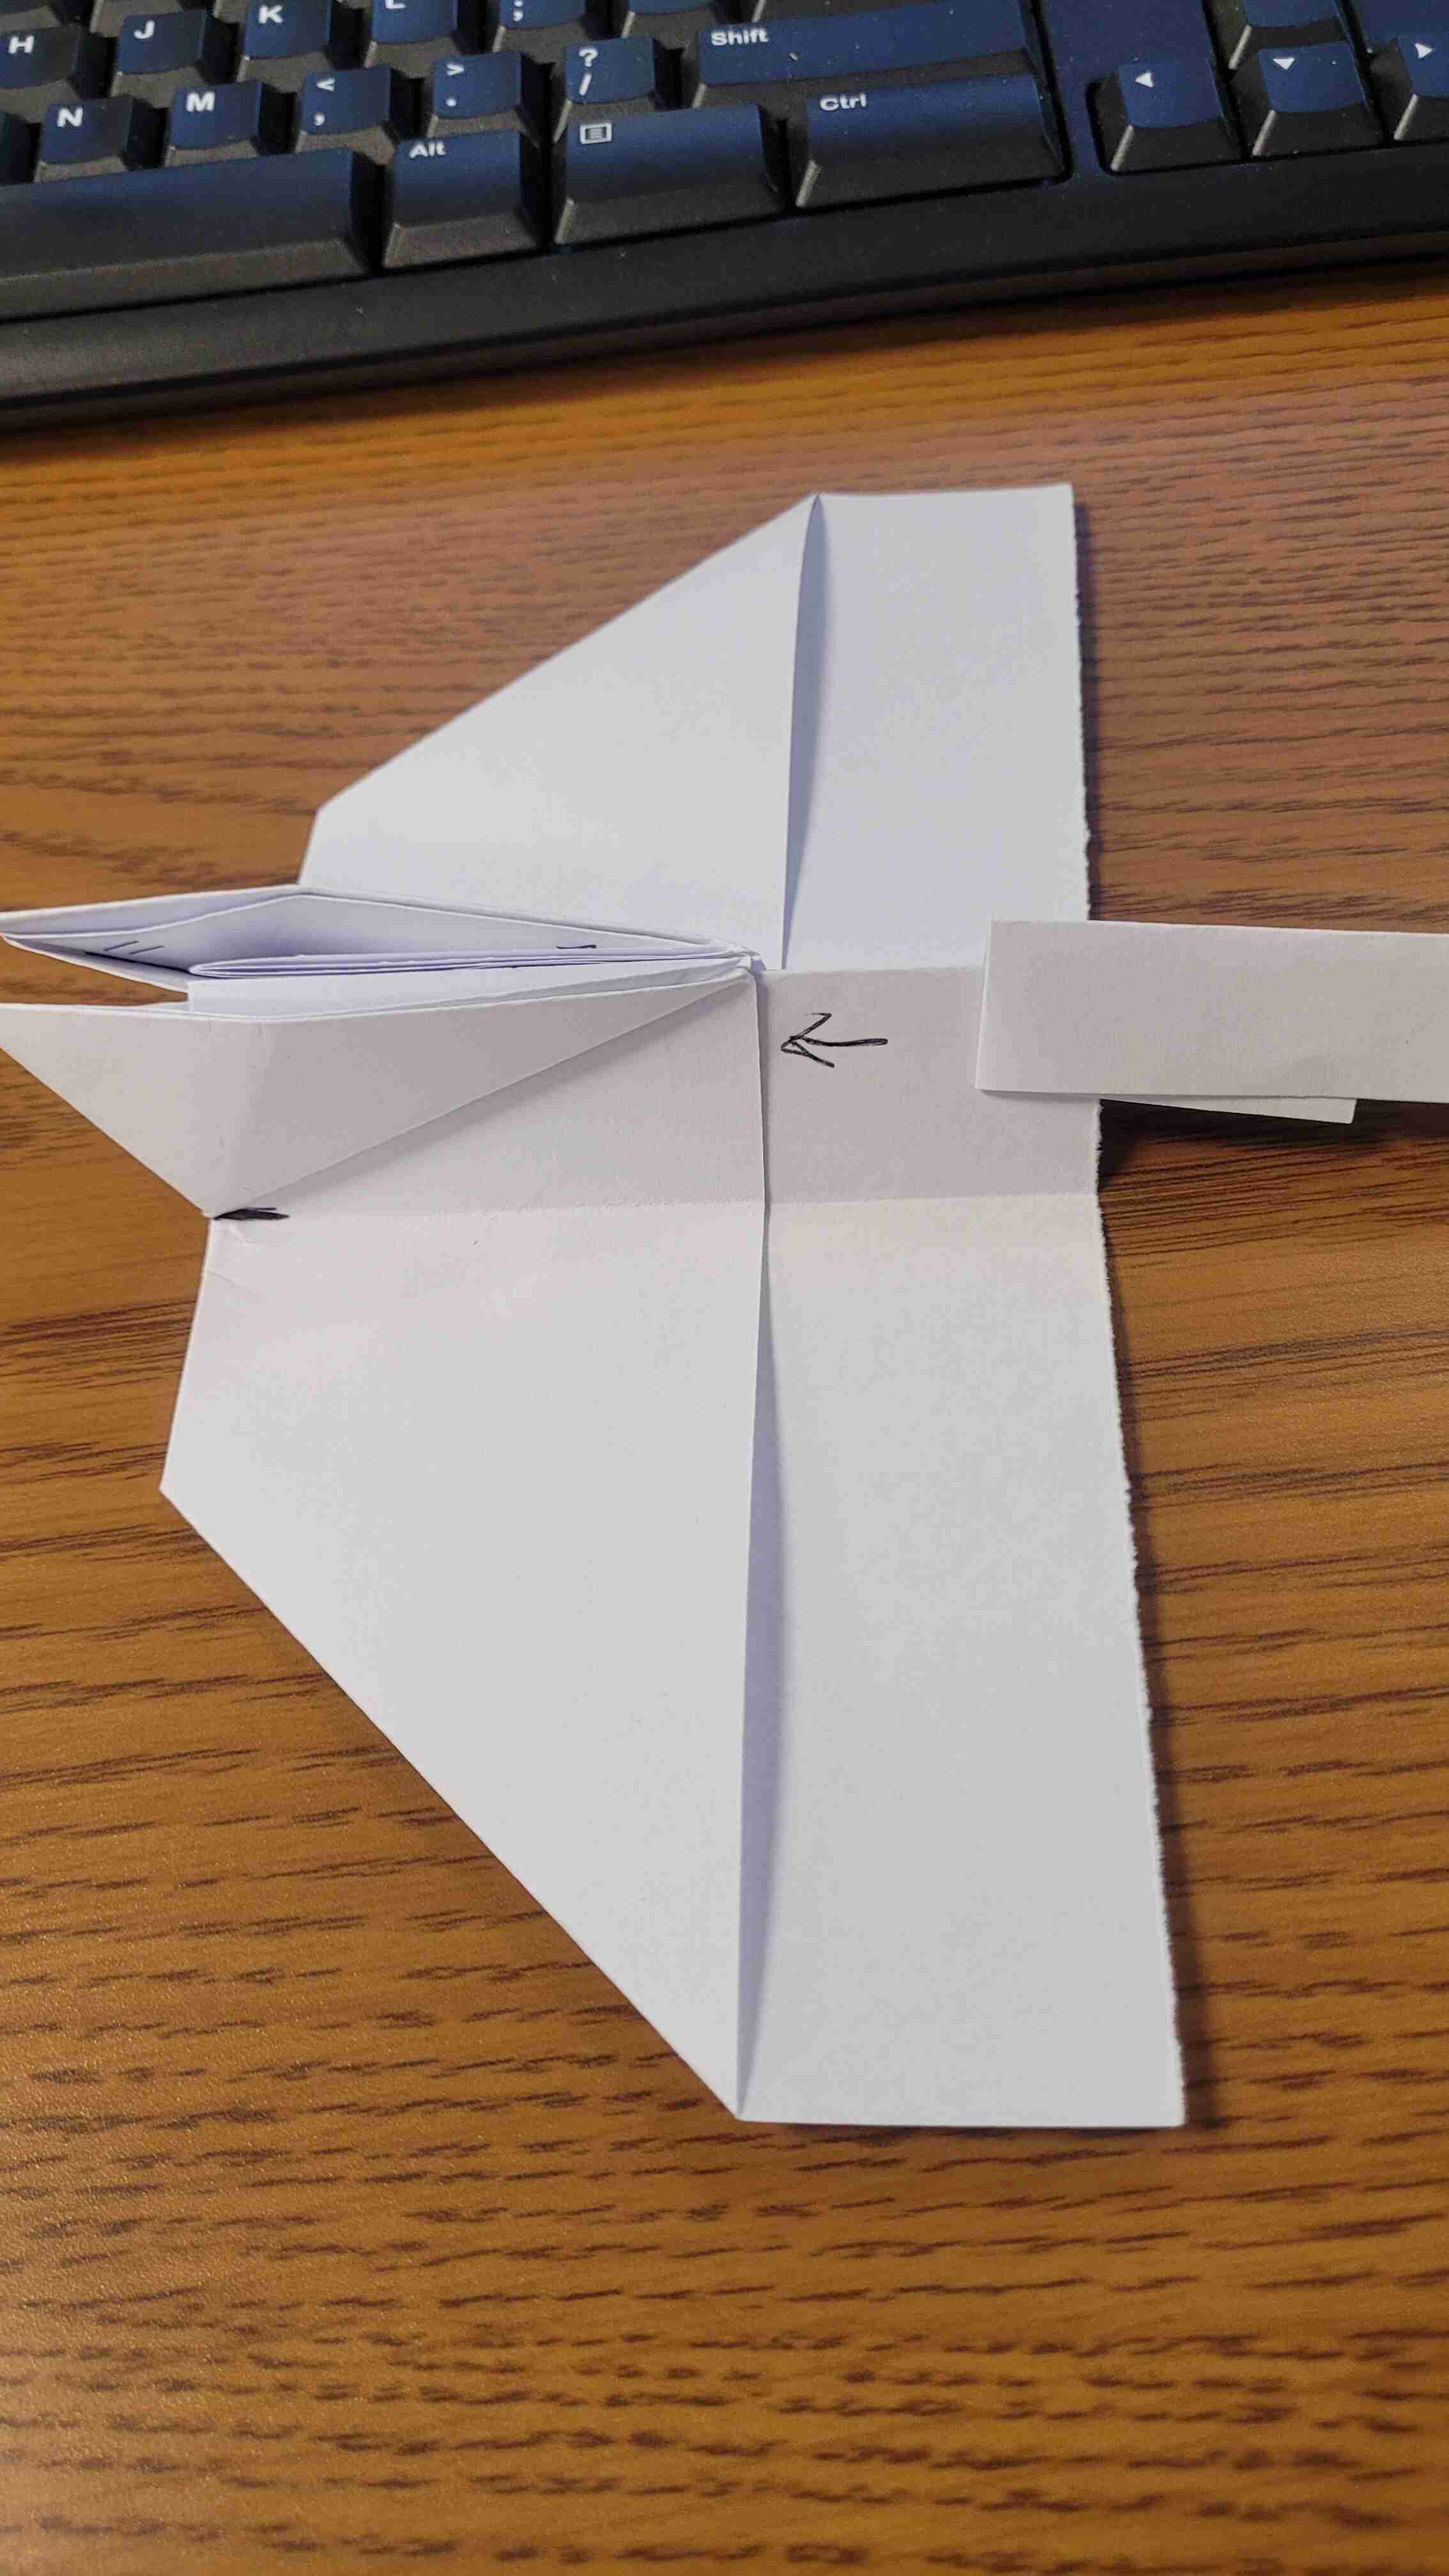
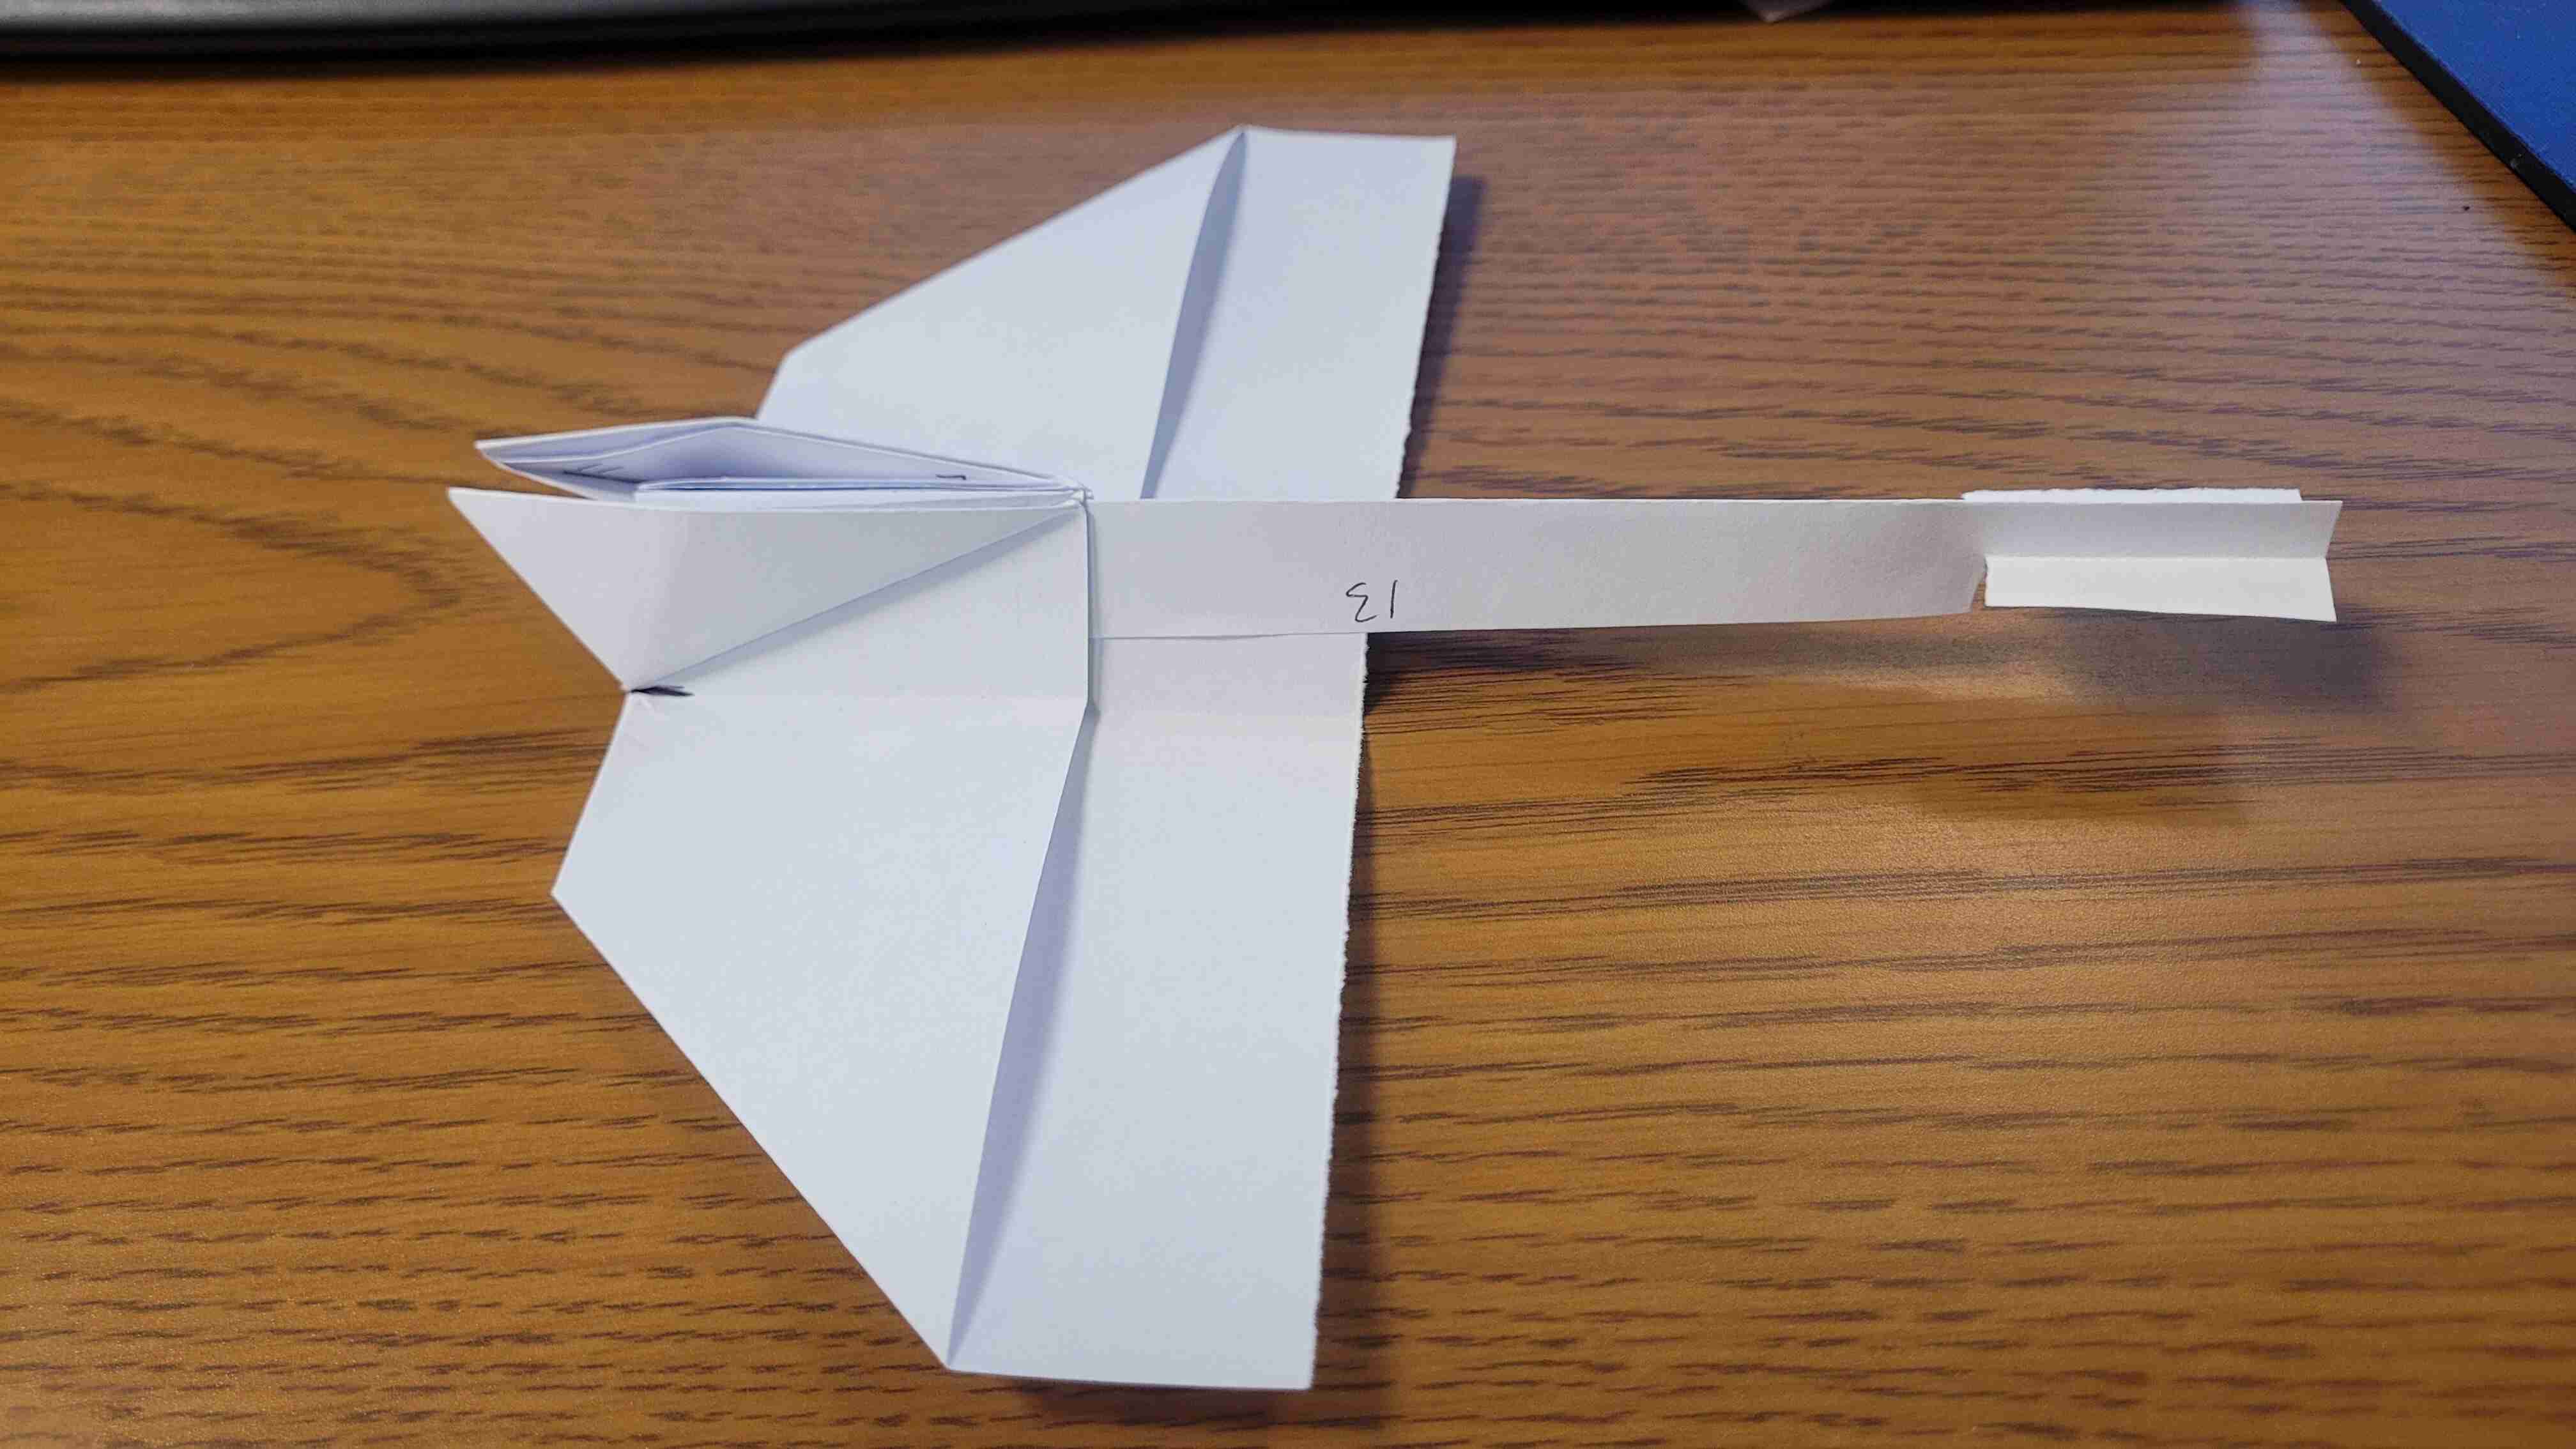 You're Done!

Some Notes:
The back corners of the tail can be tilted to adjust the direction the plane flies. I have found this is helpful to get the plane to fly straight or pull up. Every plane I have made seems to fly differently so adjusting the back tail can get if flying the way you want.
You can also fold the two small edges of the wings up to help with flying straight. I have not done much of this as I didn't seem to get too much of a difference with it but it is worth trying.
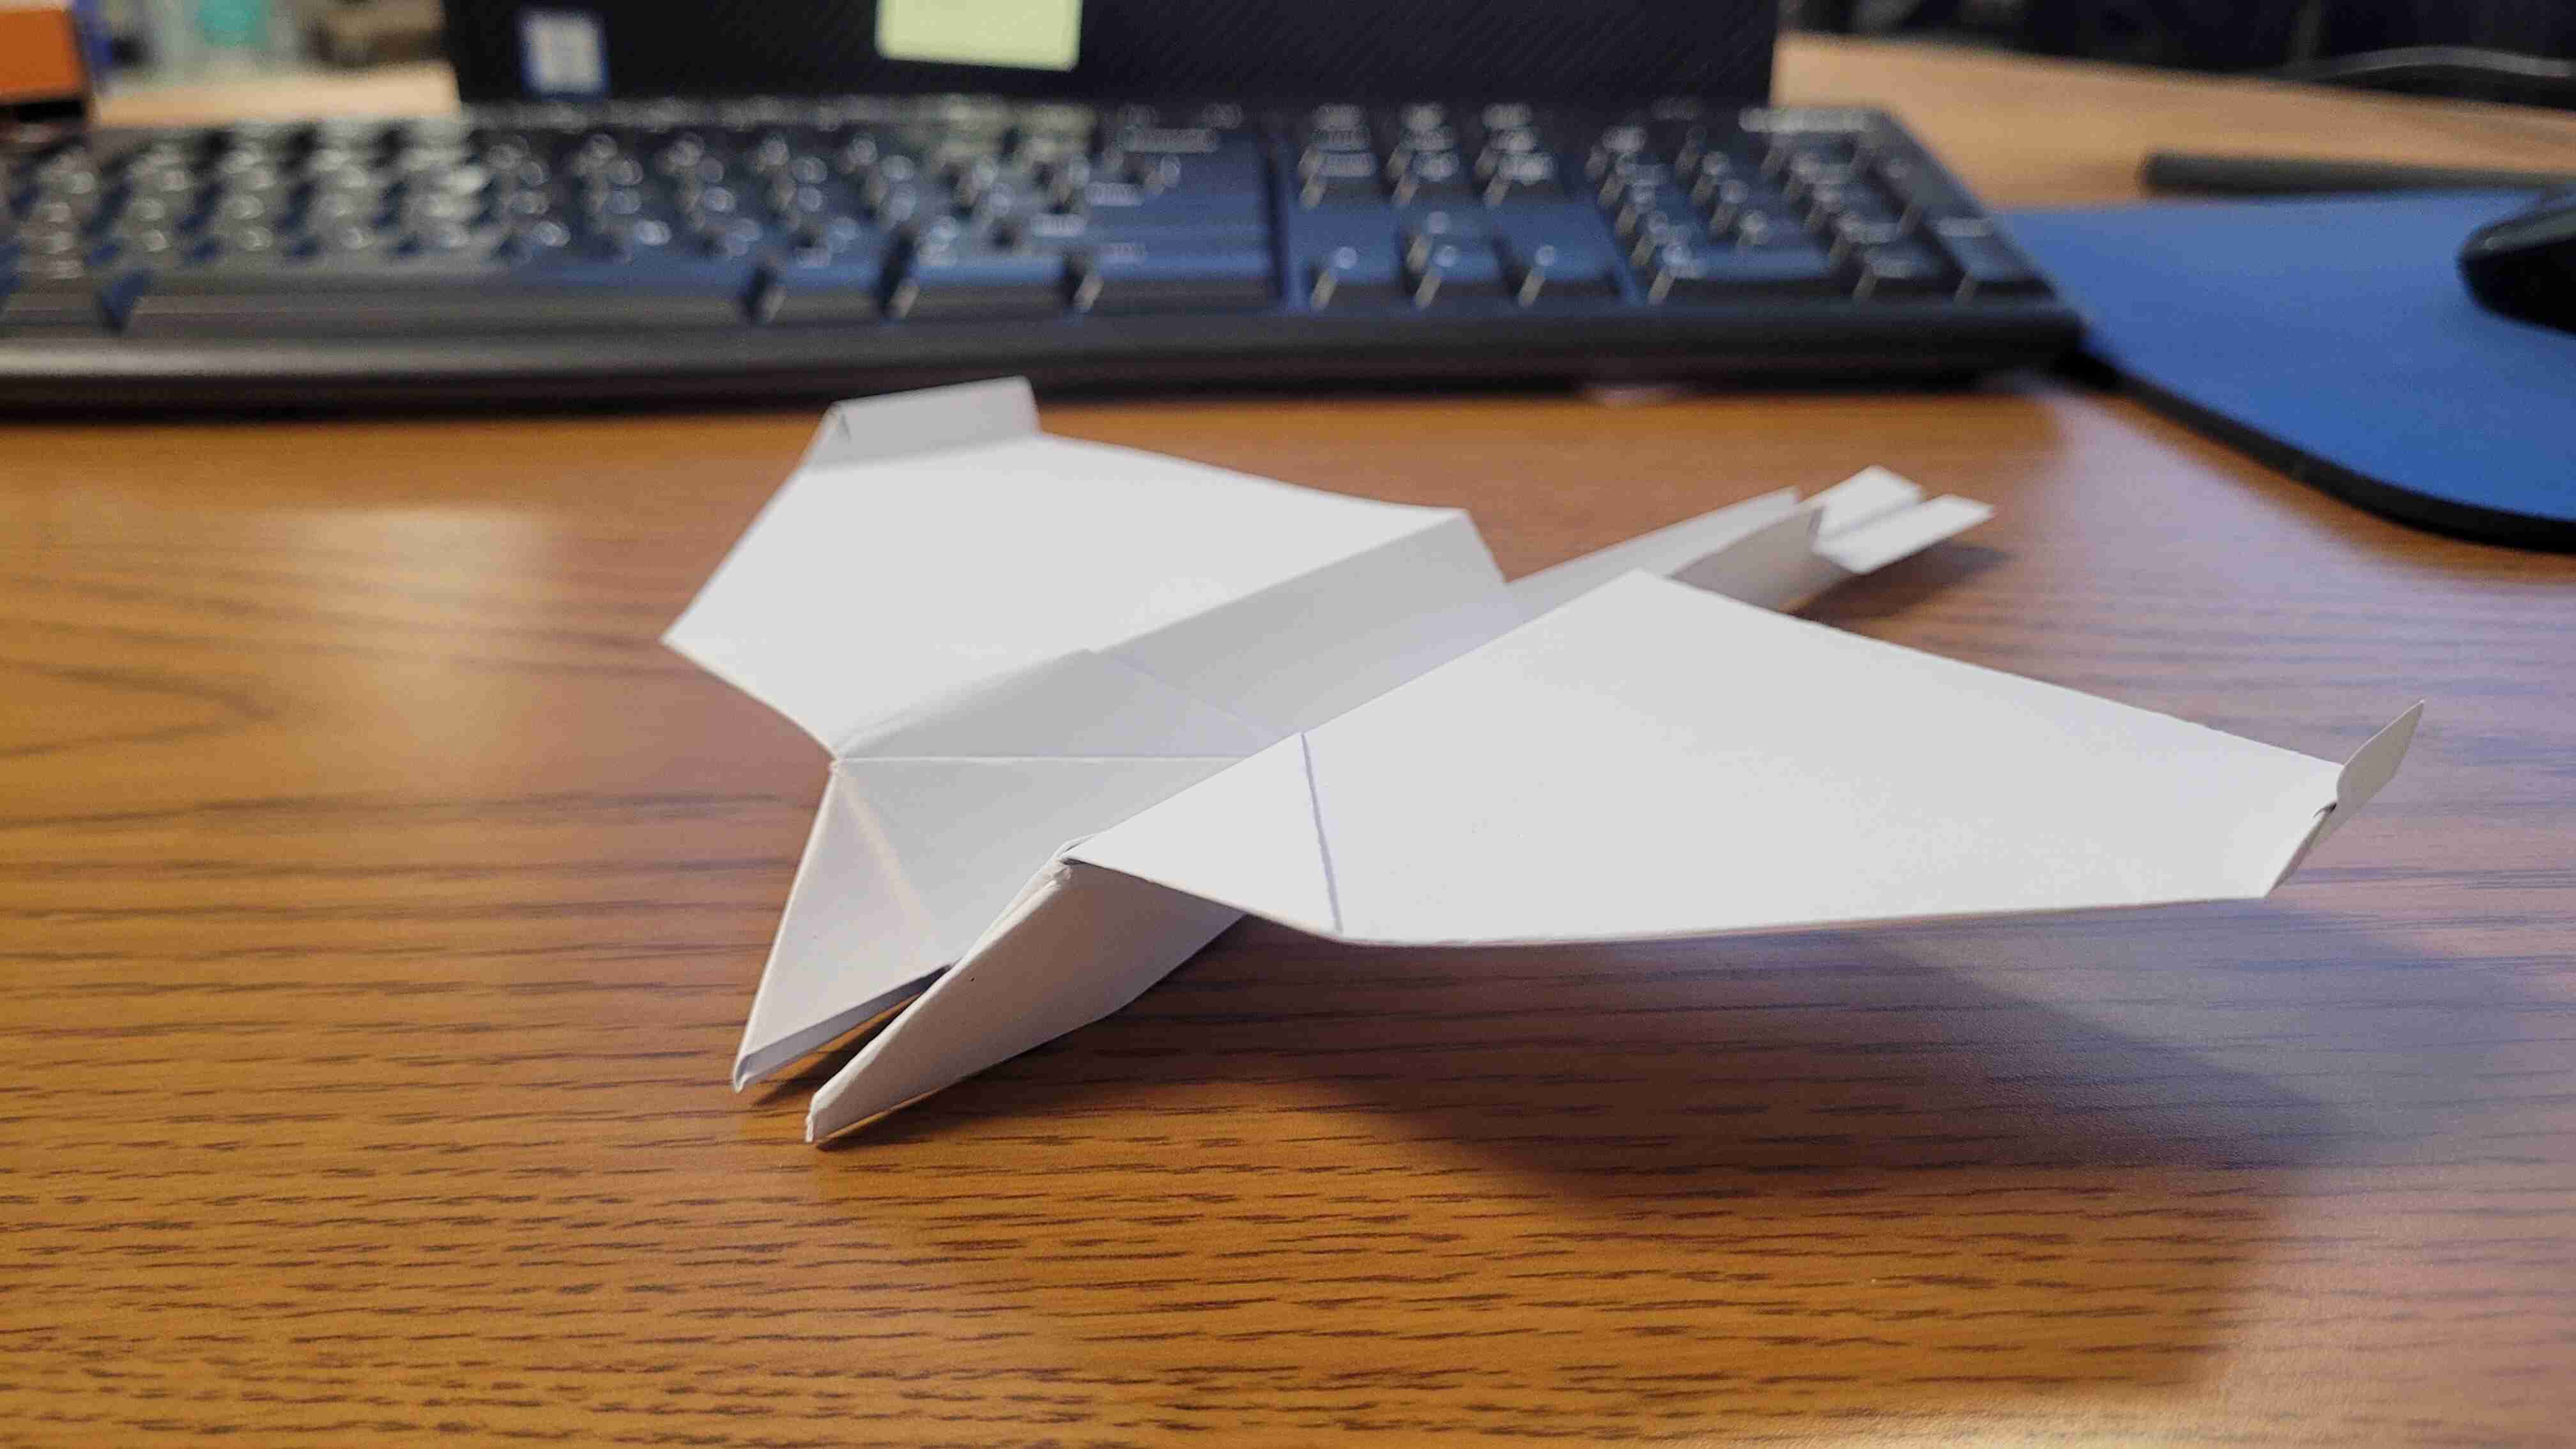
On the back edge of the wings, you can tilt the edge either up or down to adjust the flight path of the plane.
